INSTALLATION — CASSETTE
9
Mount the Brackets — Cassette Outside Mount
■
Your order will include the correct number of installation brackets for your shade width, as
shown in the table below.
Prepare the Installation Brackets
■
Use pliers or heavy duty scissors to remove the top
tabs on the installation brackets.
NOTE: Save these tabs once removed. They may be
used as shims, if necessary.
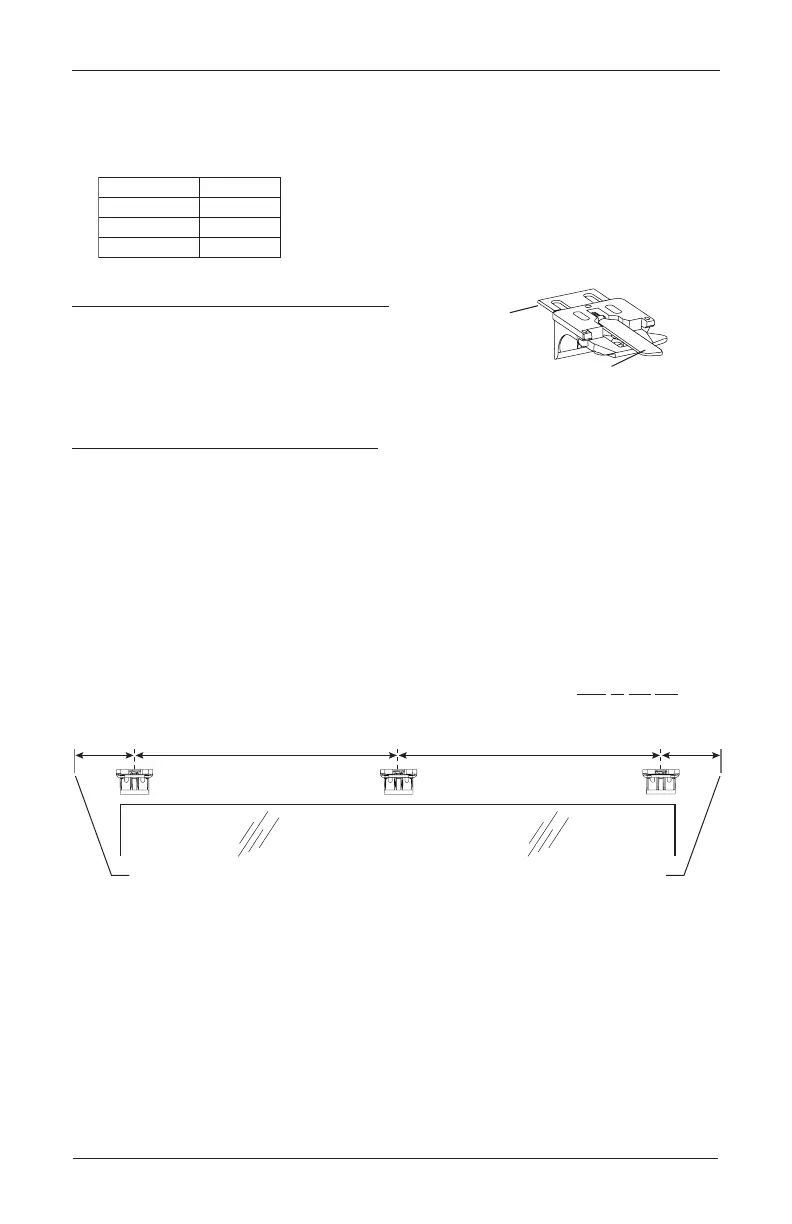
Mount the Installation Brackets
■
Center the headrail over the window opening at the desired height. Use a pencil to lightly
mark the mounting surface at each end of the headrail.
➤
Alternatively, measure the width of the headrail and use that width to mark the
headrail end points over the window opening.
■
Mark 2" to 3" from each end of theheadrail.
➤
If more than two installation brackets came with your order, space additional bracket(s)
evenly between the two end brackets and mark their location. Mount into wood
whenever possible.
NOTE: Before the headrail is installed, the bracket levers need to be fully to the left, and
once the headrail is properly in place, levers automatically click to the right.
Installation Brackets For Added Clearance
Extension
Bracket
1
∕
4
" or
1
∕
2
"
Spacer Blocks
Shade Width Brackets
2
3
4
15" – 36"
36
1
∕
8
" – 79"
79
1
∕
8
" – 96"
Tab
Remove Tab
Back Cover Bracket
Bracket Lever
Window Opening
Space Evenly
Space Evenly
2" to 3" 2" to 3"
Headrail End Mark Headrail End Mark