RIO (Remote Input Output) Cabling
The following rules apply to RIO cable connections:
Notes:
1. To connect to a 7311 you will be using the RIO-G (Remote Input Output) and SPCN
(System Power Control Network) connectors and cables. The RIO-G and SPCN
cables provide two functions, remote data bus connection and power control.
2. The I/O drawers must be connected in a loop fashion for both the RIO-G and SPCN
cables. The loop connection provides redundant paths so that if a failure occurs in
part of a cable, the system will continue to operate. If a failure does occur, a
warning message is displayed on the system console; however, the system does
continue to operate. See the following illustrations for possible cabling
configurations.
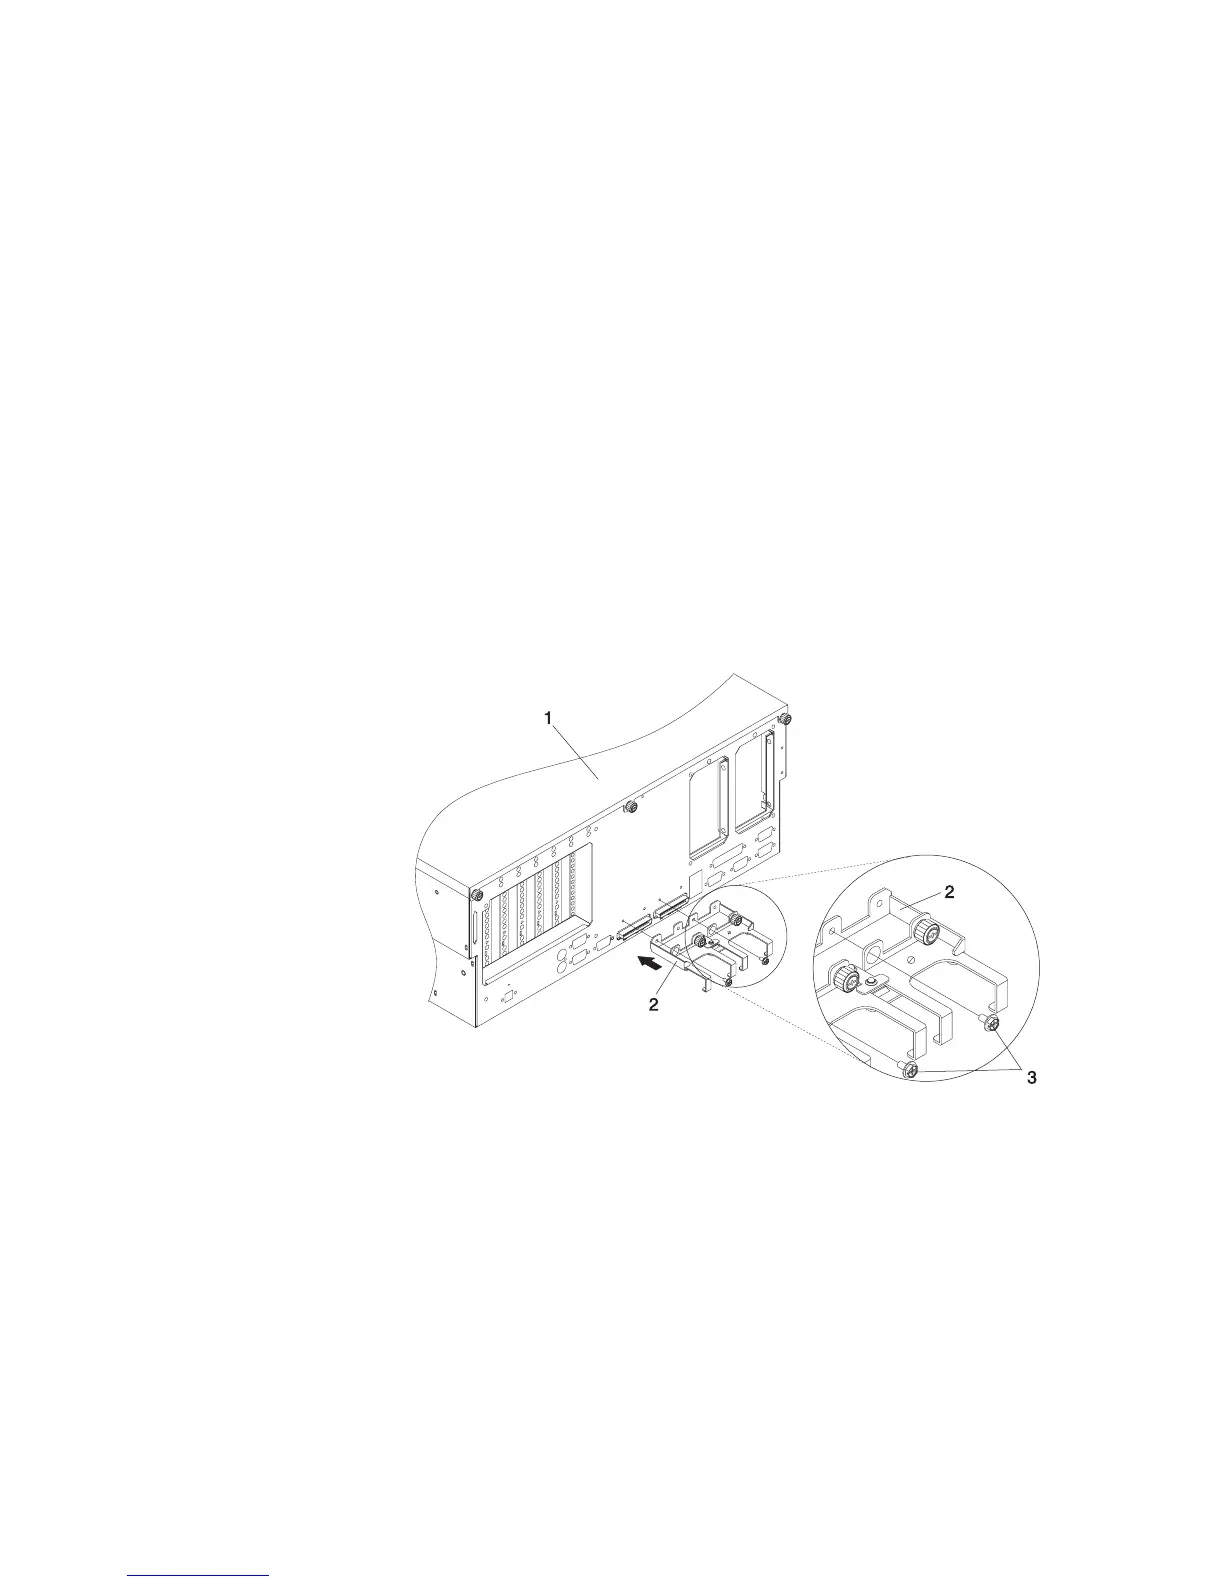
To connect the RIO-G cables to the back of the Model 6C4, do the following:
1. Locate the RIO-G cable support bracket.
2. Using two M3 x 6 retaining screws, secure the RIO-G cable support bracket to the
rear of the Model 6C4 chassis. See the following illustration.
1 Model 6C4
2 RIO-G Cable Support Bracket
3 M3 x 6 Retaining Screws (Quantity 2)
3. Pull the sliding portion of the RIO-G cable support bracket back from the Model 6C4
chassis. The sliding portion of the cable support bracket will stop before being fully
separated.
4. Align the RIO-G cable connector with the bottom of the sliding portion of the RIO-G
cable support bracket.
Chapter 1. Reference Information 27
 Loading...