4. Disconnect all cables from the rear panel of the library.
For a desktop library, remove the deskside cover.
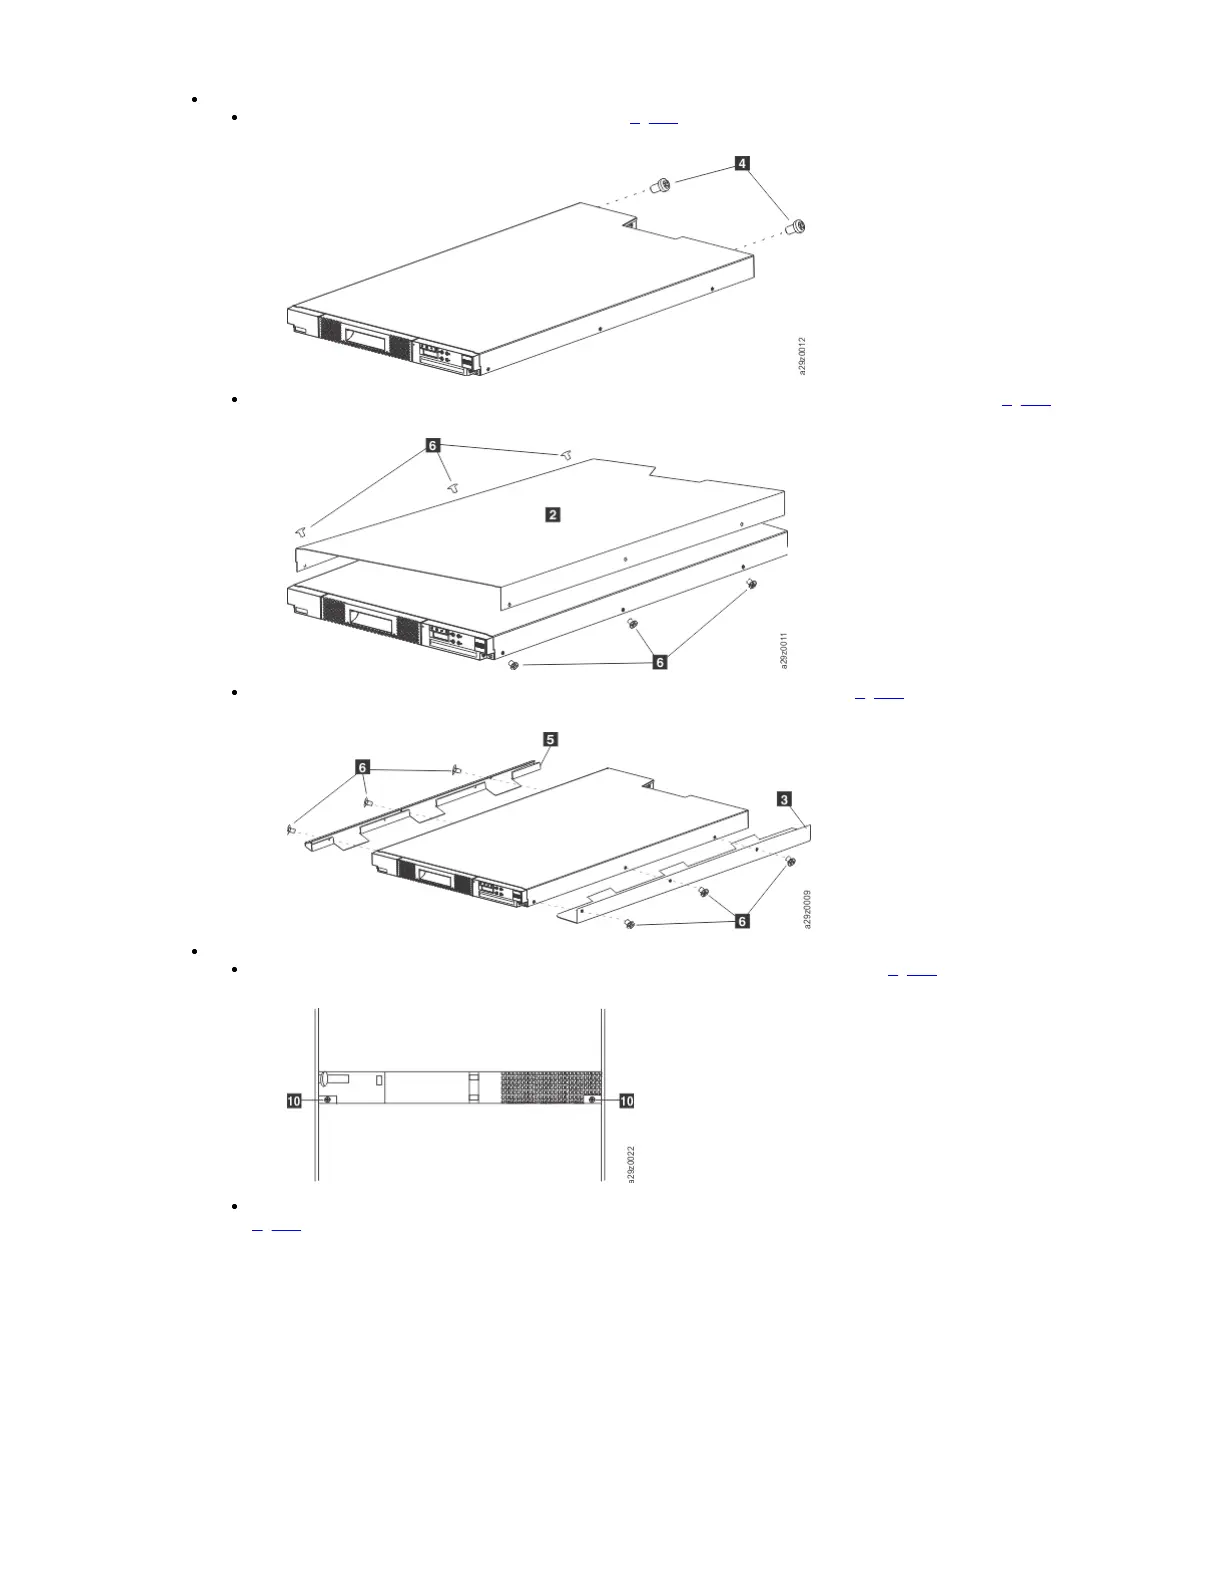
Remove the large pan-head screws 4 on the rear of the library (Figure 1).
Figure 1. Removing screws from the rear of the library
Remove the flat-head screws 6 on each side that secure the deskside cover to the library, and remove the deskside cover 2 (Figure 2).
Figure 2. Removing the deskside cover
Remove the flat-head screws 6 on each side to remove the left 5 and right 3 rails from the chassis (Figure 3).
Figure 3. Removing side rails from the library chassis
For a rack-mounted library, remove the library from the rack.
Remove the two round-head screws 10 on each rear bracket that secure the rear of the library to the rack (Figure 4).
Figure 4. Removing screws at the rear of the library
Remove the large black screws 11 from each front bracket that secure the front of the library to the rack, and slide the library chassis out of the rack
(Figure 5).
Figure 5. Removing screws at the rear of the library
 Loading...


