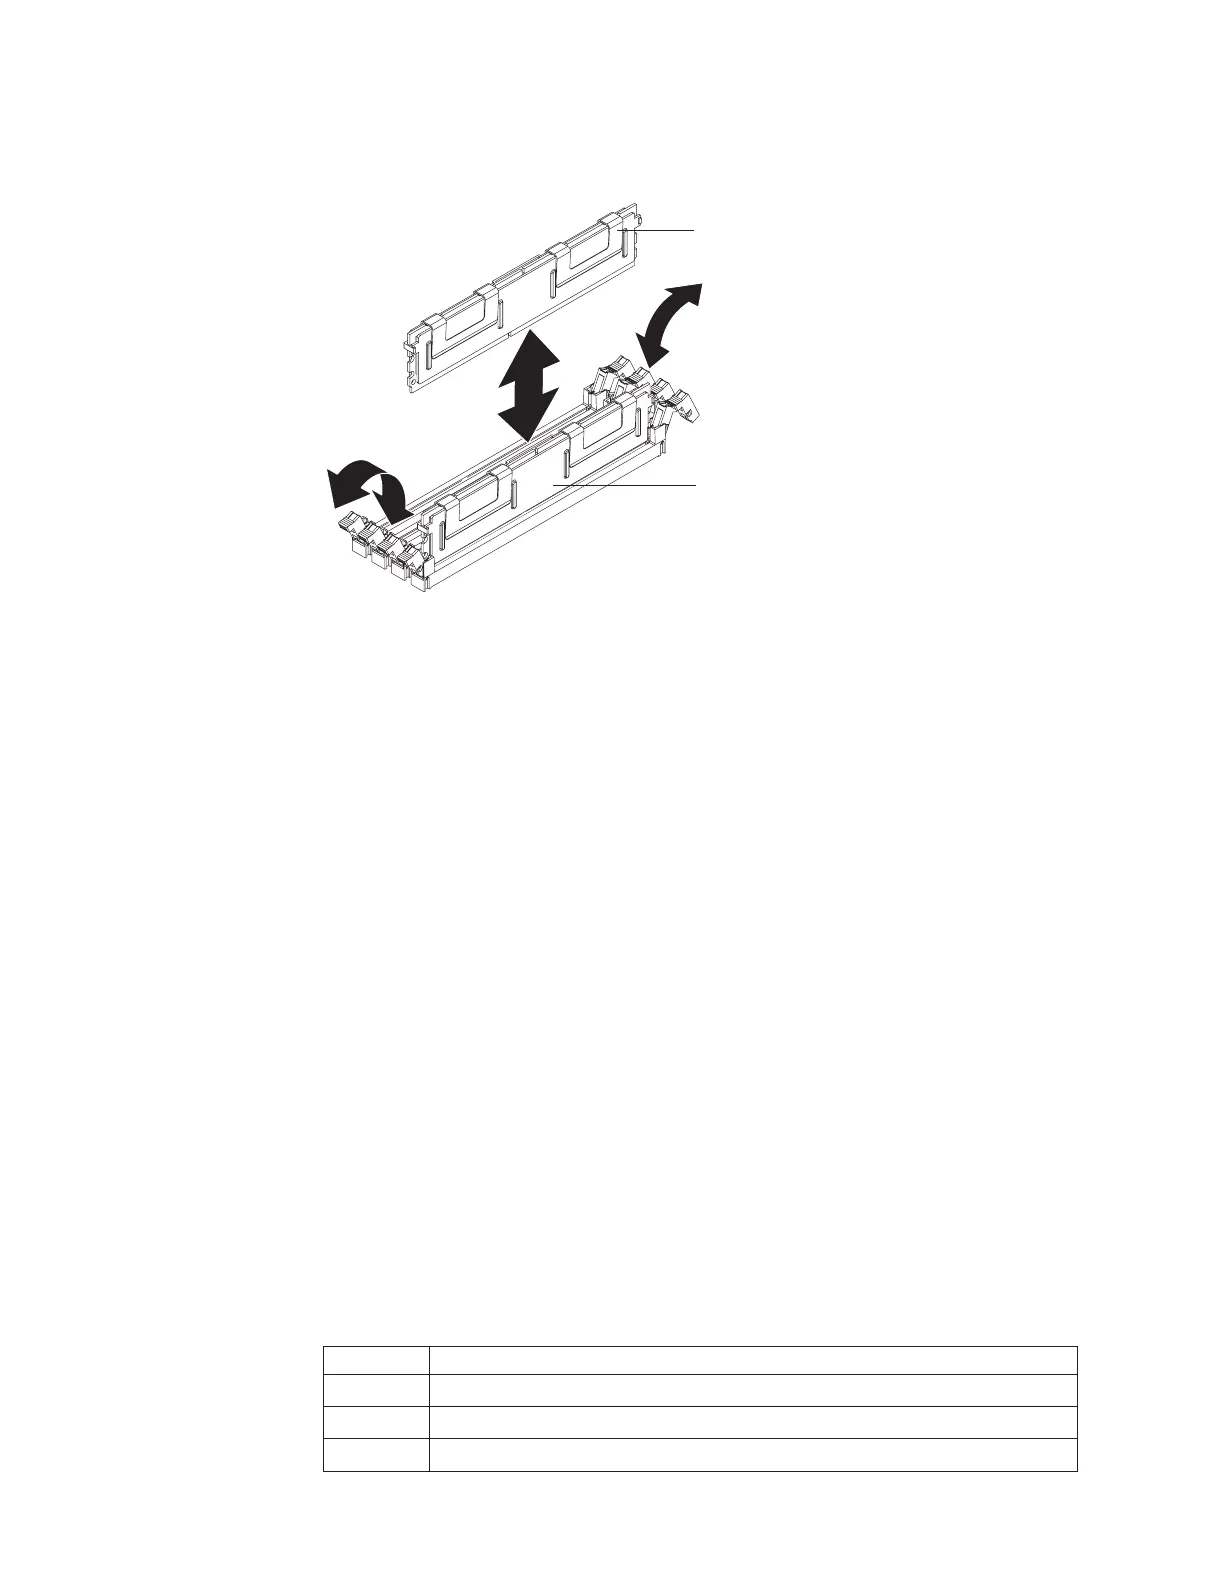
Removing a memory module (DIMM)
To remove a DIMM, complete the following steps.
2
3
4
1
DIMM 1
DIMM 2
1. Read the safety information that begins on page vii and “Installation guidelines”
on page 39.
2. Turn off the server and peripheral devices and disconnect all power cords; then,
remove the cover (see “Removing the cover” on page 42).
3. Open the retaining clip on each end of the DIMM connector.
Attention: To avoid breaking the retaining clips or damaging the DIMM
connectors, open and close the clips gently.
4. Lift the DIMM out of the connector.
5. If you are instructed to return the DIMM, follow all packaging instructions, and
use any packaging materials for shipping that are supplied to you.
Installing a memory module
The following notes describe the types of dual inline memory modules (DIMMs) that
the server supports and other information that you must consider when installing
DIMMs:
v The server supports up to eight DIMMs for system memory. See
http://www.ibm.com/servers/eserver/serverproven/compat/us/ for a list of memory
modules that you can use with the server.
Note: Because some memory is reserved for system operation, the actual
usable memory size that is reported by the operating system is less than the total
installed size.
v The server comes with a minimum of two 512 MB DIMMs or two 1 GB DIMMs,
installed in slots 1 and 3 or slots 5 and 7. When you install additional DIMMs,
you must install two identical DIMMs at a time, in the order shown in the
following table, to maintain performance.
Table 7. DIMM installation sequence
Pair DIMM connectors
1 1 and 3
2 5 and 7
3 2 and 4
54 IBM System x3550 Type 7978 and 1913: Problem Determination and Service Guide