Installing a power supply
Statement 8:
CAUTION:
Never remove the cover on a power supply or any part that has the following
label attached.
Hazardous voltage, current, and energy levels are present inside any
component that has this label attached. There are no serviceable parts inside
these components. If you suspect a problem with one of these parts, contact
a service technician.
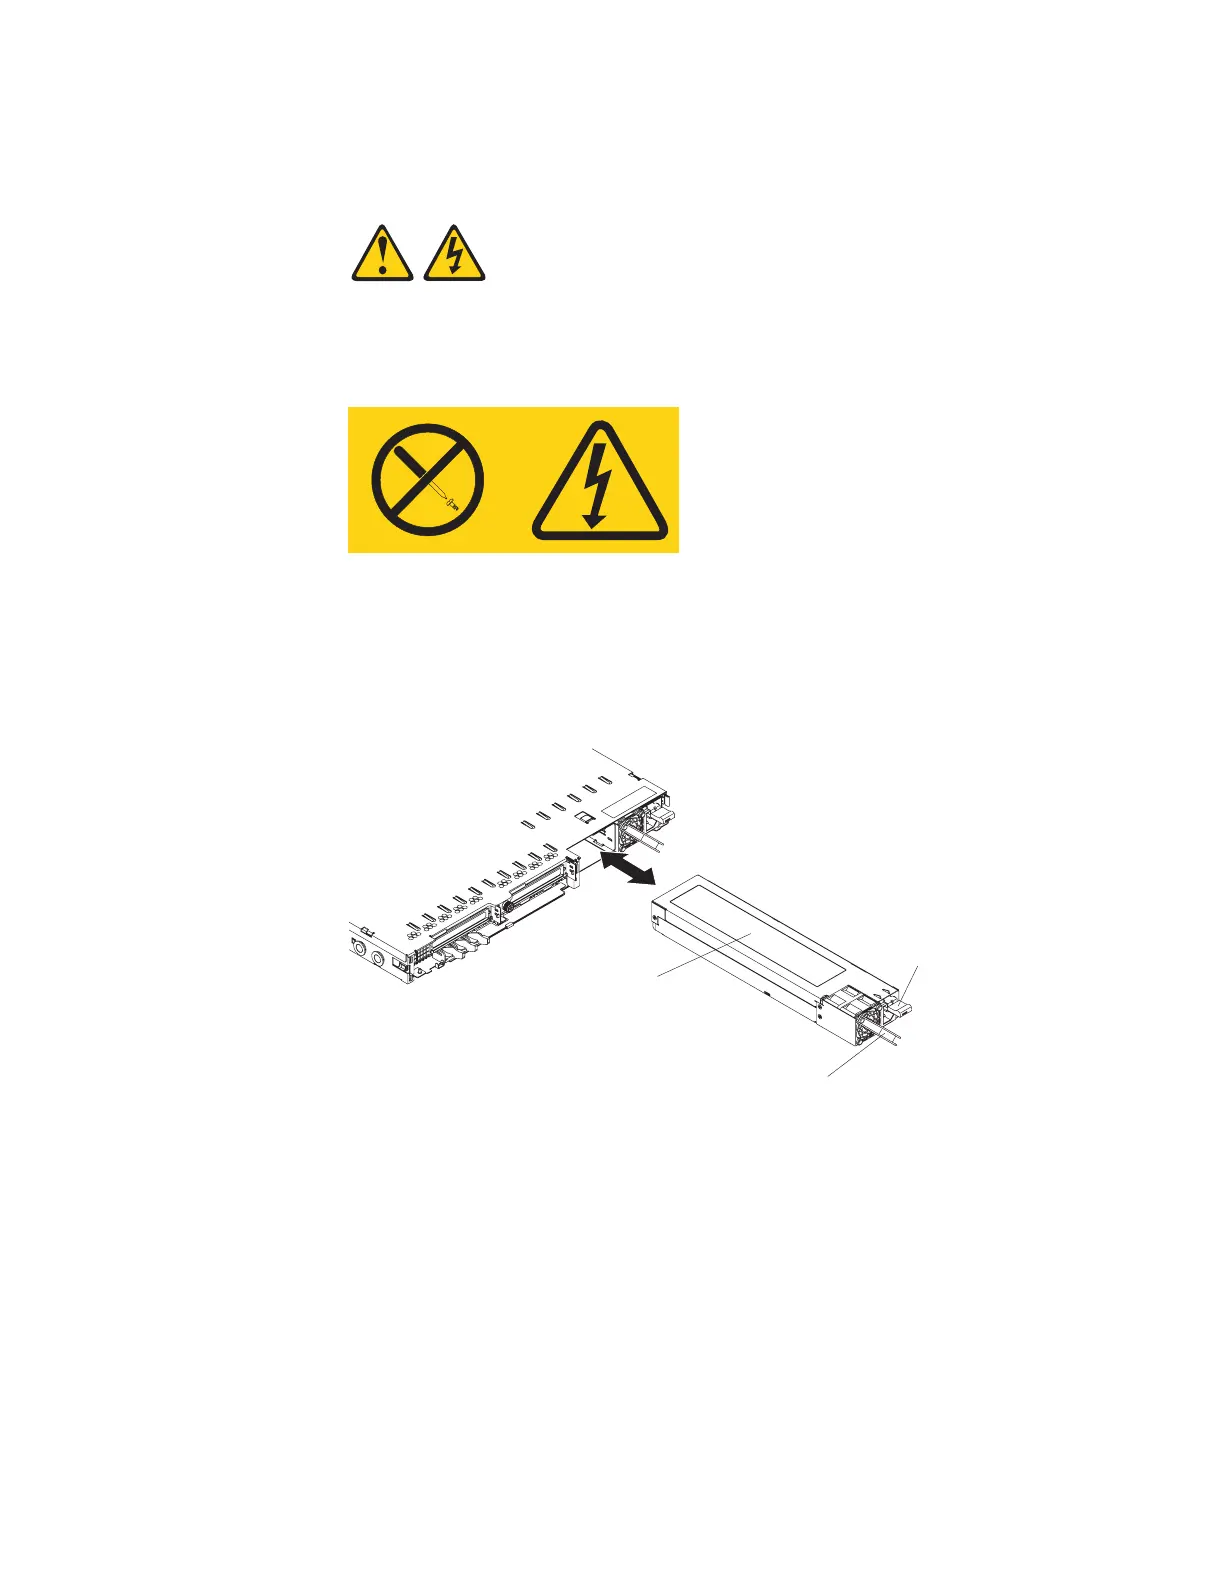
To install a hot-swap power supply, complete the following steps.
Power supply
Power-supply handle
Power-supply
release tab
1. Read the safety information that begins on page vii and “Installation guidelines”
on page 39.
2. Grasp the handle on the rear of the power supply and slide the power supply
forward fully into the server until it clicks in place.
3. Connect the power cord to the power-cord connector on the power supply,
being sure to route the cord through the power supply handle in order to
minimize mechanical strain on the cord.
4. Connect the other end of the power cord to a properly grounded electrical
outlet.
5. Make sure that the ac power LED and the dc power LED on the power supply
are lit, indicating that the power supply is operating correctly. The two green
LEDs are to the left of the power-cord connector.
Chapter 4. Removing and replacing server components 65