8
2
UNIT DESCRIPTION
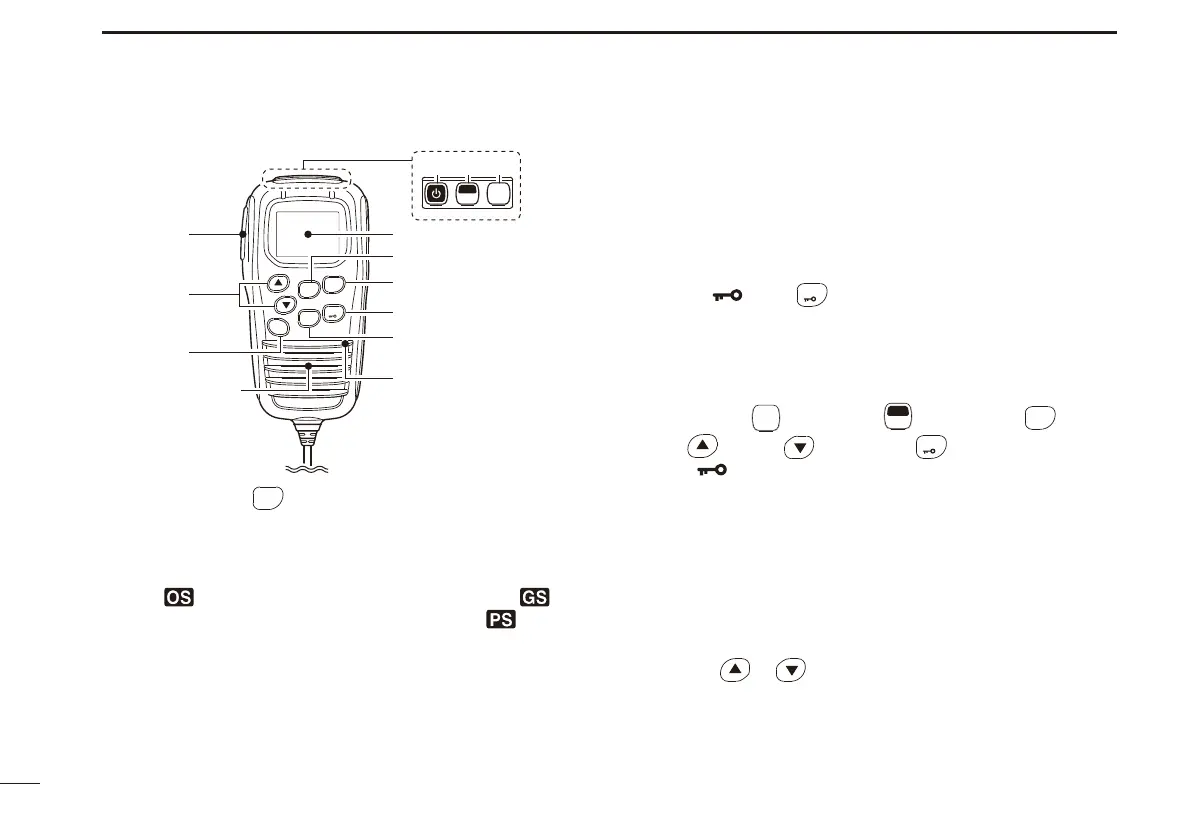
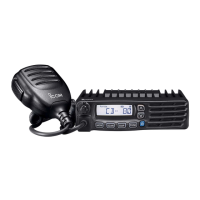
HM-182 front and top panels (Continued) ■
PRIO
LOW
SCAN
OGP
CH
SETP
RS
TAG
SQL
q
w
e
Speaker
Microphone
r
t
y
u
i
MONI
F
SET
TSQL
o!0 !1
r O•G•P/RS KEY
OGP
RS
N
(Scan Mode/Rpt Scan)
Push to sequentially select the scan type between ➥
Open scan, Group scan and Priority scan. (pp. 30, 31)
• “ ” appears when the Open scan is selected, “ ” ap-
pears when the Group scan is selected, and “ ” appears
when the Priority scan is selected.
➥
Hold down for 2 seconds to start the repeater scan.
(p. 32)
• Repeater output channels are only ‘RPT-01’ to ‘RPT-08’ and
‘RPT-41’ to ‘RPT-48.’
F
(Quiet/ID-MR)
Push to toggle the Quiet function ON or OFF. (‘CB-XX’ ➥
appears when the CB channel is selected.) (p. 39)
• “Q” appears when the Quiet function is turned ON.
Hold down for 2 seconds to enter the received ID code ➥
history indication mode. (p. 38)
• “NO ID” is displayed when no ID code is memorised.
t LOW/“ ” KEY
LOW
N
(RF Power/Lock)
Push to toggle the transmit output power level. (p. 15) ➥
Hold down for 2 seconds to electronically lock all keys ➥
except the following: (p. 18)
[PTT],
MONI
TSQL
(Monitor),
F
SET
(Function),
SCAN
TAG
(Call),
(Loud), (Small) and
LOW
(Lock).
• “ ” appears when the lock function is ON.
• Hold down for 2 seconds again to turn OFF the Lock func-
tion.
F
(Dup/Zone)
Push to toggle the selected channel between duplex or ➥
simplex operation
(Depending on the pre-setting).
• Duplex operation can be selected only between ‘RPT-01’ to
‘RPT-08’ and ‘RPT-41’ to ‘RPT-48’ only.
Hold down for 2 seconds, then select the desired zone ➥
with
or . (p. 15)
• Available only if more than two zones are set.