18 Installation, Support, and Maintenance Guide
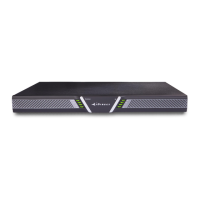
Evolution X7 Satellite Router
Preparing the PC for Connection to the X7 Router
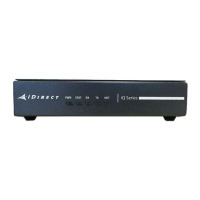
7. Monitor front and rear panel lights during startup. See Section 3.1, X7 Router Front LEDs
on page 8.
8. Prepare PC for X7 Router connection as specified in Section 4.6, Preparing the PC for
Connection to the X7 Router on page 18.
9. Login PC to Web iSite as specified in Section 4.7, Web Interface LED Status Indicators on
page 18.
10. Install the firmware and configure the satellite router as specified in Section 4.8,
Configuring the X7 Router on page 18.
4.6 Preparing the PC for Connection to the X7 Router
See Section 3.1, X7 Router Front LEDs on page 8 for more information about the LEDs, as well
as either the iDX Release Notes and iDX Satellite Router Installation and Commissioning
Guide or Web iSite User Guide.
Confirm the PC:
• Has a Web browser installed
• Has an IP address that is on the same subnet of the X7 Router
• Includes a Network Interface Card (NIC) connected with a CAT 5 Ethernet cable
4.7 Web Interface LED Status Indicators
The X7 Router has eight LEDs on the front panel, see Table 3-1 on page 8. For diagnostic
purposes, the X7 Router displays eight LEDs in the Web Interface software (Web iSite). The
eight software interpreted LEDs are:
• POWER - indicates power supply status and any power-related problems
• STATUS -indicates basic operational state and problems with core hardware
• FAN - provides fan status
• TEMP - indicates any problems with the current operating temperature
• RX1 - indicates the transmitter status
• RX2 - is for future use
• TX - indicates the receiver status
• NET - indicates the network acquisition status
The LED displayed colors (red, yellow, green) indicate the state of the X7 Router and are
documented in the iDX Release Notes, Web iSite User Guide or the iDX Satellite Router
Installation and Commissioning Guide. The definitions of the LED states may be software
version dependent.
4.8 Configuring the X7 Router
When the X7 Router is physically installed, the downloading the firmware and configuration of
the satellite router need to be completed. Refer to the iDX Satellite Router Installation and
Commissioning Guide for the release of software installed on the system and for instructions.
To download the guide, go to http:\\tac.idirect.net and click Satellite Routers.