page 5
PREPARATION
1.Models ZTS-DPU/LM with Remote Sensors
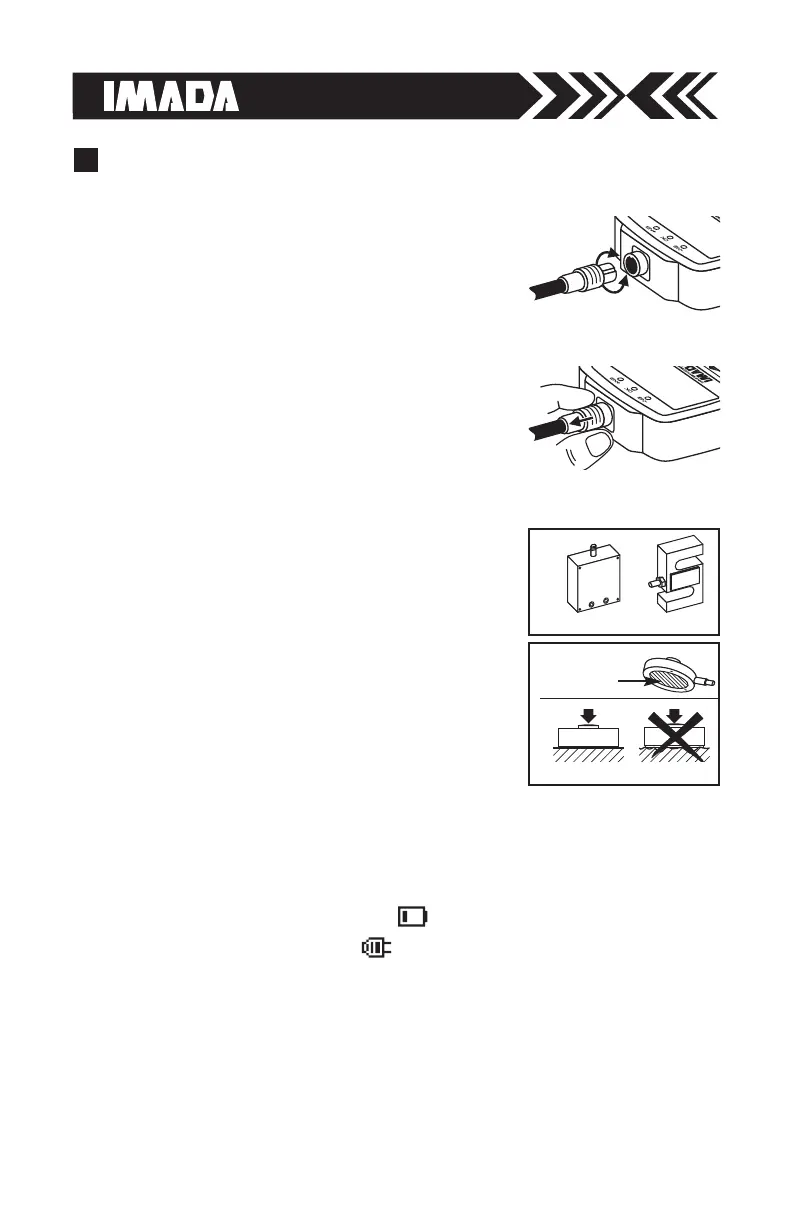
1. To connect the remote sensor to the ZTS
display unit, rotate the connector to
match the groove with the key, then push
it in until positive connection is made.
2. To disconnect, hold the ribbed cover of the
connector and pull out.
DO NOT TWIST OR PULL THE CABLE!
4
ROTATE CONNECTOR TO MATCH THE
GROOVE WITH THE KEY AND PUSH IN.
HOLD RIBBED COVER AND PULL OUT.
DO NOT TWIST OR PULL CABLE!
2.Charging the Ni-MH Battery
Power shuts off after 10 minutes of non-use. Recharge the battery
when the icon shows a single bar . A full charge takes about two
hours. When fully charged the icon appears and charging stops.
Auto shut off is bypassed when used with the AC adapter/charger.
The battery also charges when connected to a computer USB port.
1. Push
ON/OFF to turn off power.
2. Only use IMADA AC adapter/charger (ADW6010) with the proper
115VAC or 230VAC plug adapter. Plug into the correct AC output.
Turn ON the gauge. The display flashes until the battery is charged.
Remote Sensors
IMPORTANT: Both gauge and remote sensor
must have the same serial numbers.
DPU both tension and compression
Low capacity: Box Type (±0.2% F.S.; ±1 LSD)
High capacity: S Type (±0.2% F.S.; ±1 LSD;
ZTS-DPU-2200, ZTS-DPU-4400, ±0.5% F.S., ±1 LSD)
LM compression only (±0.5% F.S.; ±1 LSD)
IMPORTANT:
1. Do not apply load to back of cell.
2. Load applying surface must be flat.
LM
1. DO NOT APPLY
LOAD HERE.
BOX TYPE
DPU
‘S' TYPE
2.
FLAT SURFACE NOT FLAT
 Loading...