page 8
4.Programming Setpoints (optional)
Program High and Low setpoints for easy Go/No Go testing.
1. Press
ON/OFF to turn on the gauge.
2. Press and hold the
MENU key two
seconds to enter the Program Menu.
3. Press the up or down arrows on the
keypad to highlight High
Low Setpoints, then press the
right arrow key.
4. When High appears press the
right arrow key to set the
High setpoint.
5. Press the up/down arrow
keys to change the high set-
point and press
MENU to save and return to High Low Setpoints.
6. Press the down arrow to highlight Low and then press the right
arrow key.
7. Press the up/down arrow keys to change the low setpoint and
press
MENU to save.
8. Press the left arrow key until the door icon
# appears, then press
and hold
MENU two seconds to exit. Or press the left arrow
key and when ‘Exit Menu’ appears, press
MENU to exit.
High Low Setpoints
< High >
Low
High Low Setpoints
High
< Low >
High
{
10.0
<Back } Enter@
Low
{
5.0
<Back } Enter@
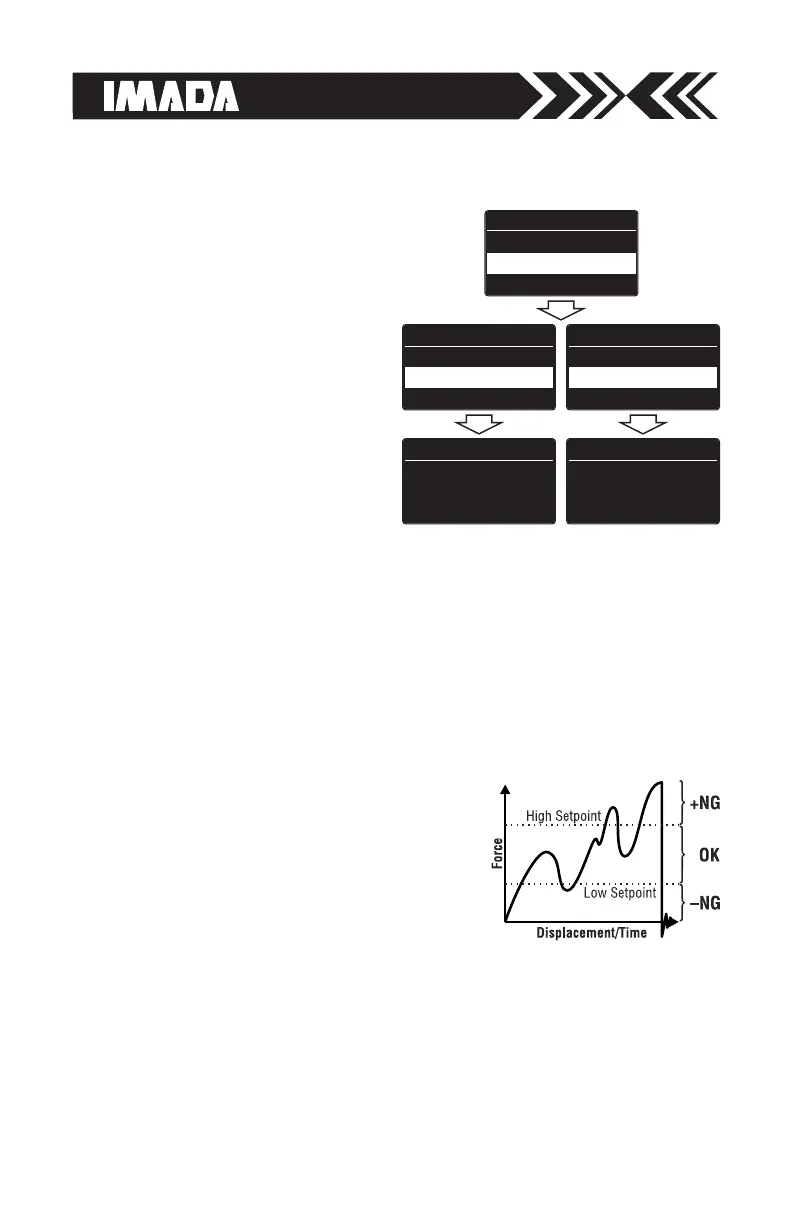
For example, if 5 lbf is set as Low and 10
lbf as High, the ORANGE LED lights for
measurements less than 5 lbf (–NG).
GREEN lights between 5–10 lbf (OK) and
RED lights over 10 lbf (+NG). Setpoint out-
put is available through the
Communications port (see page 14).
Program Menu
Date and Time
# High Low Setpoints >
Peak Functions
 Loading...