2
INDEX
Dear Customer, ................................................................................. 3
General warnings ............................................................................. 4
Safety symbols used. ......................................................................... 6
Personal protective equipment. ...................................................... 6
1 Product specications. ....................................................... 7
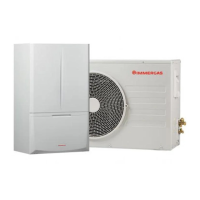
1.1 Product range. ...................................................................... 7
1.2 Accessories. ........................................................................... 7
2 Outdoor unit specications. .............................................. 8
3 Main components. .............................................................. 9
4 Installation of the unit. ...................................................... 10
4.1 Outdoor unit installation position. .................................10
4.2 Installation guide near the sea. ........................................ 10
4.3 Preparation of re extinguisher. ...................................... 12
4.4 Free ignition sources. ........................................................12
4.5 Ventilation of the area. ...................................................... 12
4.6 Leak detection methods. ................................................... 12
4.7 Labelling. ............................................................................. 12
4.8 Recovery. ............................................................................. 13
4.9 Installation place requirements. ....................................... 13
4.10 Moving the outdoor unit with wire ropes. ..................... 13
4.11 Clearance requirements for the outdoor unit. ............... 14
4.12 Installing the outdoor unit. .............................................. 16
4.13 Mount of outdoor unit. ..................................................... 16
4.14 Drain....................................................................................17
4.15 Positioning the unit in a rigid climate.............................19
5 Electrical connections. ...................................................... 20
5.1 General conguration of the system. .............................. 20
6 Connection of the cable. ................................................... 21
6.1 Power cable specications. ............................................... 21
6.2 Specications of connecting cables. ...............................21
6.3 Specications of single phase terminal block. ............... 21
6.4 Power cable connection diagram. .................................... 22
6.5 Connection of power terminal......................................... 24
6.6 Installation of earthing wire. ............................................ 24
6.7 How to connect extension cables. .................................... 25
7 Checking correct earthing. ............................................... 27
8 Installation of chiller lines. ............................................... 28
8.1 Allowed length of the refrigerant pipe and
installation examples. ........................................................28
8.2 Selection of refrigerant pipe. ............................................ 29
8.3 Keep the refrigerant pipe clean and dry. ......................... 29
8.4 Cutting and anging of pipes. .......................................... 30
8.5 Choose the insulation of the refrigerant pipe. ............... 32
8.6 Insulating the refrigerant pipe. ........................................32
8.7 Braze welding the pipe. ..................................................... 32
8.8 Testing for refrigerant gas leaks. ...................................... 33
8.9 Creating vacuum. ............................................................... 34
8.10 Select the additional refrigerant charge. ......................... 35
8.11 Recharging the refrigerant. ............................................... 35
8.12 Adding refrigerant. ............................................................ 37
8.13 Closing the valve stem....................................................... 38
8.14 Opening the valve stem.....................................................38
9 Cooling cycle diagrams. .................................................... 39
9.1 Audax Pro 4-6 V2 diagram. .............................................. 39
9.2 Audax Pro 9 V2 diagram. ................................................. 39
10 Wiring diagrams. ............................................................... 40
10.1 Audax Pro 4-6 V2 wiring diagram. ................................. 40
10.2 Audax Pro 9 V2 wiring diagram. ..................................... 41
11 Microswitch and key function settings. .........................42
11.1 Audax Pro 4-6 V2 testing operations. ............................. 42
11.2 Audax Pro 9 V2 testing operations. ................................. 44
12 “Pump down” execution. .................................................. 47
12.1 Purpose of “Pump down”. ................................................. 47
12.2 Important warnings for “Pump down” execution. ........ 47
12.3 Collect the refrigerant in a specic vessel before
“Pump down”. ..................................................................... 48
13 Completion of installation. ...............................................49
14 Final inspections and test operation. ..............................50
14.1 Inspection prior to test operation. ................................... 50
14.2 Test operation. .................................................................... 50