38
39
40
41
37
90°
45°±2°
R 0,
~0,8
A
B
30
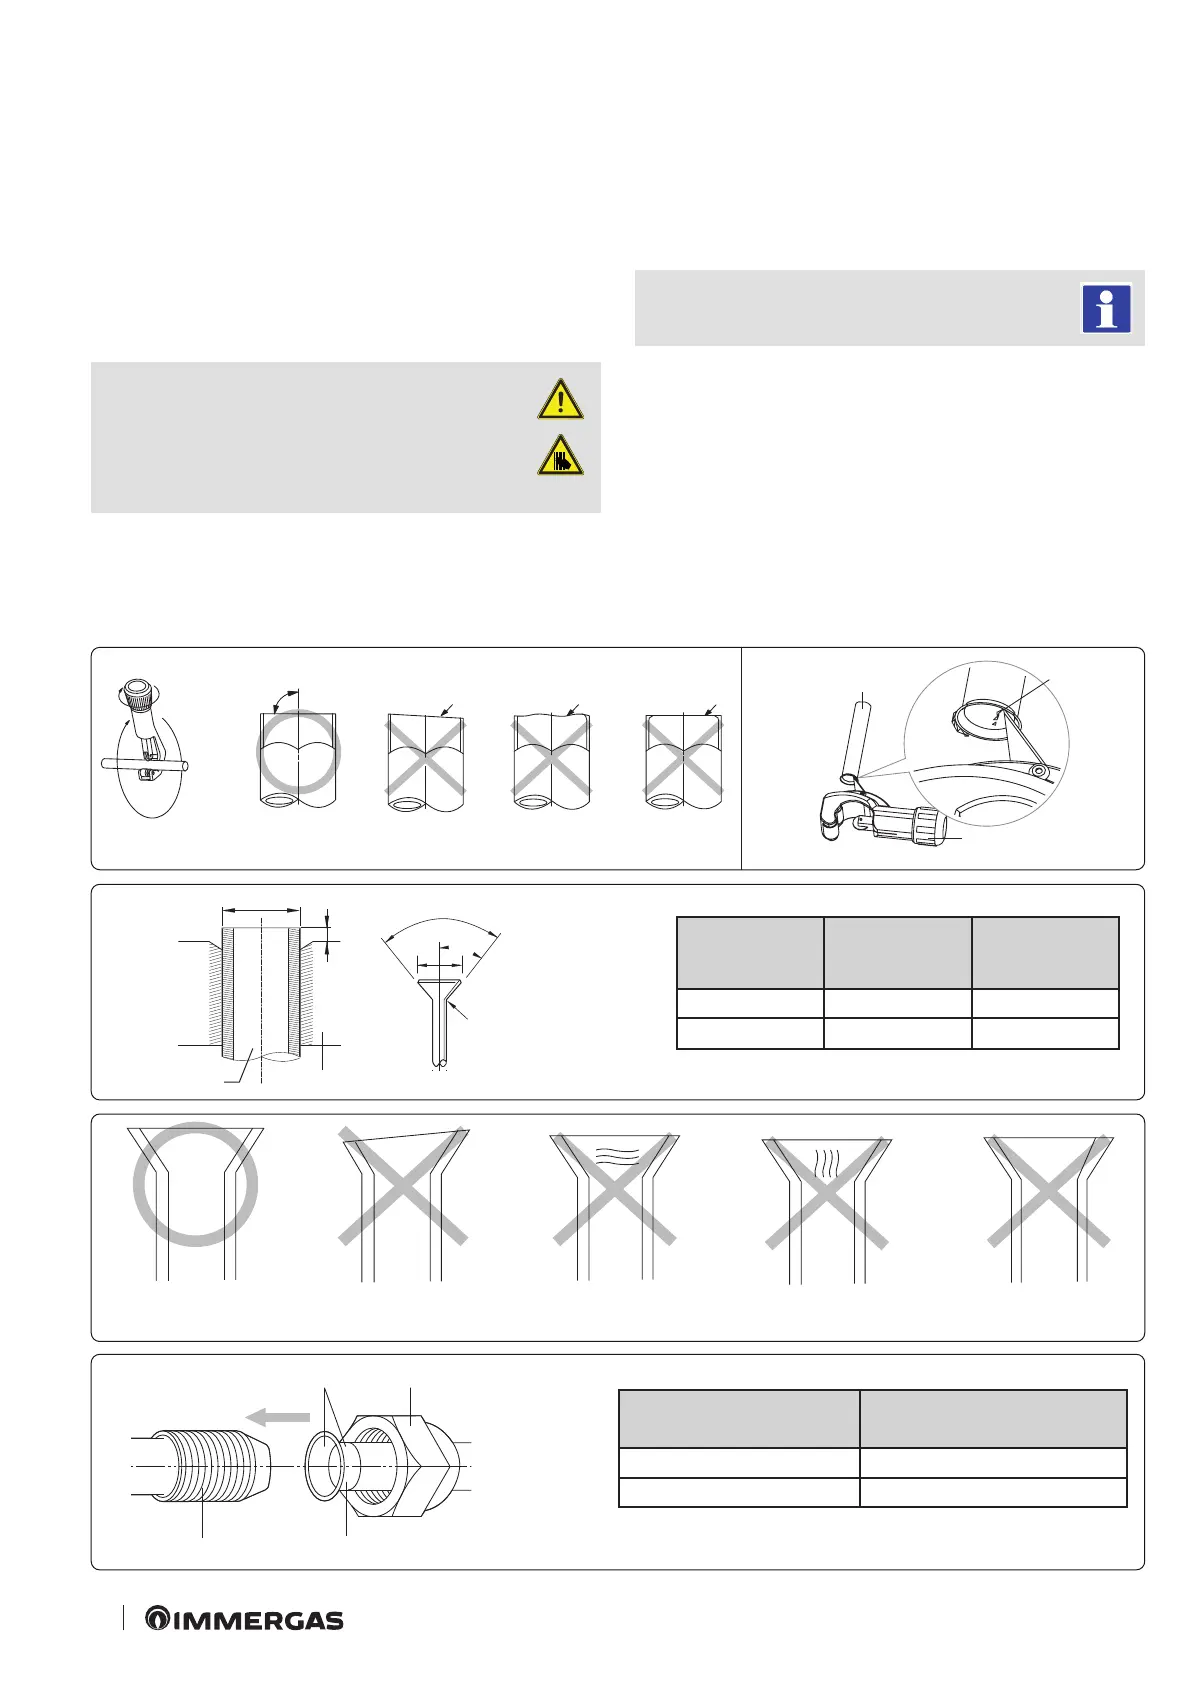
8.4 CUTTING AND FLANGING OF PIPES.
1. Make sure to have prepared the required tools.
- pipe cutter, deburring tool, aring tool, clamp, etc.
2. If the pipes need to be shortened, cut them with a pipe cutter,
making sure that the cutting-edge is perpendicular to the length
of the pipe.
- Figure 37 shows some examples of correct and incorrect cutting
edges.
3. To avoid gas leaks, remove all of the burrs on the pipe cutting
edge using a reamer.
ATTENTION:
- while removing the burrs, keep the
pipe turned downwards so that they
do not drop inside.
4. Insert a countersunk nut into the pipe and modify aring.
5. Check that the pipe is correctly countersunk.
- Figure 40 shows some examples of incorrectly countersunk pipes.
6. Align the pipes connect them easily. First tighten the counter-
sunk nuts with your hands and then with a torque wrench, at the
tightening torque values indicated in the table in gure 41.
Overtightening can cause gas leaks.
Pipe
Deburred
Deburred
Pipe cutter
Oblique Rough
Outside diameter
[D (mm)]
Depth
[A (mm)]
Flaring
dimensions
[B (mm)]
6.35 1.3 8.7 ~ 9.1
15.88 2.2 19.3 ~ 19.7
Pipe
Flaring
Correct Sloped CrackedDamaged surface Uneven thickness
Outside diameter
[mm (inches)]
Torque (N·m)
6.35 (1/4”) 14 ~ 18
15.88 (5/8”) 68 ~ 82
Apply antifreeze oil Countersunk nut
Joint pipeInternal outlet pipe