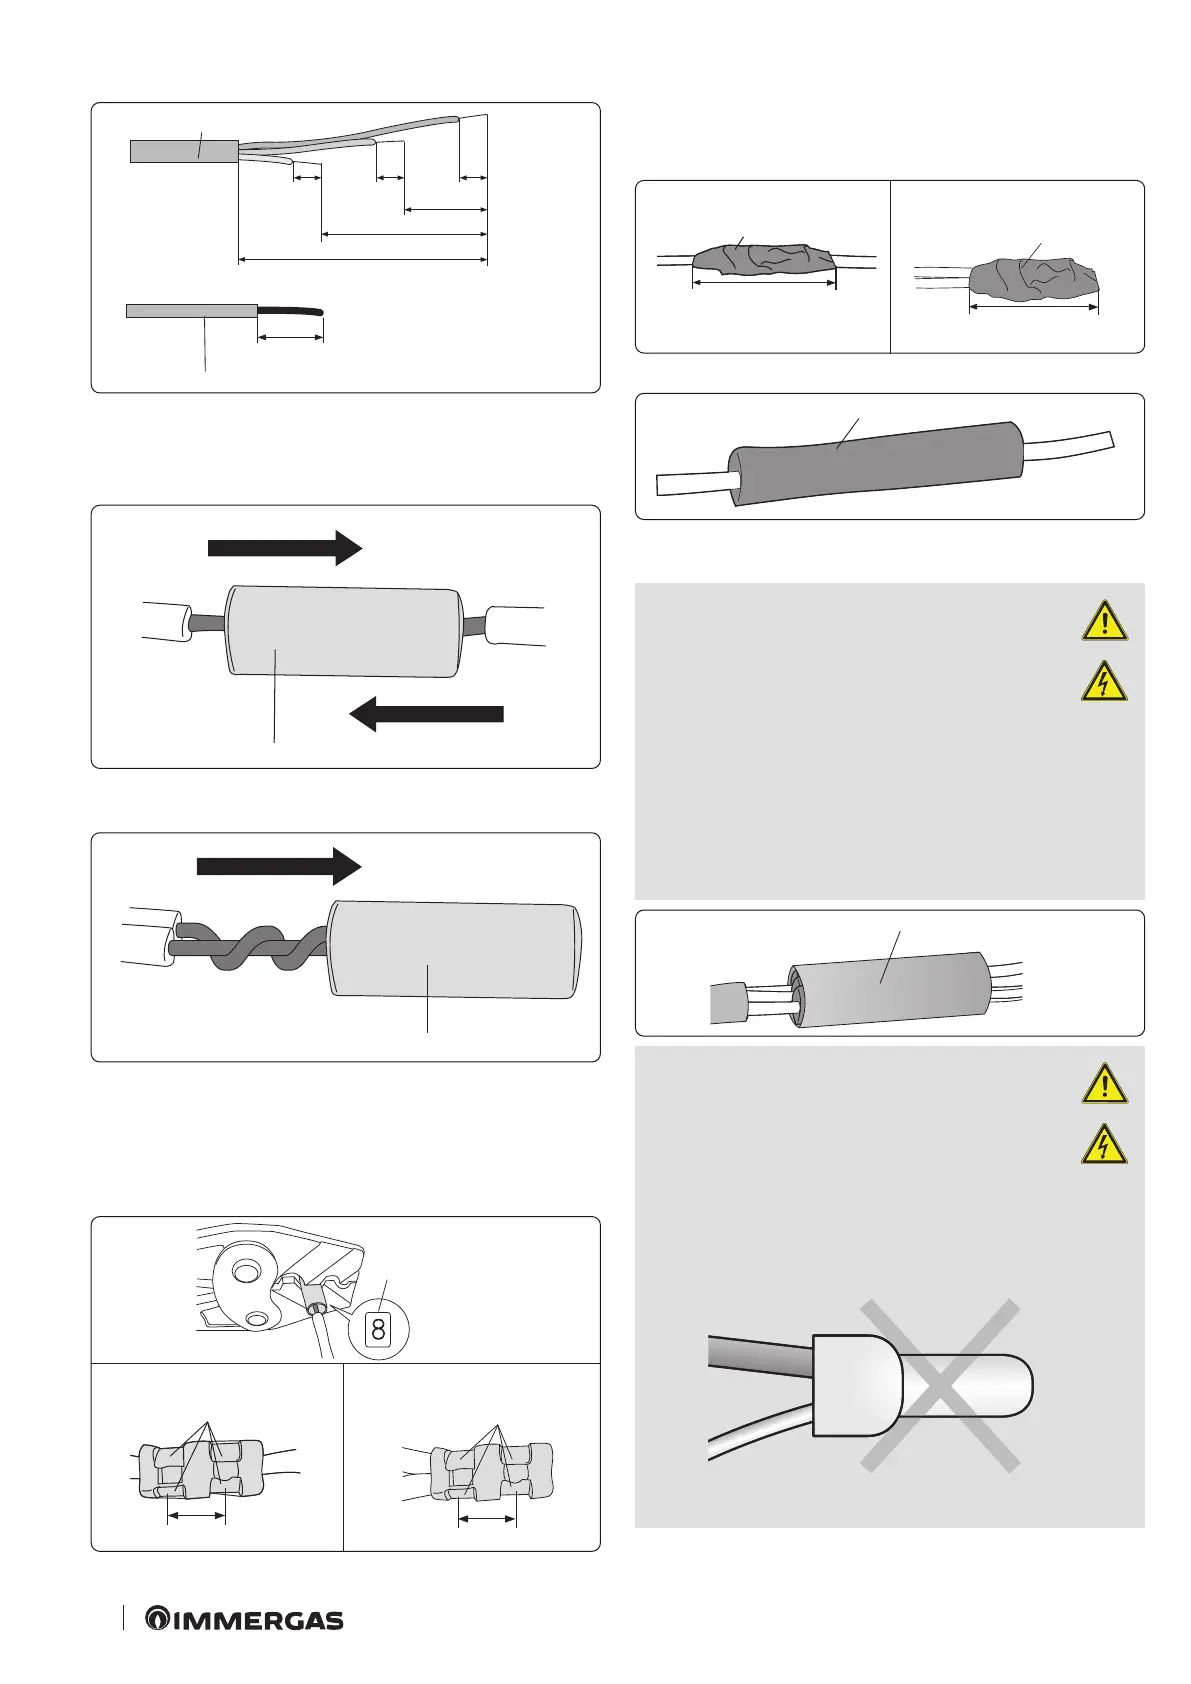
26
Power cable
28
20
120
60
202020
180
(Unit: mm)
Preinstalled sheath for the power cable
3. Insert both terminals of the copper wire of power cable into
the connection sheath.
Method 1
- Push the copper wire into the sheath from both sides.
29
Connection sheath
Method 2
- Twist the copper wires together and push them into the sheath.
30
Connection sheath
4. Compress the two points with the crimping pliers, turn them
and repeat the operation on the other two points in the same
position.
- e compressed dimension should be 8.0.
- Aer having squeezed it, pull both ends of the wire to make sure
it is rmly compressed.
Compression
dimensions
31
Method 1
Method 2
Compress 4 times Compress 4 times
5. Wrap it in at least two turns of electrical tape and position the
contraction sheath in the middle of the tape.
ree or more layers of tape are required.
32
Electrical tape
Electrical tape
Method 1 Method 2
6. Heat the contraction sheath to contract it.
33
Heat shrink tube
7. Aer having completed the contraction stage, nish the oper-
ation by wrapping it with electrical tape.
ATTENTION:
- make sure that the parts to be con-
nected are not exposed to the outside.
- Make sure that the electrical tape and
the contraction sheath are made with
approved reinforced insulating materials
with the same voltage and current values as
the power cable. (Comply with local stand-
ards for the extensions).
34
Electrical tape
ATTENTION:
- in case of extension of the electric
wire, do NOT use a round press-t
bushing.
- Incomplete electrical connections
can cause electrocutions or re.
 Loading...