99903514:TELESCOPIC CRANE: 3-14 SECTION 3: REPAIR
DANGER
SUPPORT THE CRANE BASE, MAST, AND
BOOMS PRIOR TO REMOVING ANY CYLIN-
DERS! FAILURE TO SUPPORT THE CRANE
FULLY CAN CAUSE PERSONAL INJURY AND
EQUIPMENT DAMAGE.
3-14: LOWER CYLINDER REMOVAL &
REPLACEMENT
Replace the lower cylinder if it leaks or is bent or
damaged. To replace the cylinder:
1. Operate lower boom control levers to
position the lower boom as low as possible.
Support the boom using a hoist or two
slings, and make sure the mast and base
are fully supported.
2. Identify and remove hose connections. Cap
or plug all open hydraulic fittings, and dis-
connect anti-two block wires.
3. Position a fabric sling of adequate capacity
around lower cylinder and cinch sling near
rod end such that sling will lift cylinder in
vertical position. Hook sling on hoist and
raise hoist to tension the sling.
4. Remove and discard retaining bolt from rod
end of cylinder.
5. Remove and discard retaining bolt and
keeper plate from piston end of cylinder.
With aid of a heavy sledge hammer and pin
driving tool, drive piston end pin from mast.
Position cylinder on a firm work support.
6. Reverse procedure for reassembly. Rein-
stall pins using anti-sieze for ease of as-
sembly. Torque new threaded fasteners per
Torque Data Charts in the general reference
section.
7. Start the crane and slowly cycle lower boom
hoist cylinder out and in with no load to
purge air from the system.
8. After the air has been purged from the
system, check the reservoir oil level. Top off
if necessary.
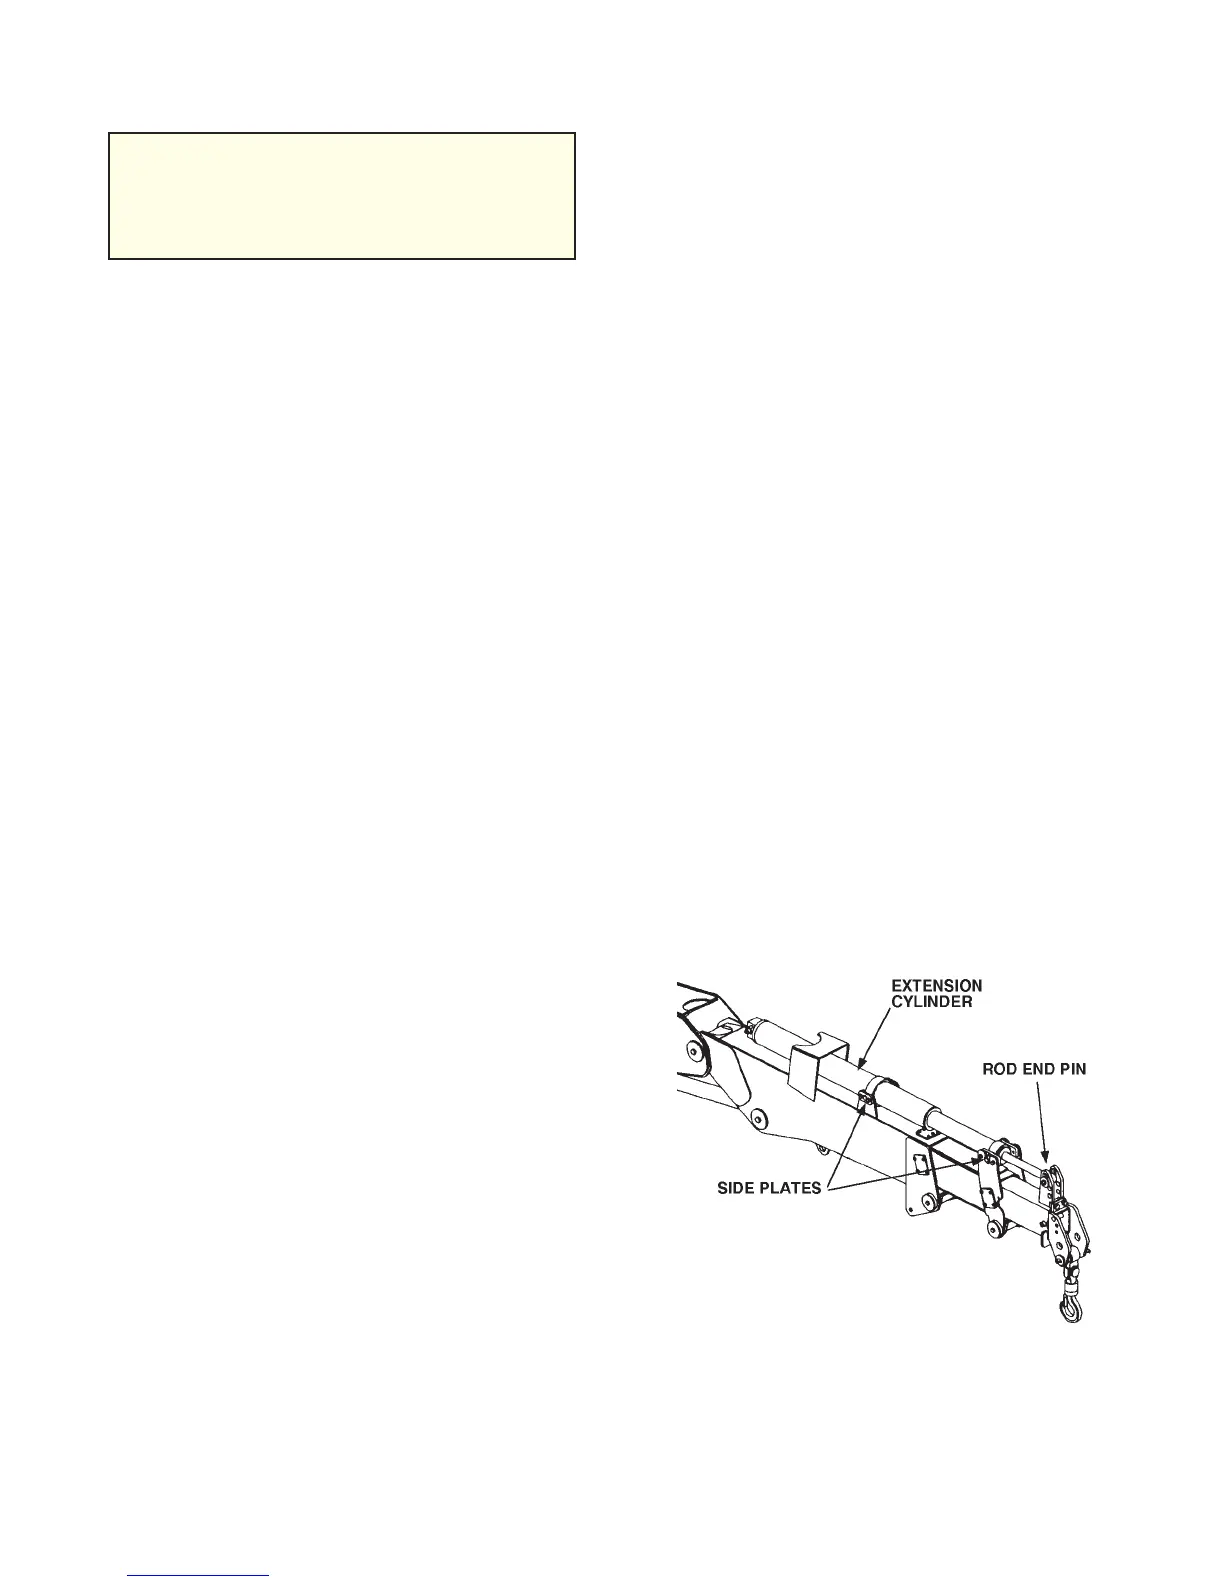
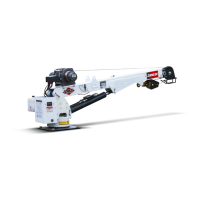
3-15: EXTERNAL EXTENSION CYLIN-
DER-REMOVAL AND REPLACEMENT
Models 1015, and 2020 telescopic cranes have
external extension cylinders. See Figure C-14
for identification. To remove and replace a
telescopic crane cylinder:
1. Position the crane with the lower and exten-
sion booms horizontal. Support the base,
mast and boom.
2. Disconnect and cap the extension cylinder
hydraulic hoses. Plug the hose ports.
3. Remove and discard bolts securing the
wear pad retainer plates. Remove the
plates and wear pads.
4. Remove the retaining ring, bushing, and pin
which secure the rod end of the cylinder to
the boom.
5. Using a sling or hoist, lift the external exten-
sion cylinder and remove.
To install an external extension cylinder:
1. Using fabric slings and hoist, position the
cylinder atop the extension boom. The
extension boom may have to be moved
manually to align the rod of the cylinder with
the ears of the extension boom. Once
aligned, insert and secure pin.
2. Install the side plates securing the cylinder
to the outer boom. Torque fasteners per
Torque Data Chart.
Figure C-14: External Extension Cylinder
20030115