X1 Service Guide 44
Assembly Notes
♦ Check the screens over the openings on the sides of the lamp module to make sure they're clean.
Vacuum away any dust on the screens so cooling air can flow freely through the lamp module.
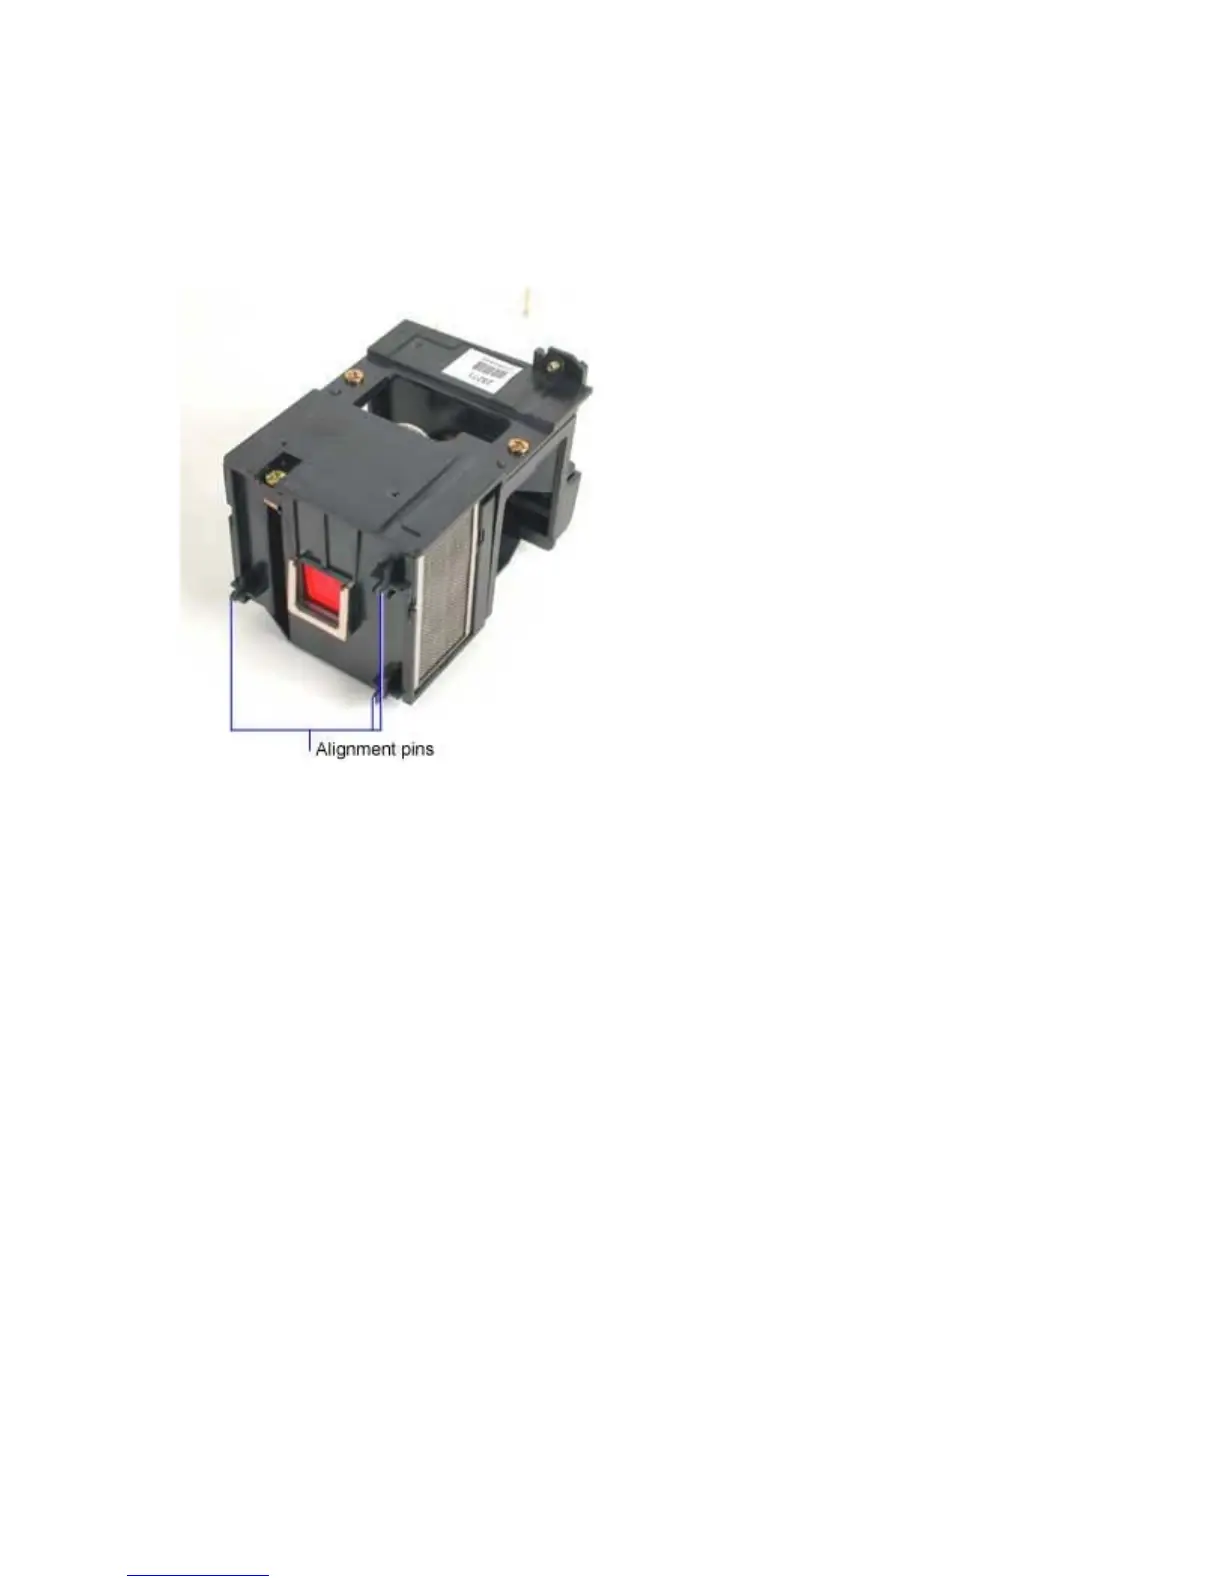
♦ Slide the lamp module straight into the lamphouse. The alignment pins on the innermost side of the
lamp module engage holes on the optical engine.
♦ Gently tighten the two captive screws on the lamp module to secure it in the projector.
♦ Plug the cable on the lamp module into the connector inside the lamphouse. Ensure that the locking
tab securely holds the connector halves together.
♦ Place the two tabs on the bottom side of the lamp door in their respective slots on the projector. Then
press the top of the door against the projector to engage the alignment pin and the two upper tabs
that secure the lamp door in position.
♦ If you installed a new lamp module, follow the directions below to reset the lamp timer.
♦ Press the Menu button and navigate to the Main Menu>Settings>Service menu. Select Lamp Reset
to reset the lamp timer.
After you reset the lamp timer, read the timer value to make sure it was reset. Navigate to the About
screen from the Main Menu, then view the Lamp Hour value. It should show 0 hours.