X1 Service Guide 19
Remove and Replace the Controller ECA
The controller ECA (510-1773-xx) mounts beneath the metal chassis and ballast/power supply ECA and
behind the optical engine. It fastens to the bottom case with seven screws and connects to the DMD ECA
through two connectors at the front side of the controller.
A new controller ECA includes the keypad and ballast/power supply cables. These cables
permanently connect to the controller ECA. Do not attempt to remove them.
WARNING Be sure to take proper ESD precautions while working near the controller ECA. It can be
easily damaged by static electricity. ECAs damaged by static electricity require replacement.
1. Remove the following items:
Lamp module (page 42)
Focus ring (page 30)
Zoom ring (page 30)
Front bezel (page 32)
Rear bezel (page 49)
Top case (page 52)
Ballast/power supply ECA (page 6)
Chassis (page 12)
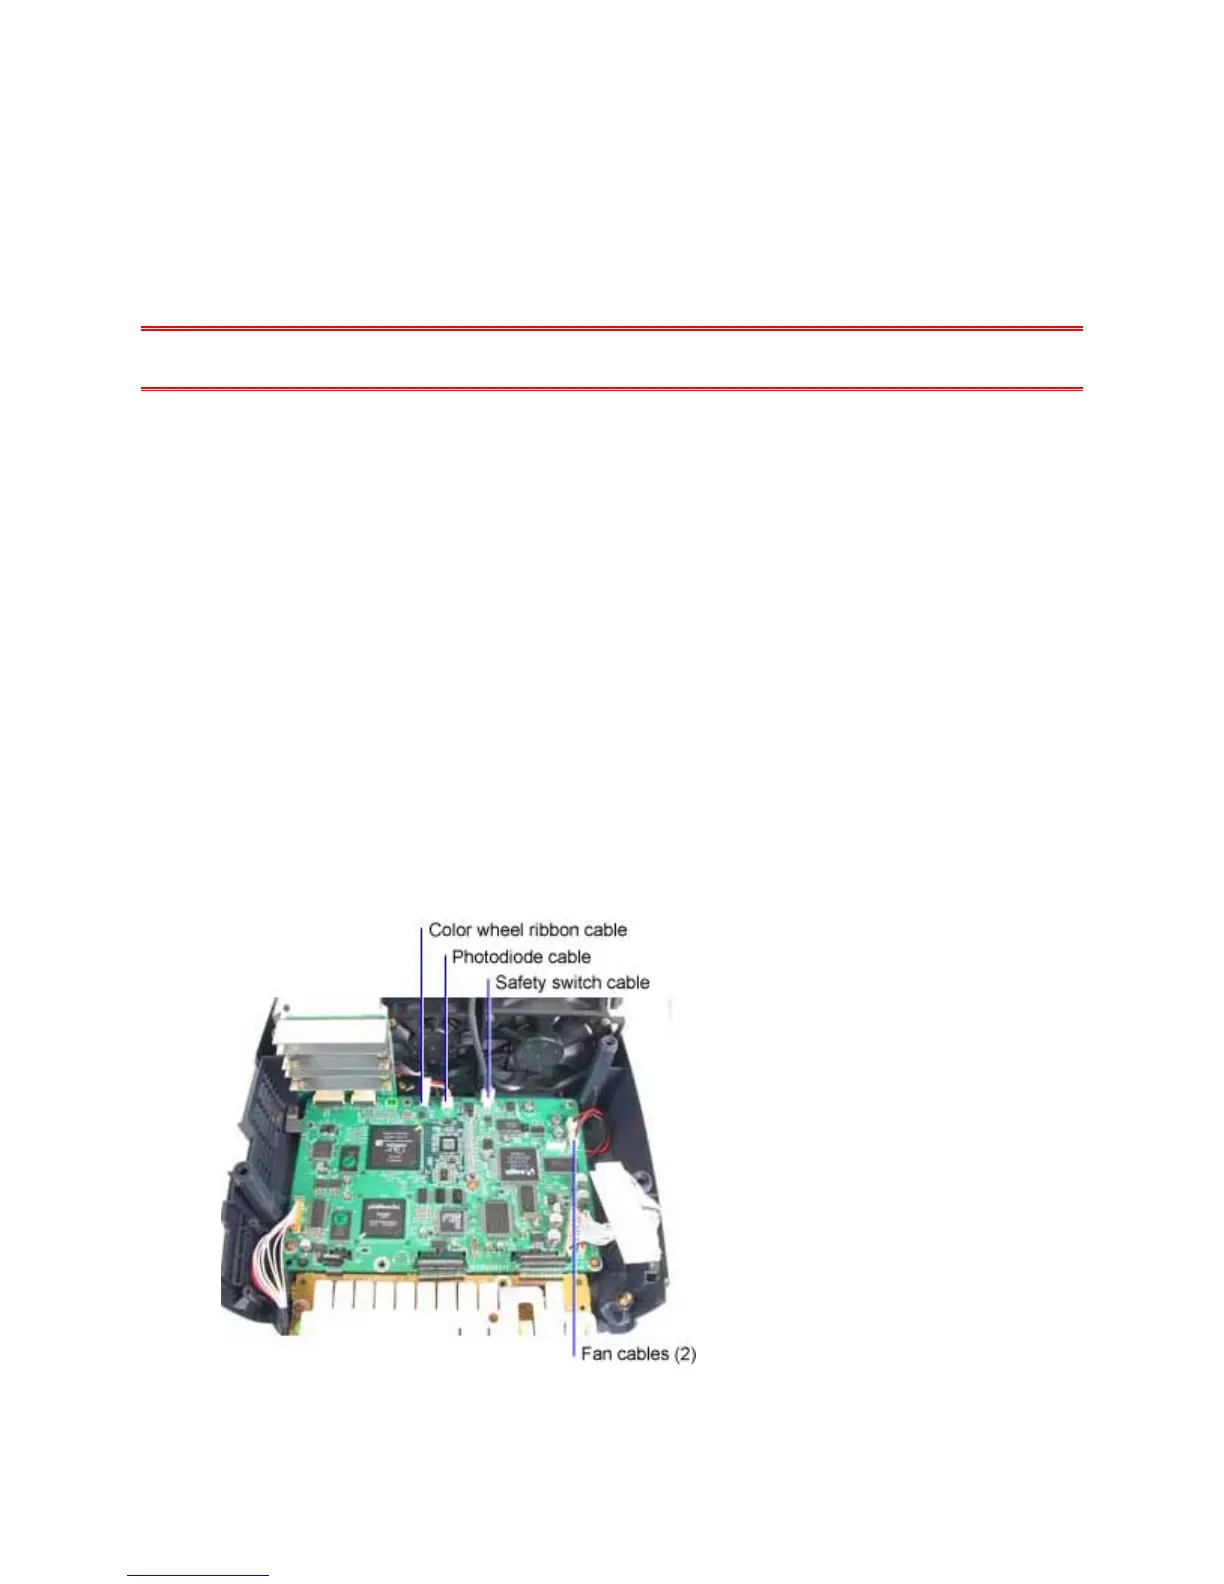
2. Unplug the safety switch cable, the two fan cables, the color wheel ribbon cable, and the
photodiode cable from the controller ECA.