X1 Service Guide 50
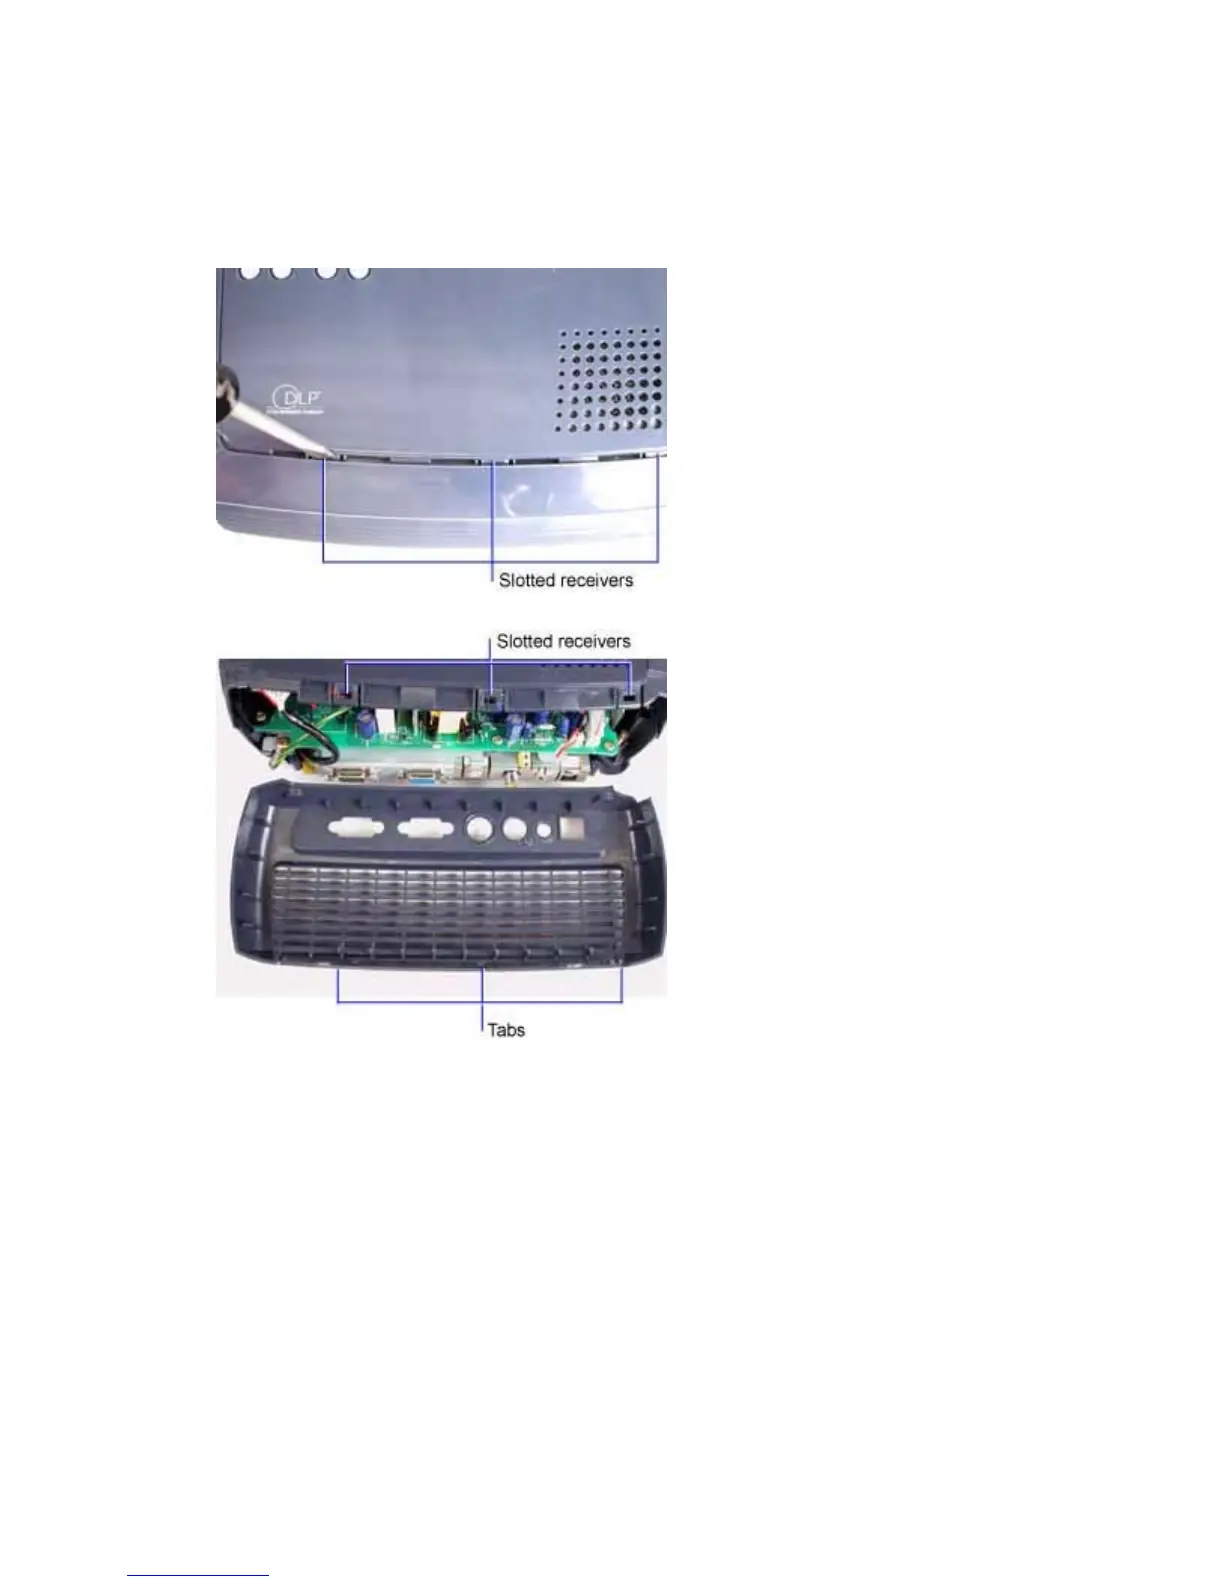
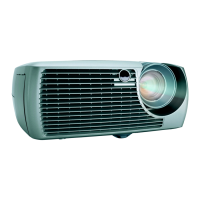
4. Turn the projector right side up on the work surface. Three tabs on the rear bezel engage slotted
receivers on the top case. While firmly pulling the top of the rear bezel away from the projector,
carefully insert the tip of a flat blade screwdriver into the space between the rear bezel and top
case. Position the screwdriver blade at the location of one of the slotted receivers and press
down to release it.
You may need to repeat this step, pressing down on one of the other two tabs in order to release
the rear bezel from the top case.
5. Pull the rear bezel away from the projector.
Assembly Notes
♦ Align the rear bezel against the rear of the projector. Press the bezel into position to lock the three
tabs against the top case.
♦ Tighten the two M3x10 and the M2.6x10 Plastite Phillips screws securely. Do not overtighten the
screws.
When you install a new rear bezel:
♦ Adhere a new I/O panel label to the outside of the bezel.