22
5. Lower the retention module down over the processor slot so that the retention module
seats flatly against the system board. Tighten the screws in a clockwise manner to
secure the module to the board.
WARNING Do not overtighten the screws as you may damage the module and/or the system
board.
6. Replace the heat-sink locks, if necessary. See the “Heat-Sink Mounting Brackets”
section above for details.
7. Replace the processor module. See the “Processor Modules” section above for details.
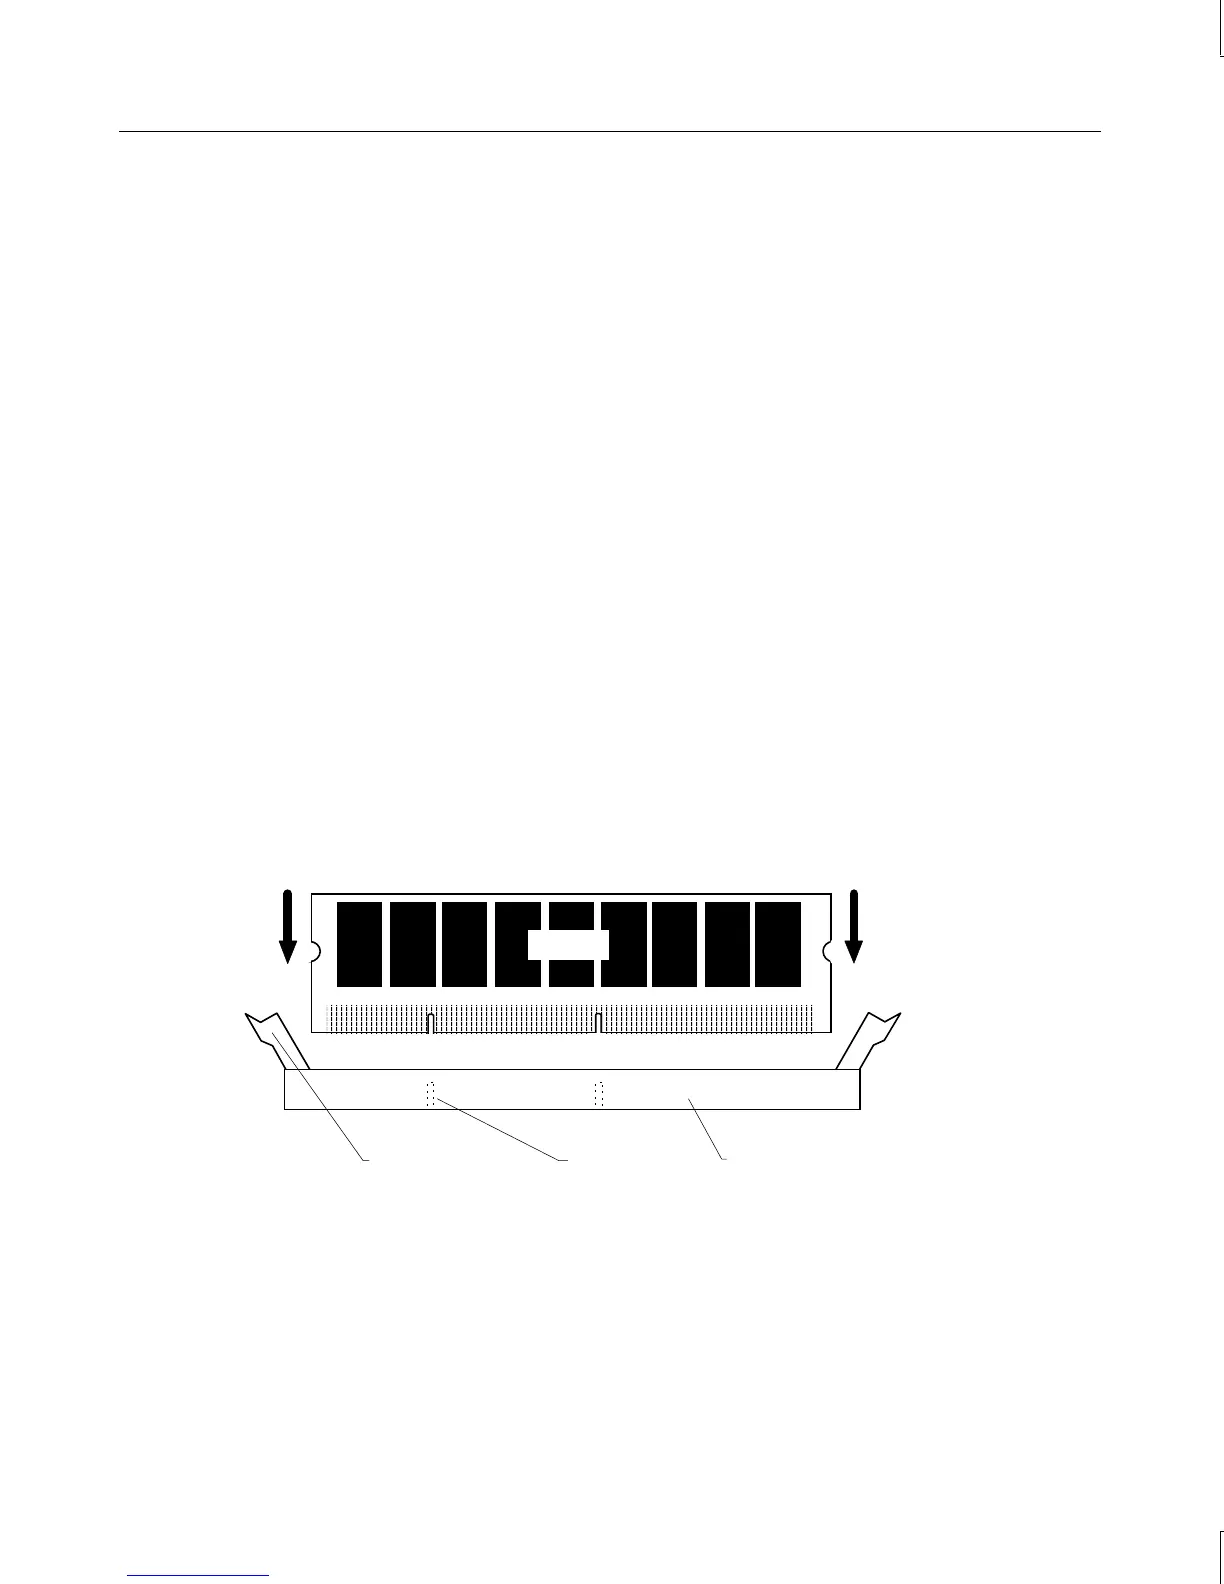
DIMMs
See the section, “Adding Memory,” in Chapter 3 for important details on handling DIMMs.
The DIMM sockets are located to the right of the processors on the system board. See the
system board diagram in Chapter 5, “System Board,” for socket locations.
To replace a DIMM:
1. Press the release tabs outward, away from each other.
2. Grasp the top edge of the DIMM and pull it out of the socket.
3. Remove the new DIMM from the antistatic package.
4. Orient the DIMM so that the notches match the keys in the socket.
Release Tab
Notch
DIMM socket
DIMM
5. Push gently straight down until the release tabs snap into place.
6. When you restart the computer, the BIOS detects the new memory automatically.
NOTE Whenever you change your memory type, either from ECC to non-ECC or the reverse, you
should check that the DRAM Type BIOS parameter is set correctly. For more information,
see Chapter 4, “Configuring the BIOS,” in the
TDZ 2000 GL2/ExtremeZ GL2 System Setup
.