13
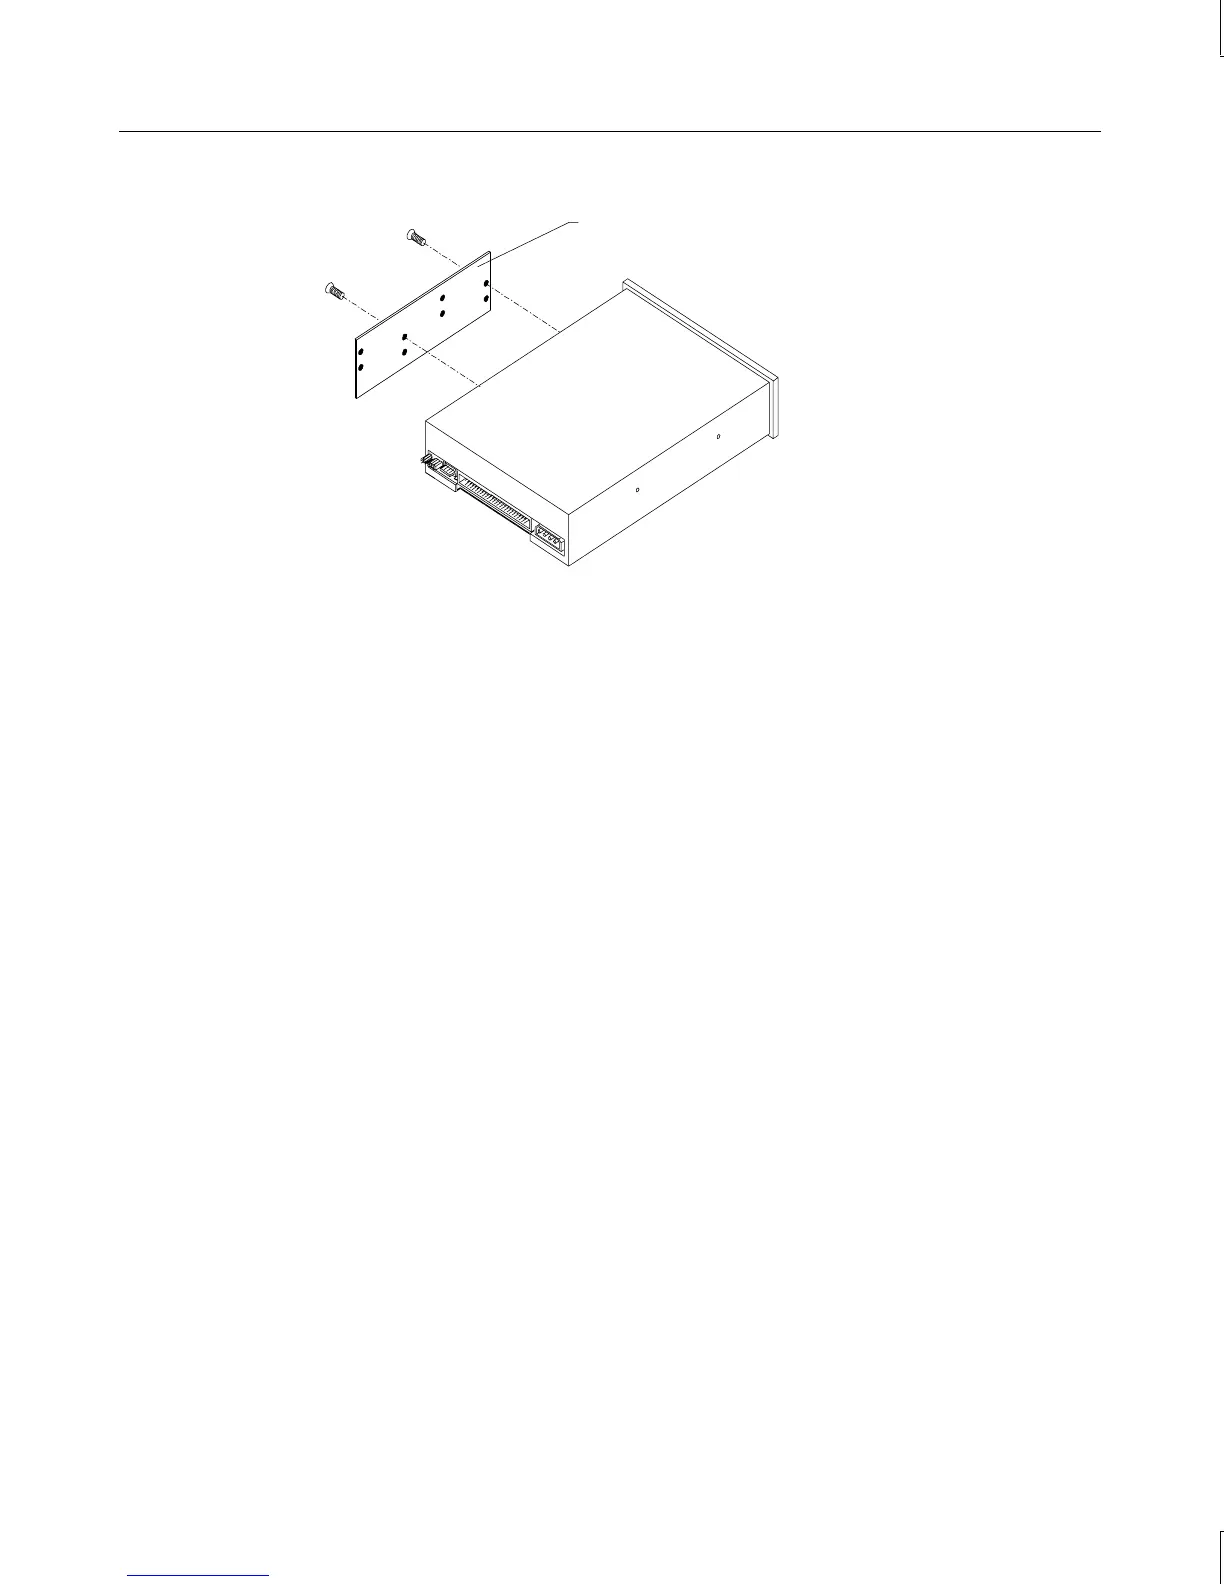
Mounting guide
5. Note the jumper settings on the rear of the CD-ROM.
6. Set the master/slave jumper to the same position as the old drive.
7. Install the mounting guide on the right side of the new CD-ROM.
8. Slide the new CD-ROM drive into the chassis and align the mounting holes.
9. Install the screws that secure the CD-ROM to the chassis.
10. Connect the audio cable, data cable, and power cable.
External Bay Disk Drives
If a Kingston or other brand of removable disk module is installed in the external bay, see
the vendor documentation for disk drive and module replacement instructions.
To replace an external bay disk drive:
1. Disconnect the data cable and power cable from the disk drive.
2. Remove the two screws that secure the external bay disk drive tray to the chassis. See
the following figure.