Chapter 2: Installation
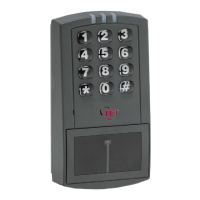
Chapter 2 supplies information about prox.pad plus
installation configurations; installation considerations;
and procedures for checking the cables, mounting the
prox.pad plus unit, inserting circuit boards, and de-
faulting prox.pad plus memory.
2.1 Installation
Configurations
It is the installer’s responsibility to determine the ap-
propriate prox.pad plus installation configuration,
which differs from installation to installation. These
three installation configurations are possible:
• Wall mounted installation (exterior to the room
to be accessed). In this configuration, a single gang
electrical box can be used. Typically, the prox.pad
plus unit is wall mounted (surface mounted) out-
side the access area on the unsecured side.
• Glass mounted installation, using the four IEI-
supplied pressure-sensitive adhesive pads. In this
configuration, the prox.pad plus unit is affixed
with the adhesive pads t o the glass door or the
window adjacent to the door being accessed, on
the interior side of the glass. The side cut-out on
the unit is used to bring the wires out of the side
of the prox.pad plus case.
• Secure installation (or “two-stage” configuration),
for higher security. In this configuration, the
prox.pad plus antenna is located a maximum of
10 feet away from the controller/keypad; the con-
troller/keypad is located on the secure side of the
door.
prox.pad plus Install/Program. Manual, PPP, D2 2-1