Mechanical installation
INTORQ | BA 14.0168 | 11/2018 41
5.6 Installing the friction plate (optional)
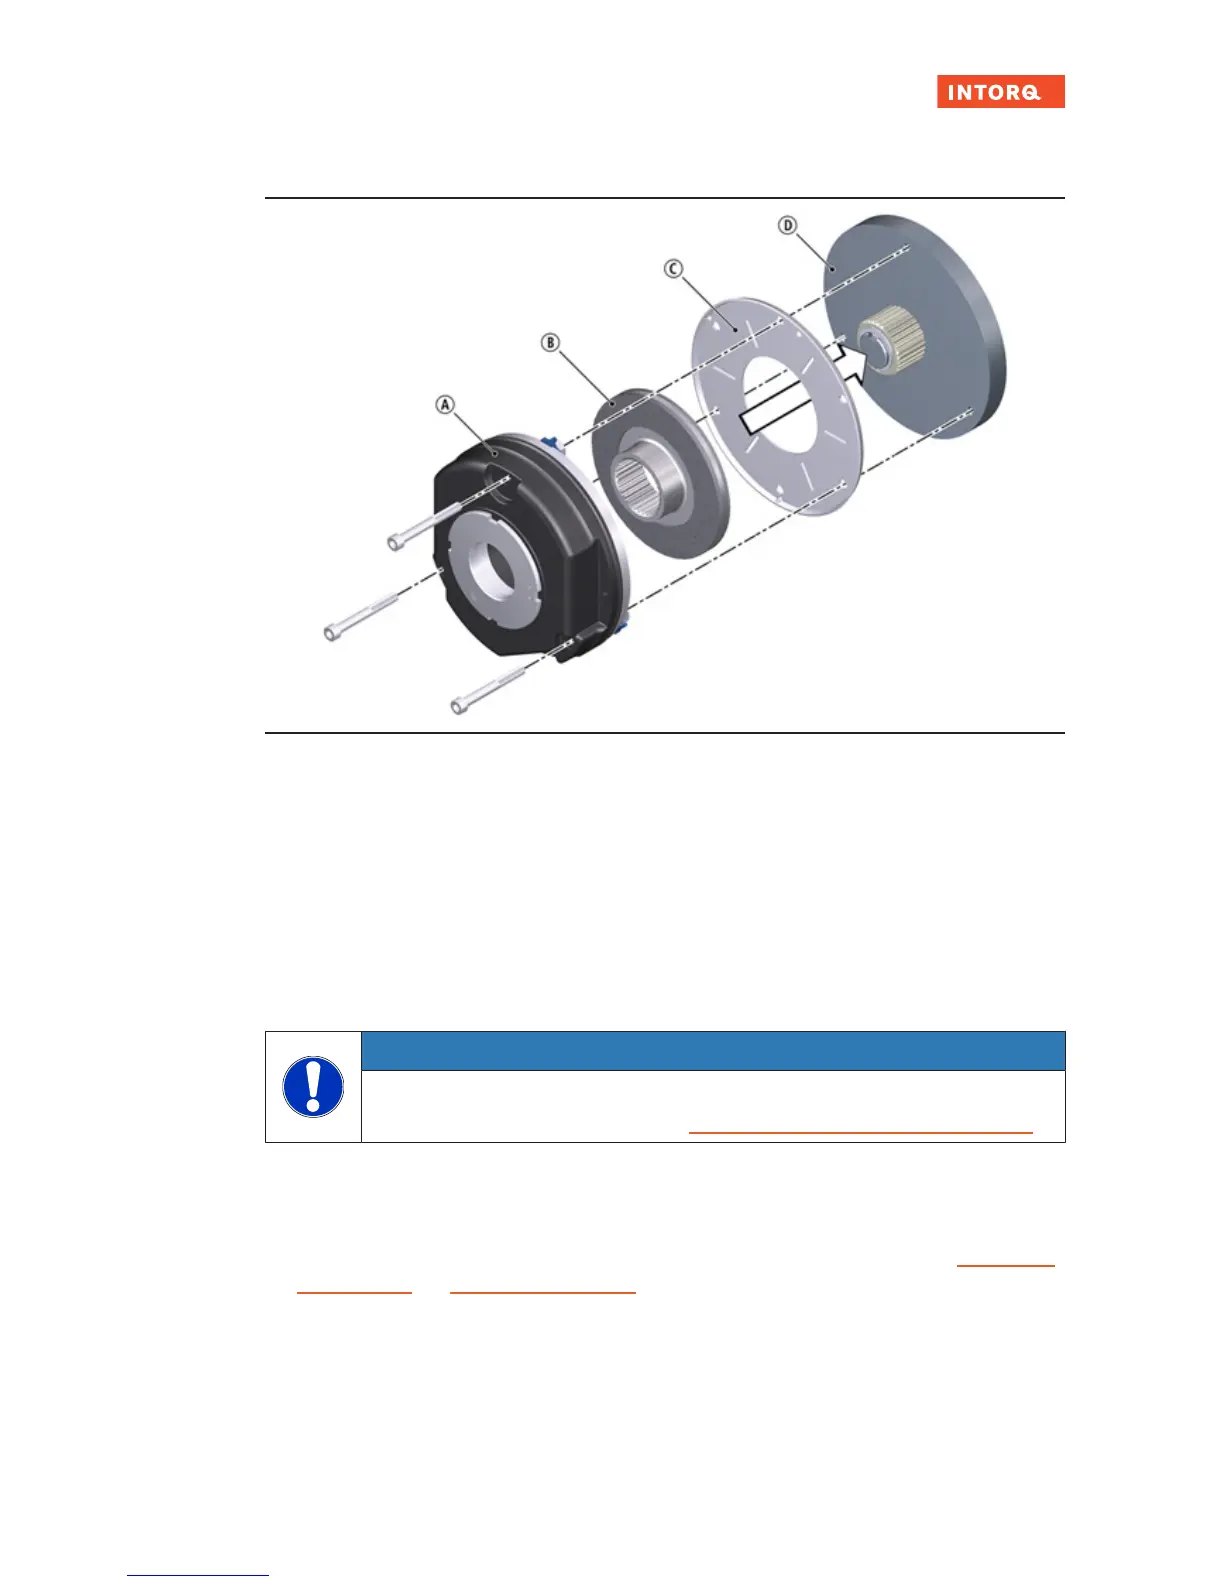
Fig.14: Mounting the friction plate
A
Stator
B
Rotor
C
Friction plate
D
End shield
1. Place the friction plate against the end shield. The lip edging of the friction plate must remain visible!
2. Align the hole circle along the screw-in holes.
5.7 Mounting the flange
5.7.1 Mounting the flange without additional screws
NOTICE
When dimensioning the thread depth in the end shield, be sure to take into account the
permissible wear distance (refer to Table Rated data for air gap specifications
,Page23).
1. Place the flange against the end shield.
2. Align the hole circle along the screw-in holes.
3. Mount the brake using the appropriate set of screws (refer to the figures in the chapters Mounting the
brake,Page38 and Spare parts list,Page68 ).