34
Ioline FlexJet User Guide
Set an Origin
1. Ensure that cartridges are installed in the carriage stall(s). (See
Guidelines for Installing a Cartridge earlier in this chapter.)
2. Close the cover and turn on the power. After a brief pause, the
carriage will glide to the left end plate, then return for a clean-
ing in the Service
Station. When the
initial start-up pro-
cess completes, the
OK light will turn
red and the Square
light will turn green.
3. Press the Left Arrow
key to position the
carriage so that the
tip of the small ‘V’
notch in the base
is over the desired
starting point of the
plot. Close the safety
cover.
4. Press the Set Origin key. The OK light will turn green. The
printer is ready to plot.
Sending Plot Files
Send plot les to the printer using FlexPlot or design software. Make
sure the power is on and that the paper is loaded as previously
described. Also, be sure that a new origin is set with the Set Origin
keypad button and that the printer is in Start mode (green light).
From FlexPlot:*
1. Choose input le type and location then double click on the le.
2. Conversion will occur and the Send to Queue button is acti-
vated. Press this button to add the le to the queue.
3. Repeat steps 1 to 2 until the Queue contains all les you wish to
print.
4. Press the Send button.
Pausing a Marker Plot
1. Pause a plot by pressing the Start/Stop key.
2. The OK light will change from green to red. The FlexJet will nish
printing the current scan, then pause.
3. Once the printing has paused, you may use the keypad keys to
move the carriage, paper, and take-up shaft. When the Start/Stop
key is pressed again (OK light changes from red to green) the
printer will begin printing again where it left off.
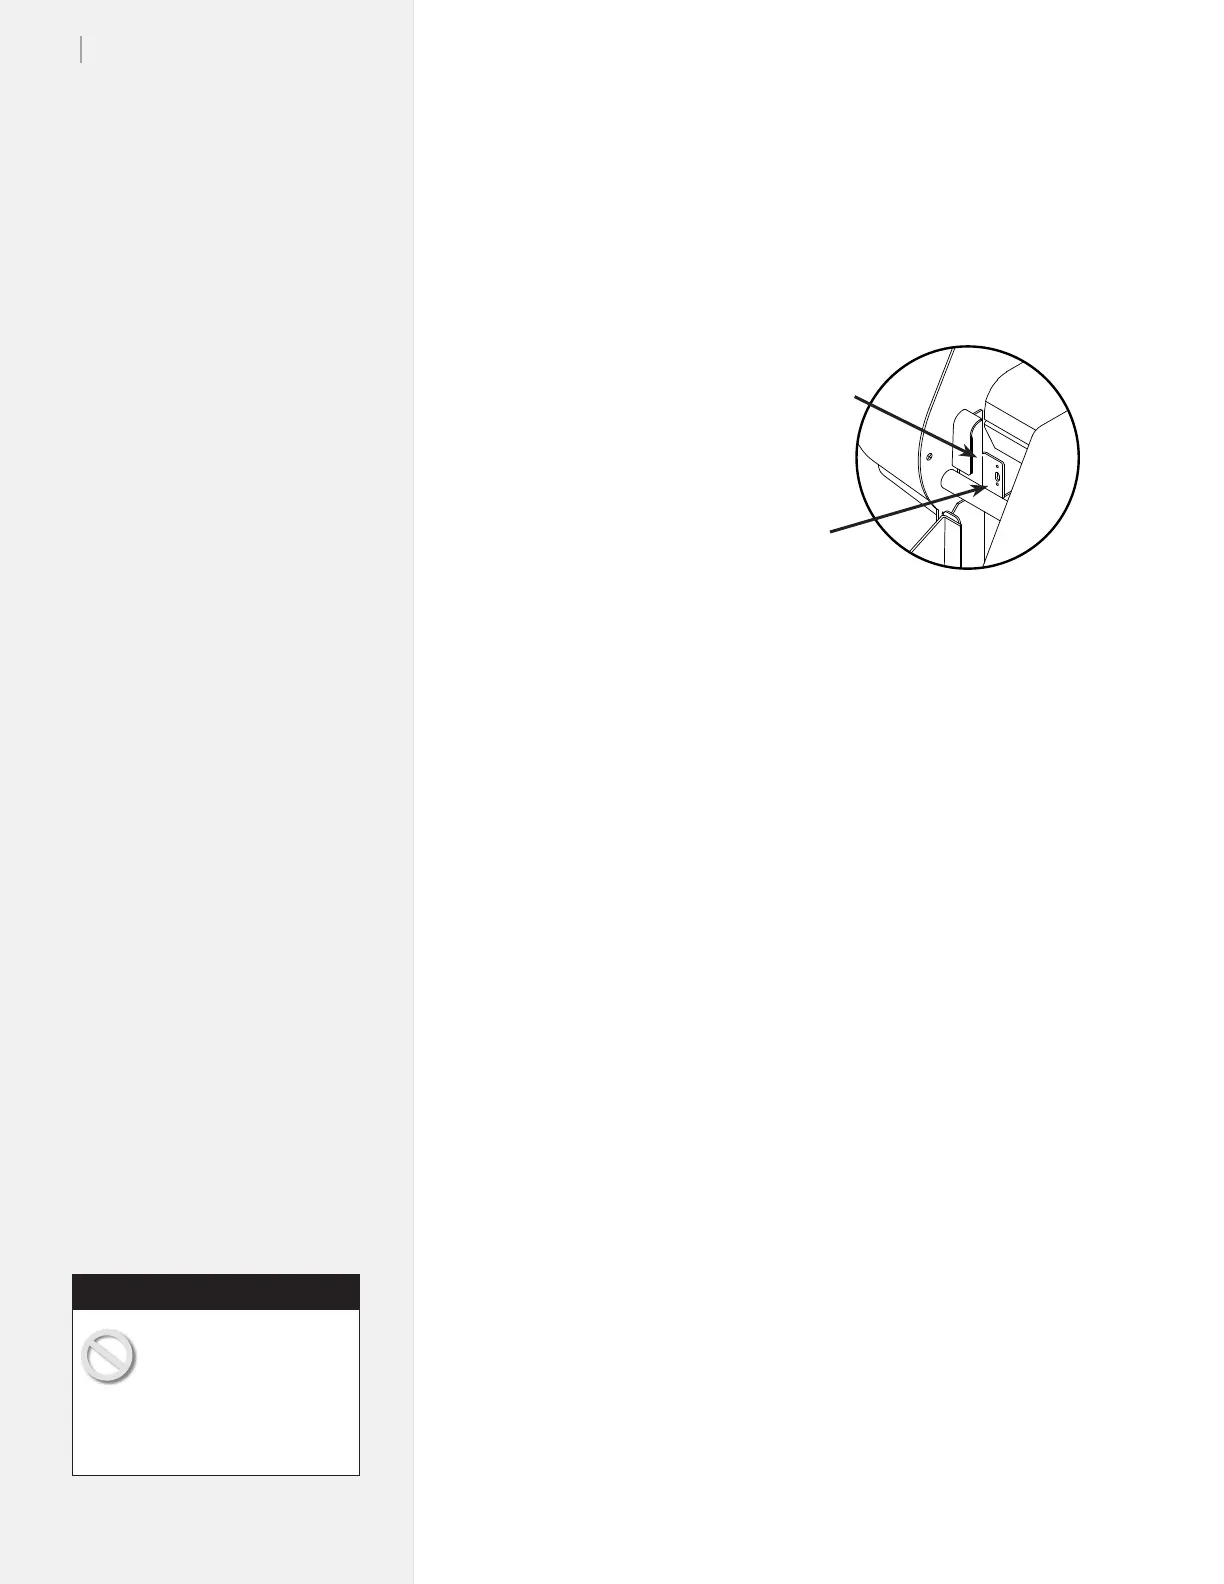
Figure 22. Front Dancer Bar Channel.
Front Dancer
Bar Channel
Sensor
Window
Do not pull paper tight
between the drive shaft
and the take-up shaft while
printing is paused. Do not turn the
feed roll or take-up roll by hand
while printing is paused.
Caution
* See the FlexPlot User Guide or
your design application user guide
for information on how to send
les to the printer.