38
Ioline FlexJet User Guide
Printing to the Floor
With careful setup and constant supervision, the FlexJet will print
markers directly onto the oor. This method is NOT intended for
printing long markers or unattended printing. Ioline recommends
that only markers 10 yards and shorter are printed with this method.
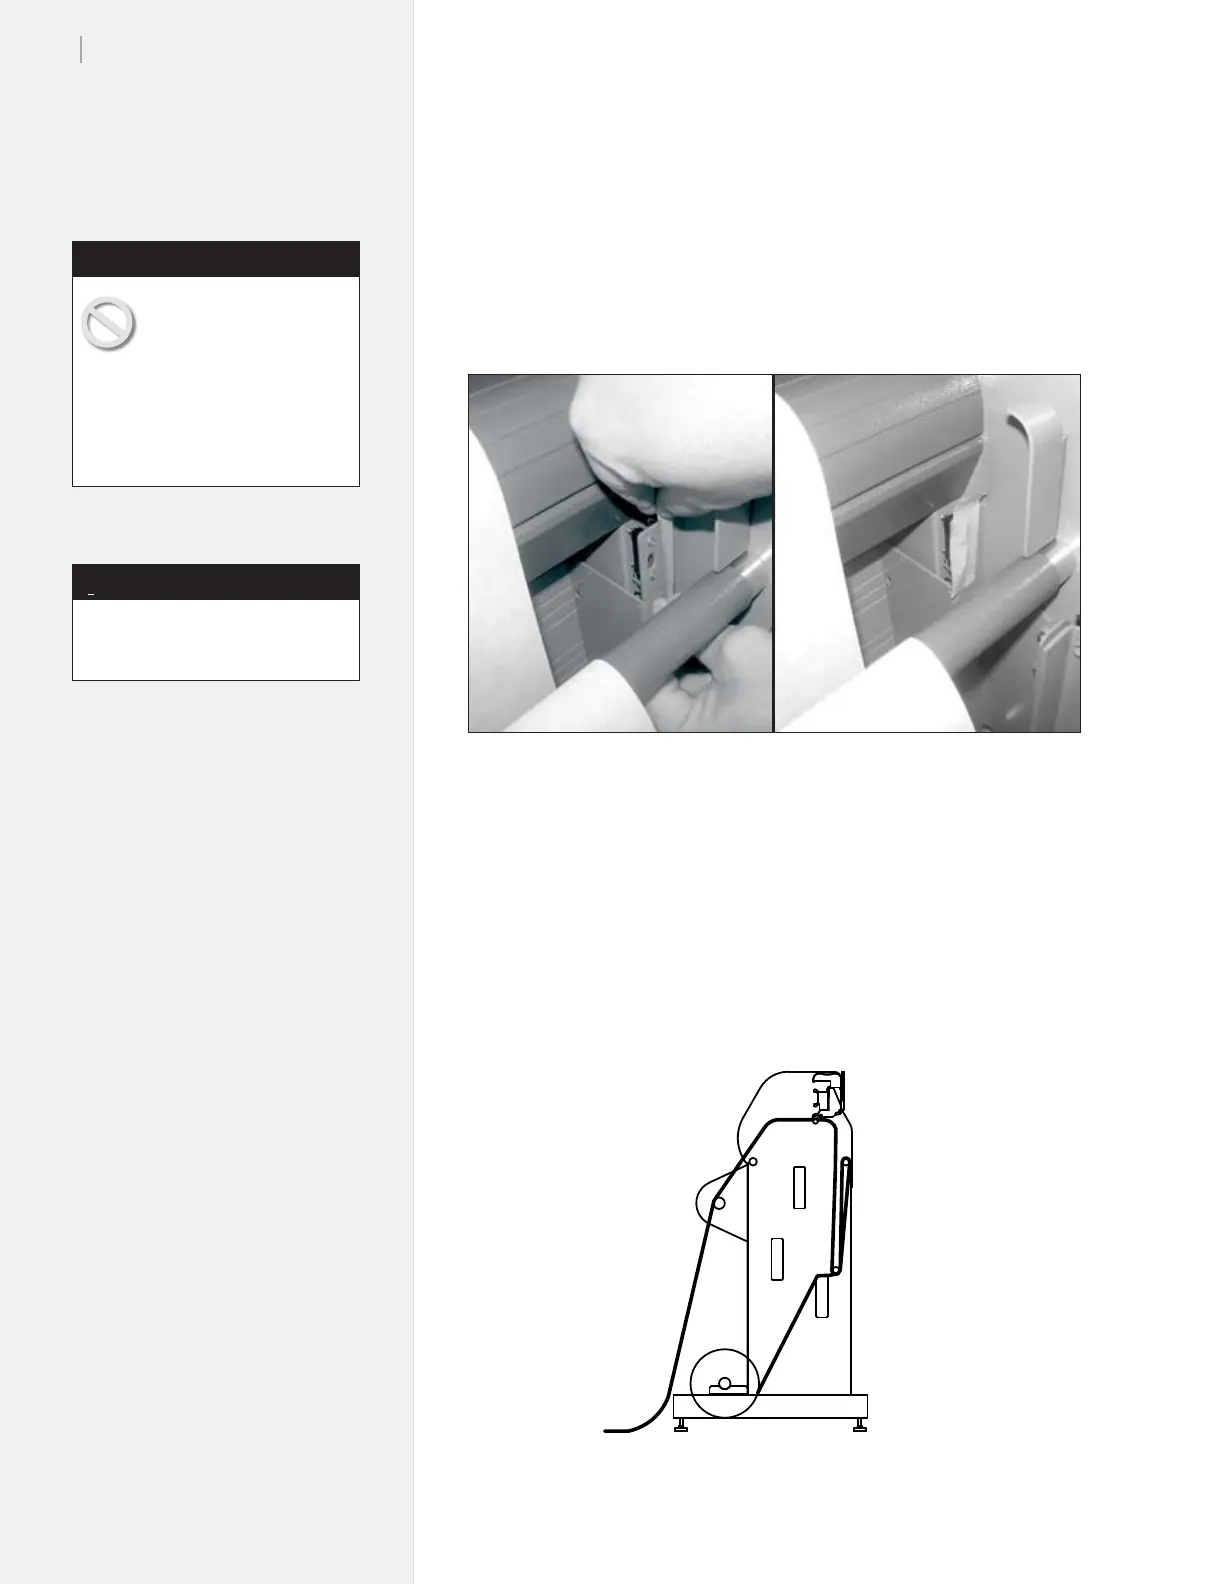
Figure 24. Before printing to the oor, place tape over the front take-up bar sensor.
1. With FlexJet power off, place a piece of tape over the front
take-up bar sensor as shown in Figure 24.
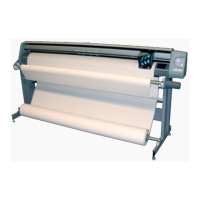
2. Use the paper path diagram to thread the paper on the front
of the machine. It should drape over the front top bar AND
the empty take-up shaft.
3. Set an origin normally and begin plotting. Make sure that the
paper piles smoothly onto the oor. If it bunches up, it may
catch on the moving carriage and tear.
Figure 25. Paper path for printing to the oor.
If the paper bubbles or
wrinkles while it ows
over the platen surface,
the carriage might catch the edge
of the paper and tear it, causing
a paper jam. Make sure that the
paper is smoothly collecting on
the oor to avoid paper jams.
Caution
The front dancer bar is not needed
when plotting to the oor.
Note
i