Initial Operation
45
5.7.2 Inserting tools for calibration
After having inserted the block and tool holders, you will be prompted to insert the ESD pins
“ESD pins B axis for One” and “ESD pin tool holder for One” one by one into the device.
The ESD pins will be manually inserted into the processing and changer arm in the milling
chamber.
The ESD pin “ESD pin spindle for One” is already inserted into the spindle upon delivery.
CAUTION! Milling dust, body grease or other residues on the ESD pins. Moisture in the
device.
Damage to the device due to collision of ESD pins in the milling chamber.
Damage to the device, tools or blocks due to faulty calibration.
Always wear gloves when handling ESD pins.
Wipe the ESD pins with a lint-free cloth before use.
Clean the milling chamber including the collection container completely and very
carefully with a dry, clean, soft cloth.
To avoid damaging sensitive components in the milling chamber, avoid strong pressure,
scrubbing, rubbing and wiping.
Do not clean with or enter the milling chamber using brushes, tools, sponges with metal
components, or any cleaning equipment other than that specified in this chapter.
For safety reasons, the Wizard asks you to additionally confirm the following steps in the app.
1. Remove the loading aid according to the instructions in the app.
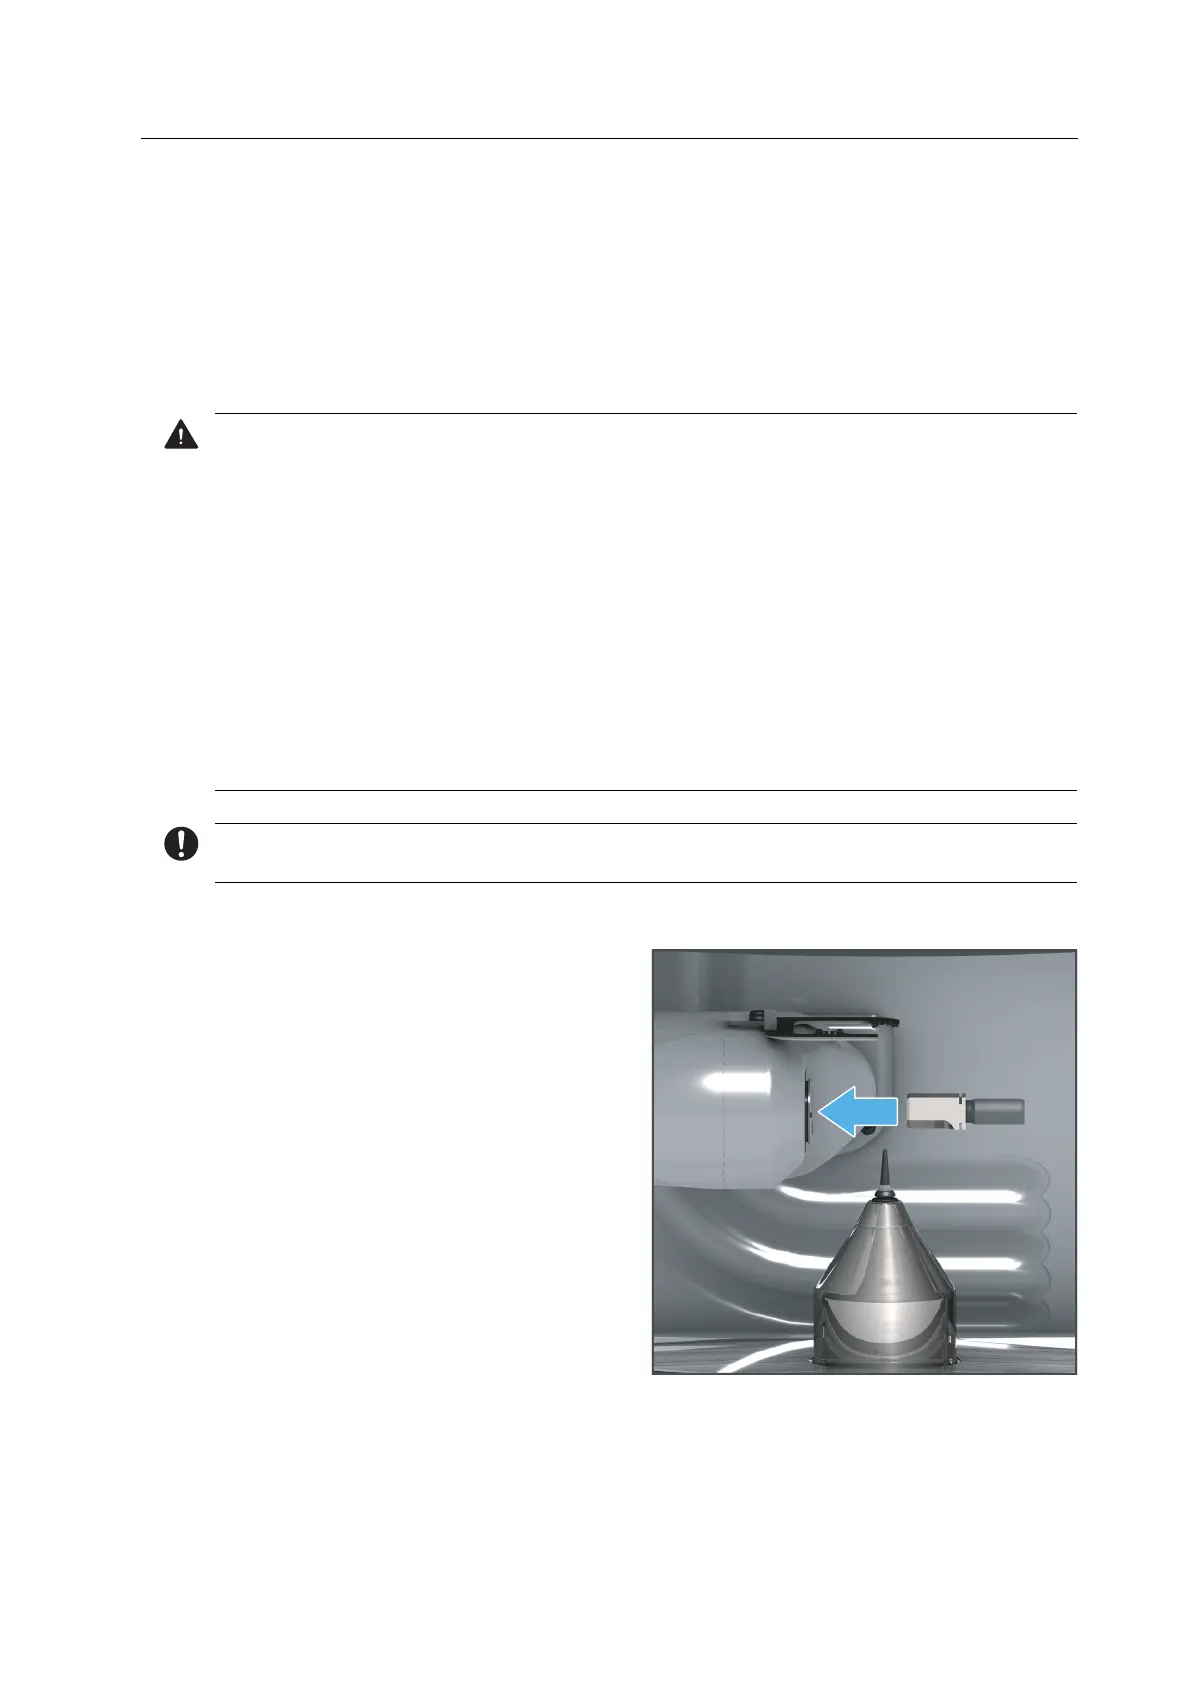
2. Insert the “ESD pin B axis for One” as
shown, with the shaft phases pointing
downwards into the processing and
changer arm.
3. Gently press the pin until it is firmly
inserted.
4. Insert the loading aid according to the instructions of the app.