13
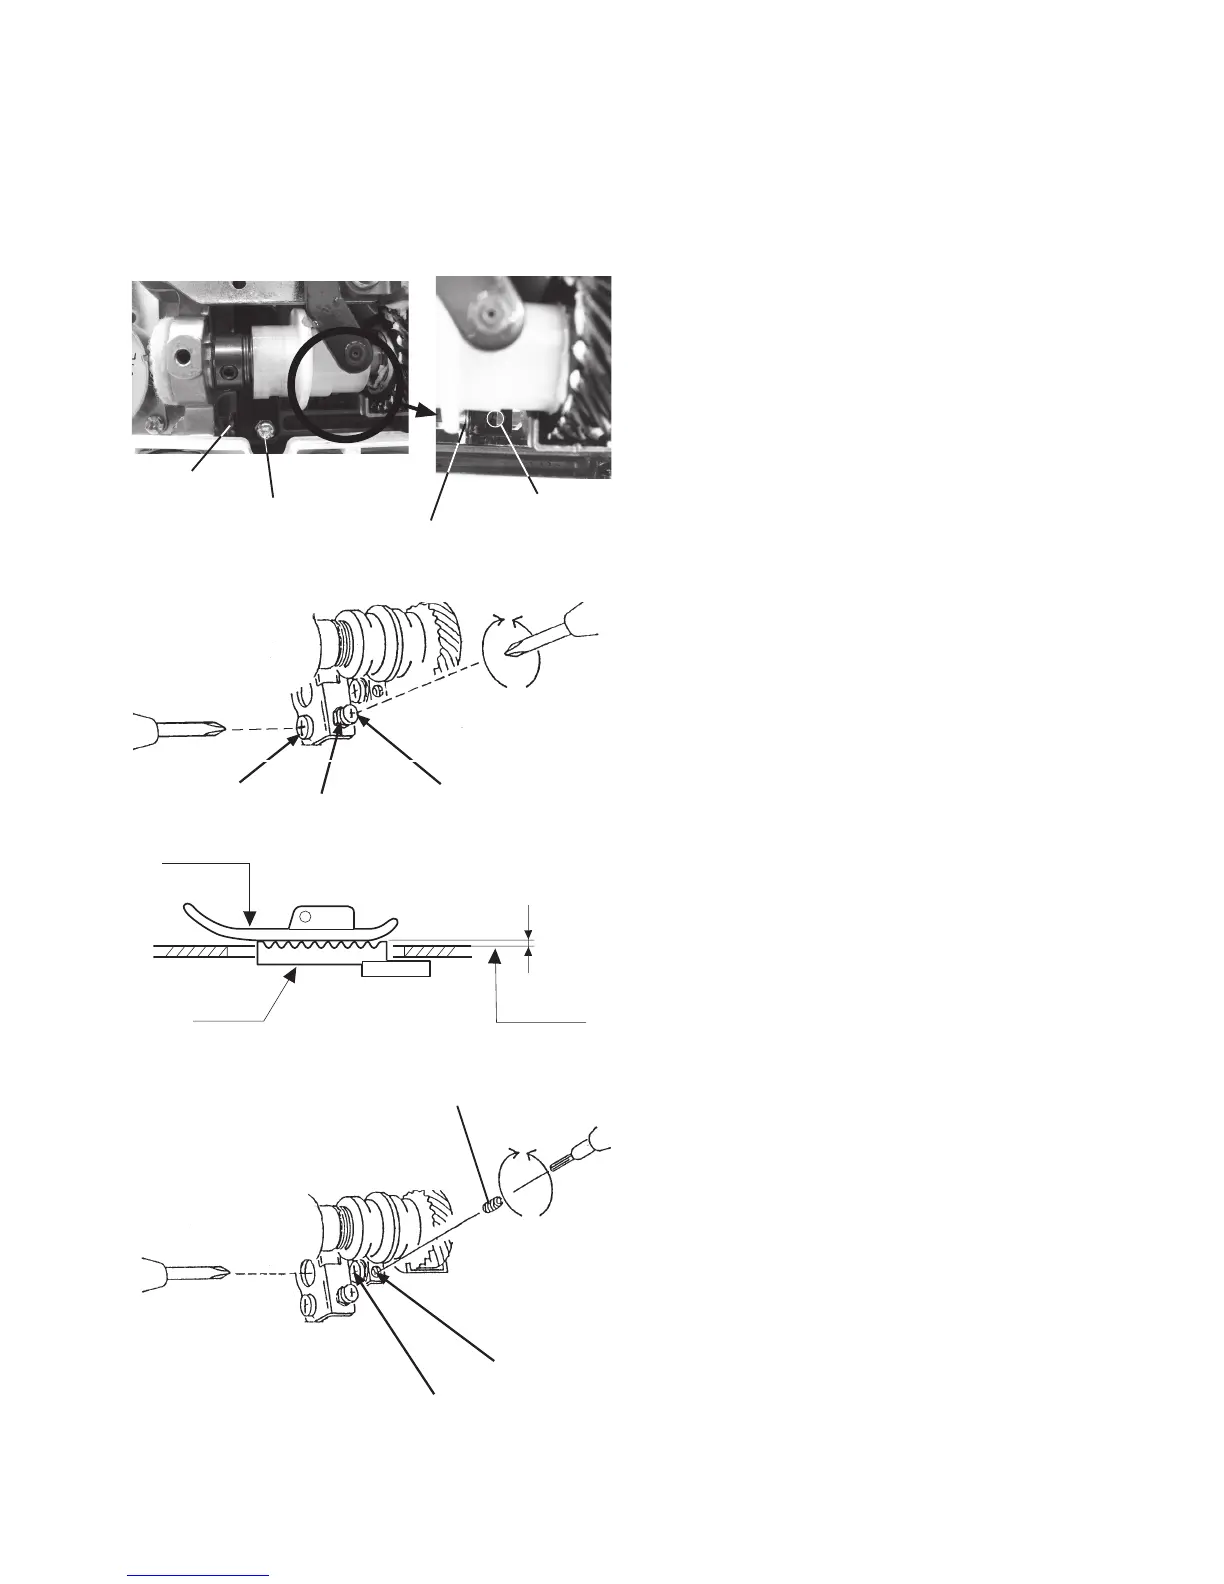
Nut
Setscrew A
Adjusting screw B
Presser foot
0.80 – 0.90 mm
Surface of
needle plate
Feed dog
Hexagonal socket screw I
Setscrew D
Threaded hole C
Adjusting screw B
Threaded hole C
Setscrew A
Setscrew D
Mechanical adjustment
Feed dog height
When the foot pressure is set at maximum (AUTO+4) and the presser foot A is lowered, the highest position of the feed
dog should be 0.80 to 0.90 mm from the surface of the needle plate.
1. Attach the zigzag foot A. Remove the bed cover and
base cover (see page 3).
2. Turn the power switch ON. Adjust the foot pressure to
the maximum (AUTO+4) in the ordinary sewing setting
mode. Adjust the stitch length to the maximum (5.0).
3. Press the presser foot lifter button to lower the presser
foot.
4. Turn the handwheel toward you to raise the feed
dog to its highest position.
5. Loosen the setscrew (A).
6. Loosen the nut with a socket wrench.
Turn the adjusting screw and adjust the feed dog hight
to 0.85 mm.
7. Tighten the nut and setscrew (A).
8. Turn the handwheel and check that the feed dog teeth
are pararell with the surface of the needle plate. If not,
follow the adjustment procedure below.
If the feed dog is not parallel to the surface of the needle
plate at its highest position, make the adjustment as
follows:
* For this adjustment, a hexagonal socket screw 4x6, part
No. 000111108 is required.
1. Insert a hexagonal socket screw part No. 000111108
into the threaded hole (C) until it stops (use an Allen
wrench of 2 mm width across ats).
2. Turn the setscrew D (left hand screw) clockwise to
loosen it.
3. Turn the hexagonal socket screw until the feed dog is
parallel with the surface of the needle plate.
4. Tighten the setscrew D by turning it counterclockwise.
5. Remove the hexagonal socket screw.
6. Attach the bed cover and base cover.
After nishing adjustment, return the foot pressure to
AUTO.

 Loading...