Operating and Maintenance Instructions – 20
Setting Operating Mode and Using the Attenuator
The attenuator functions in Attenuation (ATT) mode or in output Power (PWR) mode.
In ATT mode, the attenuator displays attenuation in dB. Normally, the attenuation displayed on
the front panel is relative to the 0 dB reference position of the attenuating optical filter inside
the attenuator. However, the display-offset feature of the attenuator can be used to account
for insertion and connection losses and the adjusted attenuation value displayed.
In PWR mode, the attenuator displays the optical output power in dBm. The attenuator has no
power measurement capability; but using the calibration methods described in Setting the
Calibration Wavelength and Setting the User Slope sections, the user can match the power
level displayed by the attenuator to an external power meter.
To power up the unit:
1. Connect the attenuator to the AC power source, using the AC power cord provided.
2. Set the power switch to
I
(on), and observe the power-up sequence. The attenuator always
powers on in ATT mode. All key lamps and status LEDs light. The version number of the
software is displayed briefly. The calibration wavelength in nm (XXXX), and the attenuation
(YY.YY dB) are displayed, for example, XXXX YY.YY dB.
The command set (YYY), the message terminating sequence <CR> <LF>, or <CR> or
<LF> (TR), and the GPIB address (AD; a number between 1 and 30) are also displayed.
An example is YYY (TR) AD. The status of the beam block (BLK) and the attenuation in
dB (XX.XX) are displayed, for example, BLK (XX.XX). If a malfunction is detected, an error
message is displayed.
If an offset setting was entered and used before the last power-down, the OFFS status
LED is lit, and the attenuation displayed is the offset value. If the offset value is 0, the
attenuation displayed is 0.00 dB.
To set the operating mode to ATT or PWR mode:
1. Press the ATT/PWR key to toggle between Attenuation and Power modes. When switching
back from OFFS or λ (wavelength) mode, the last operating mode used (ATT or PWR) is
activated when ATT/PWR is pressed. The attenuator displays results in dB when in ATT
mode and in dBm when in PWR mode.
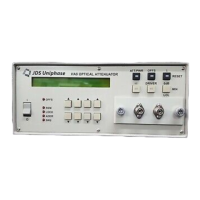
To use the attenuator:
1. Connect the device under test to the unit (Figure 9).
Artisan Technology Group - Quality Instrumentation ... Guaranteed | (888) 88-SOURCE | www.artisantg.com
 Loading...