Operating and Maintenance Instructions – 21
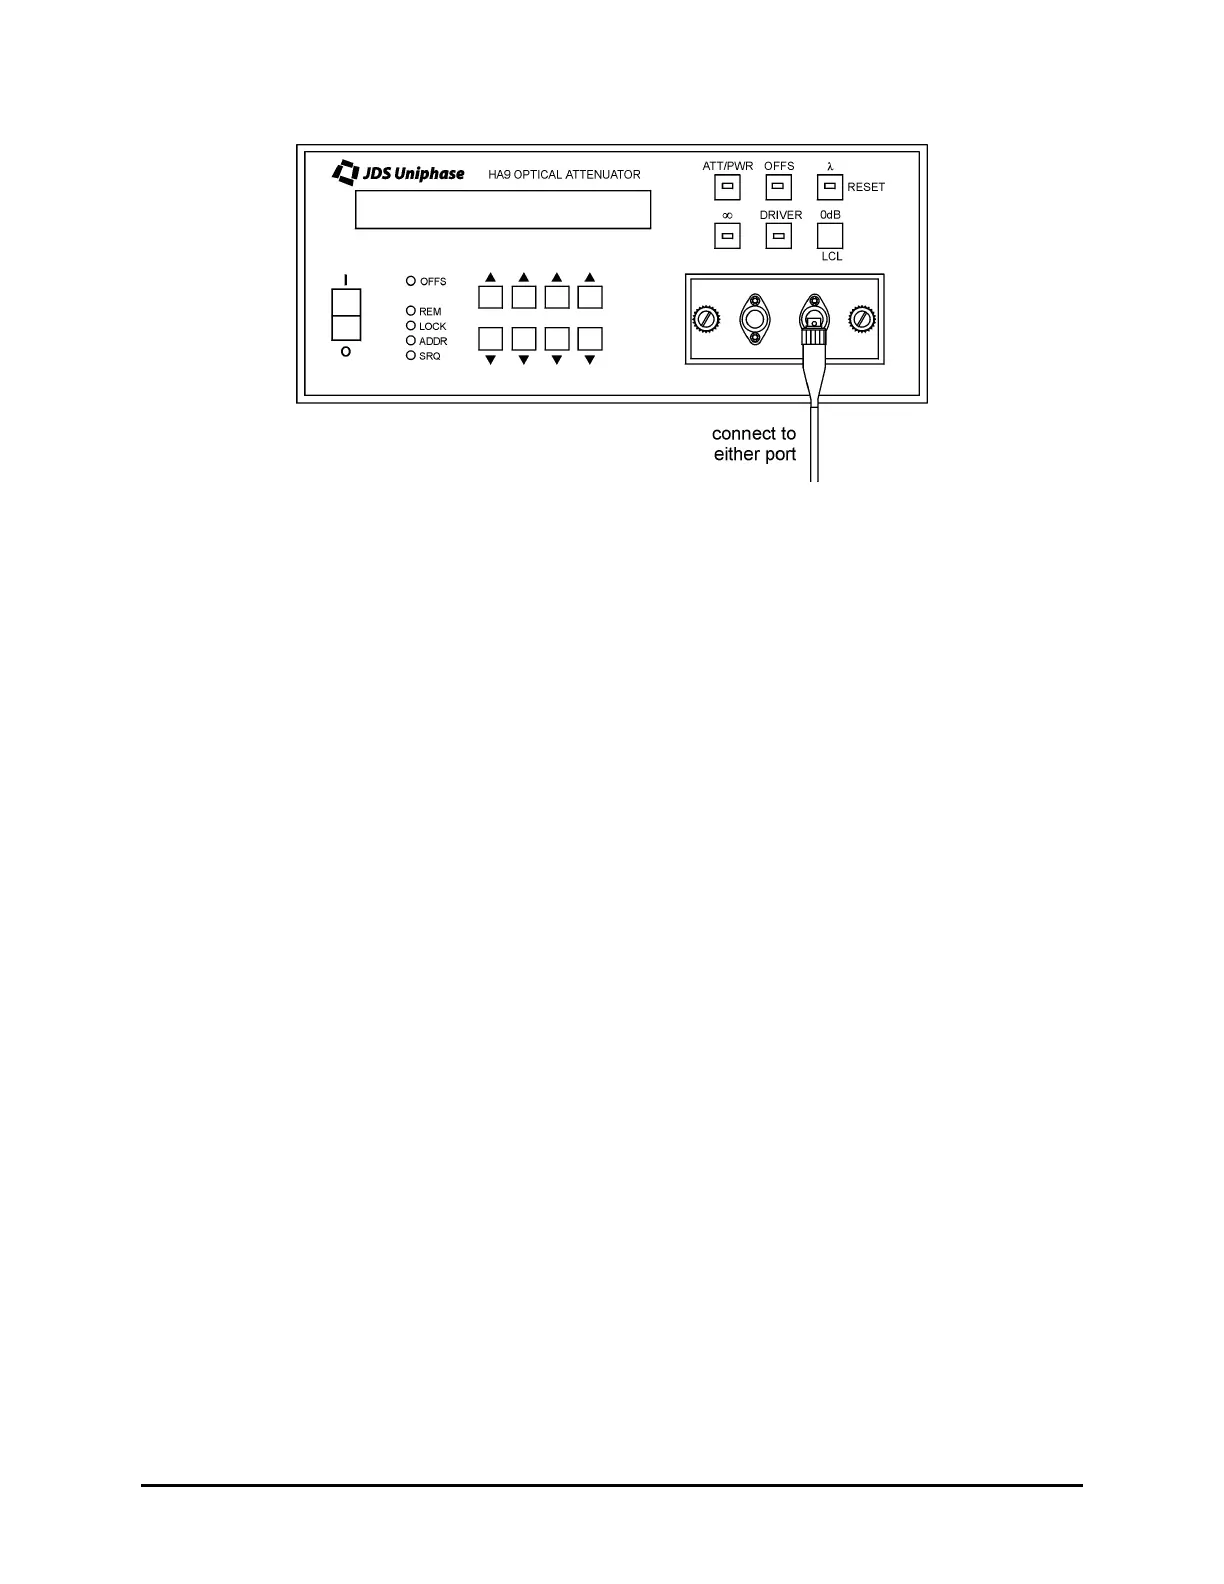
Figure 9: Using the Attenuator
Turning the Beam Block On or Off
The beam block function uses a transistor to drive a 5 V relay which, when activated, moves a
blocking element in front of the light beam. The relay actuator is attached to the beam-blocking
element, which provides an infinite attenuation by blocking the optical path.
The built-in beam block is automatically activated when the attenuator is powered off, as a
safety feature. It must be deactivated after power-up so that light can pass through the
attenuator. To turn the beam block on or off when the attenuator is powered on:
1. To turn the beam block off, press the ∞ key. The beam block is deactivated when the
indicator light on the ∞ key is on (the beam block moves out of the beam, thereby turning
on the optical power from the attenuator).
2. To turn the beam block on, press the ∞ key. The beam block is activated when the
indicator light on the ∞ key is off (the beam block remains in the beam, thereby turning off
the optical power from the attenuator).
Setting the Calibration Wavelength
Set the calibration wavelength before setting the display offset and the attenuation. For
accurate output from the attenuator, set the wavelength on the attenuator to match the source
wavelength.
To calibrate the attenuator for a specific source wavelength:
1. Press the λ key. The key lamp lights. The attenuation or power setting (YY.YY) and the
calibration wavelength (XXXX nm) are displayed, for example, YY.YY / XXXX nm.
2. Press the ▲ or ▼ key to adjust the calibration wavelength to the required resolution of 1
nm. A change in the calibration wavelength automatically changes the attenuation or power
setting displayed by the attenuator.
Artisan Technology Group - Quality Instrumentation ... Guaranteed | (888) 88-SOURCE | www.artisantg.com
 Loading...