Page 26
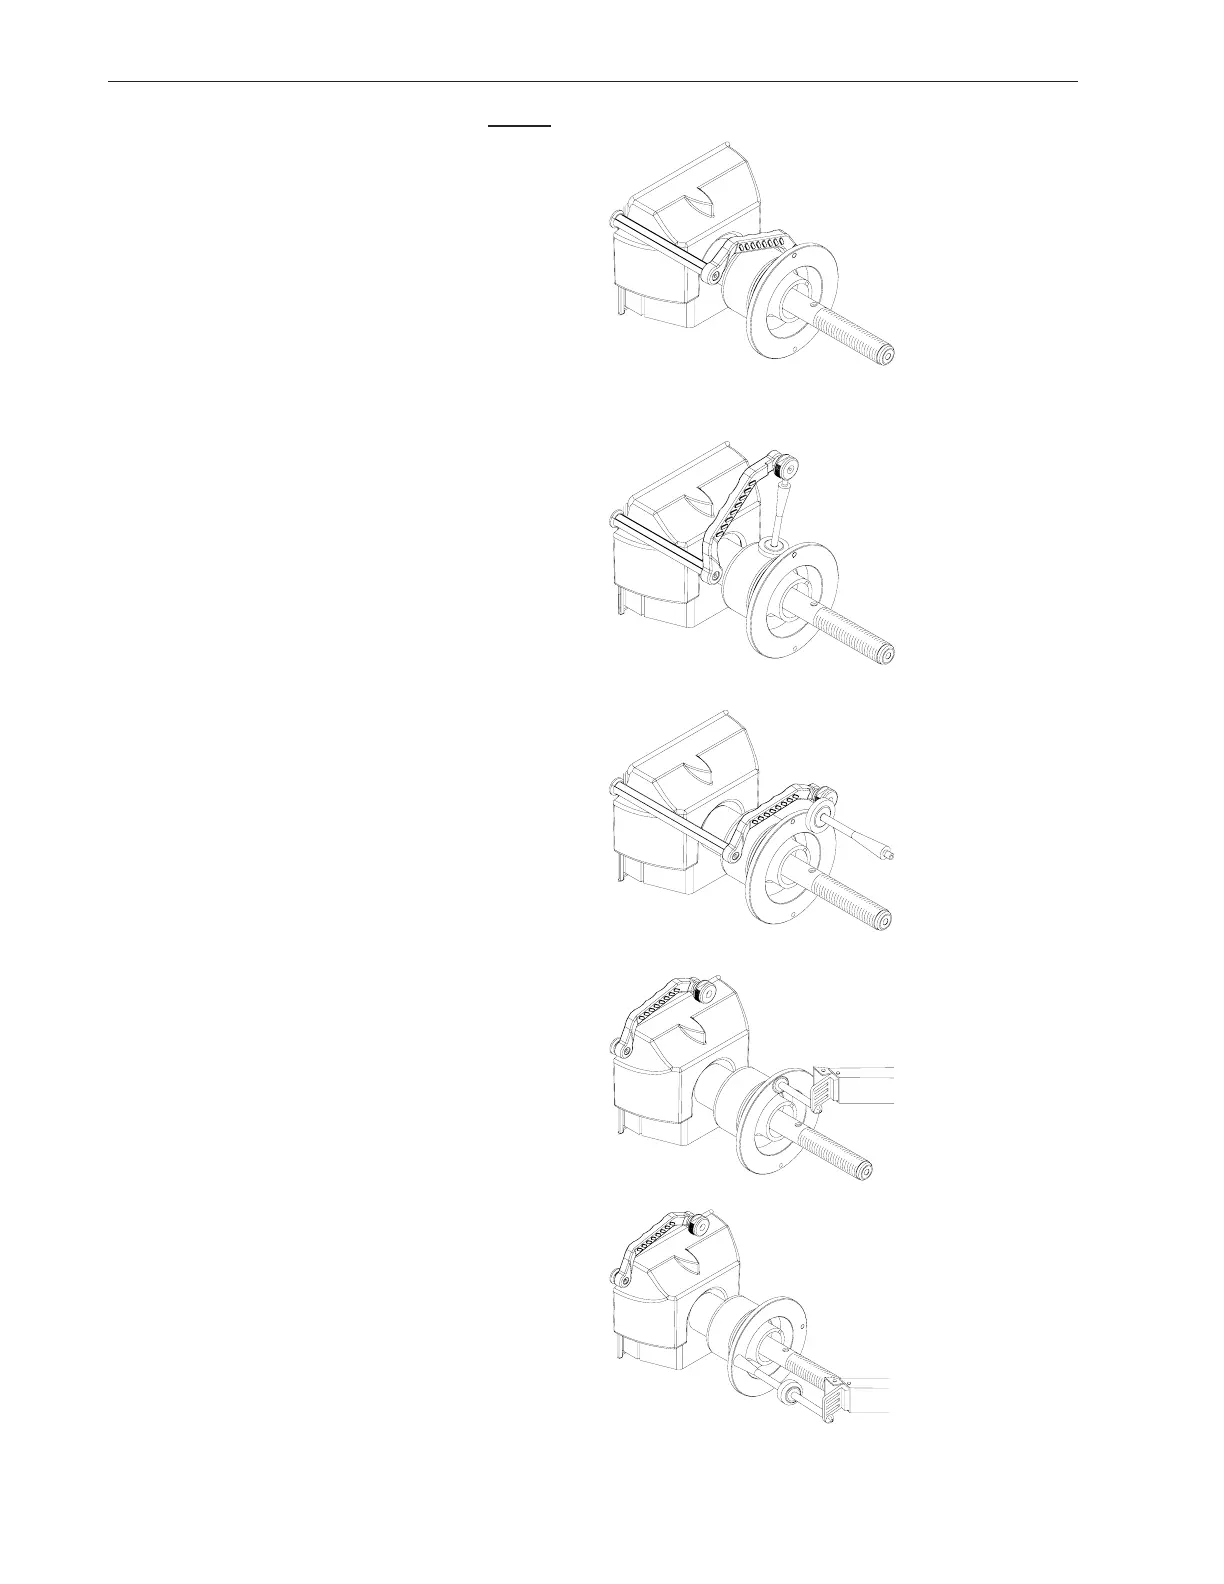
4. Gently pull the SAPE arm OUT until it is FULLY
extended, (Figure 45) hold it steady for about 1
second, a tone will sound.
5. Display will read “BAC” “H” “POS” followed by a
beep. Return the arm to the home position. Fig. 44.
6. Display changes to “dIA” “ -18” “POS”.
7. Gently pull the SAPE out and rest the arm of the
SAPE gauge on the inner part of the bell housing
as shown in (Figure 46). A tone will sound and the
display will change to “BAC” “H” “POS”.
8. Return the arm to the home position, Figure 44.
The display will change to “dIA” “42.1” “POS”.
9. Locate the Calibration Weight. Place the calibra-
tion weight with the large end oriented on the bell
collar as shown in Figure 47. Extend the SAPE
arm outward and rotate the extension to just touch
the end of the calibration weight as shown in Figure
47. A tone will sound and the display will change to
“BAC” “H” “POS”. Return the SAPE arm to the
home position.
10. The display will change to “SAP” “E-1” “FIN” for
one second then changes to “DIS” “tO” “FLA”.
11. Pull the distance gage to the outside flange of the
backing collar, use the flat head of the calibration
weight as an index. After a short beep, the machine
displays “bAC H POS”. See Figure 47a.
12. Touch the tip of the width gauge to the backing
collar and hold it for one second or press the “F”
button (Figure 48). The display will change to “bAC
“H’ ‘POS” followed by a tone. Return the SAPE
arm to the home position.
13. Display will then change to “tO” “CAL” “SLG”.
Screw the calibration weight onto the outside of the
flange. Touch the tip of the width gauge to the tip of
the calibration slug and hold it for one second or
press the “F” button (Figure 49). The display will
change to “SAP” “E-2” “FIN” for one second
followed by a tone indicating a successful calibra-
tion. Unit will then go into an idle state.
FULL SAPE CALIBRATION COMPLETE
Figure 46
Figure 47
Figure 48
Figure 49
Figure 47a