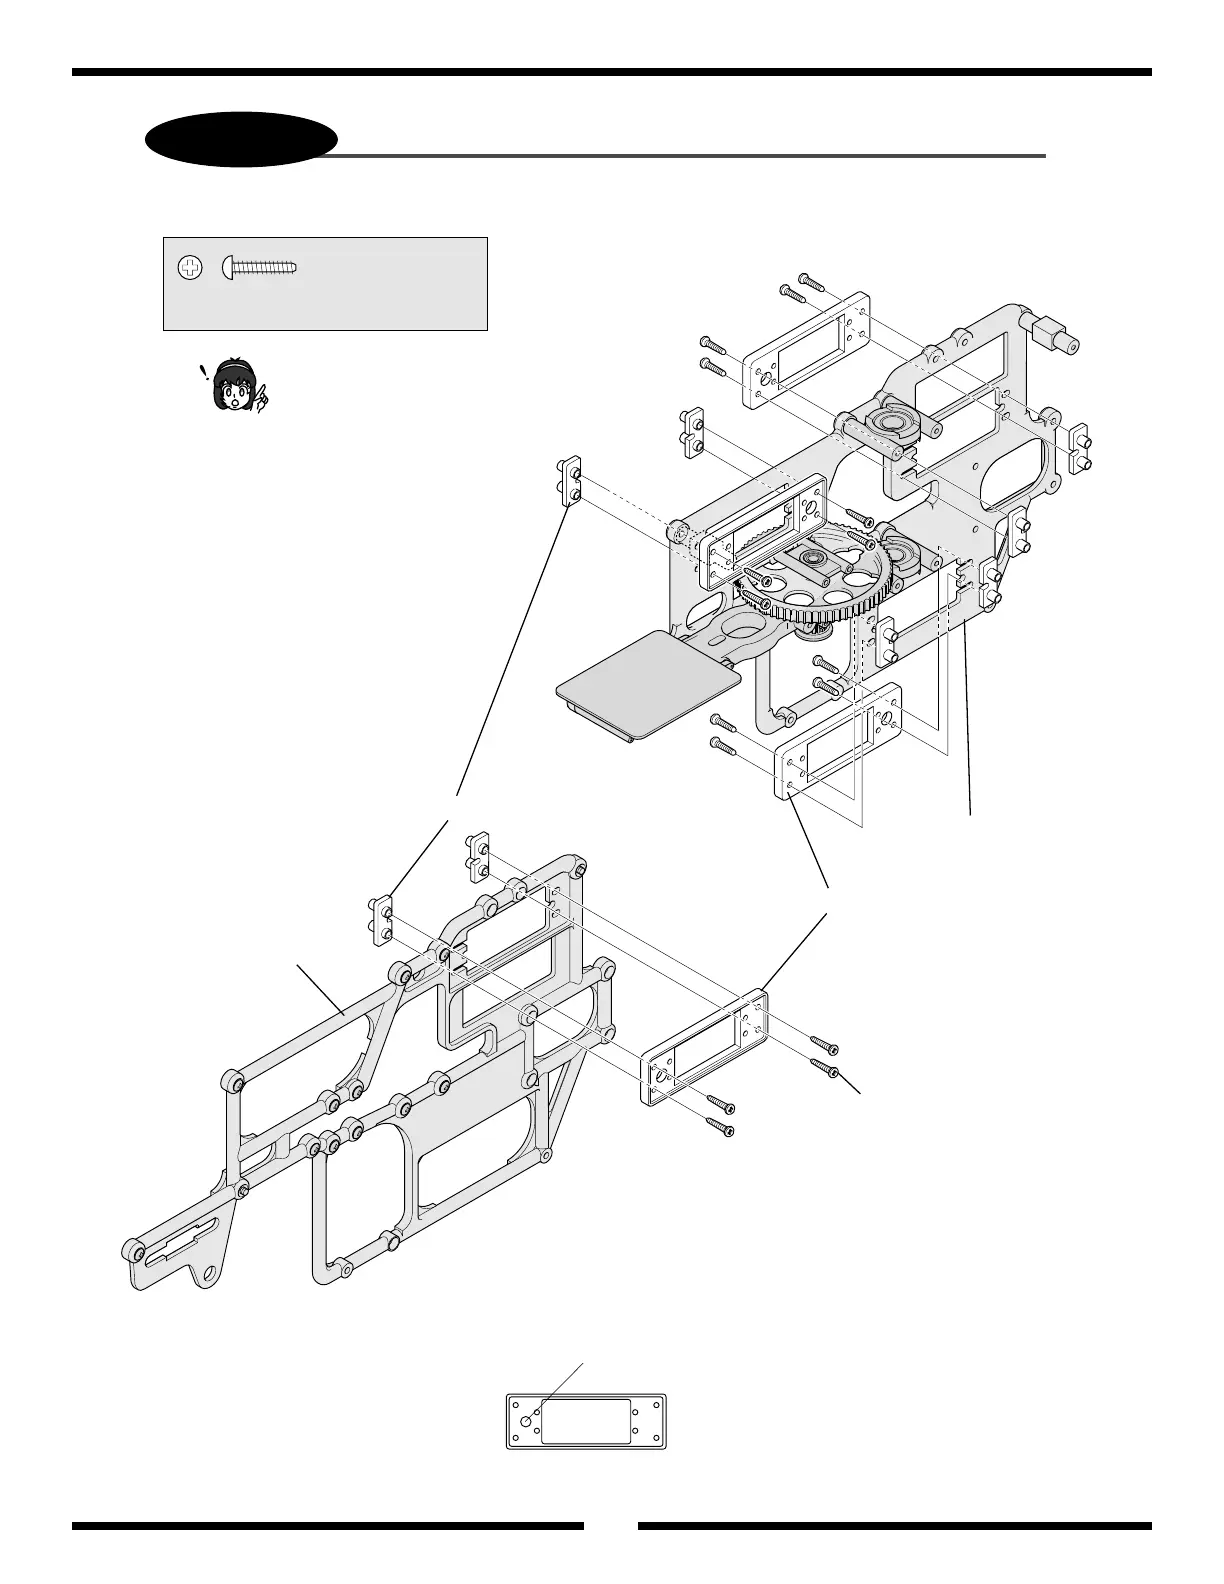
Servo Mounting Plate B
Main Frame (Right)
Mini Servo Mounting Plates (4)
2.6 x 12 mm Self Tapping Screw (16)
Main Frame (Left)
................................. 16 pcs
2.6 x 12 mm Self Tapping Screw
9
Mini Servo Mounting Plate Installation
When installing mini servos,it is necessary to
install the mini servo adapters prior to com-
pleting the frame assembly. In this assembly,
use the parts (including screws) in the bag
from Step 5. When using the mini servo
mounts, the Servo Mounting Plate B is not
necessary in Step 4-A or 4-B.
Install the servo adapter so that the flat side faces toward the frame. Be sure to
note the correct orientation using the 4 mm hole as a guide when installing.
Be sure to install the Servo
Mounting Plate “B” so that the
shorter portion of the servo
mounting screw flange is
toward the frame.
If you are using standard size servo, please proceed to Step 1-3.