-
31
-
Pattern register from P26 to P50 can be
performed. Register can not be performed
in to key. Designate the pat-
tern by the pattern selection only. Indicate
the pattern with key.
Pattern selection from P26 to P50 cannot
be performed while the SET READY LED
lights up.
Press P1 to P25 key while the SET READY
LED lights up and the presser comes
down. Be careful that your ngers are not
caught in the presser.
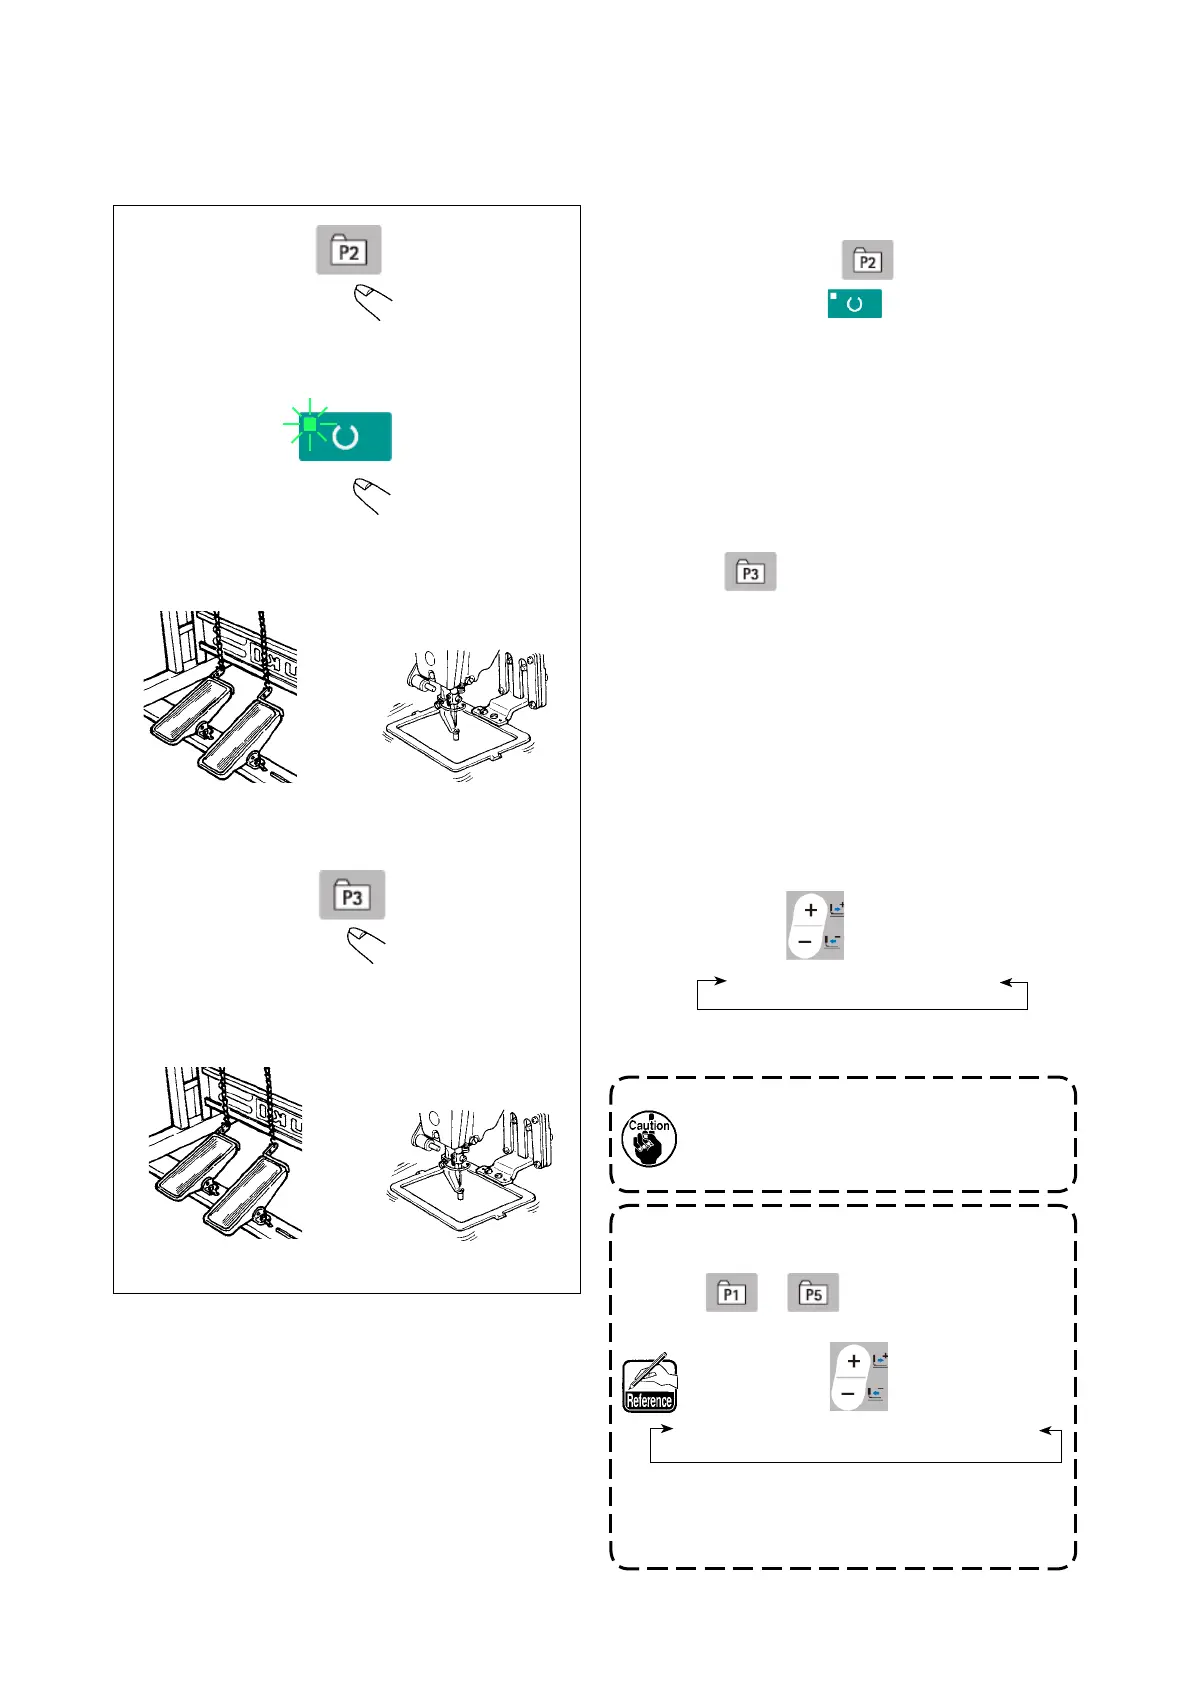
(3) Sewing operation
Operation example : After performing sewing with the contents of the registered P2, perform sewing
with the contents of P3.
⇔
⇔
⇩
⇩
⇩
⇩
0 to 200 ←→ P1 to P25 ←→ P26 to P50
1) Turn ON the power switch.
2) Press direct pattern .
3) Press READY key to light up SET
READY LED . Once the LED lights up, the
work clamp goes up after traveling.
4) Check the contour of the sewing pattern.
(Refer to the item
"5-5. Checking the con-
tour of a sewing pattern" p.23
.)
5) If the contour of the sewing pattern is accept-
able, the sewing can be made.
6) After the completion of sewing, press direct
pattern . Then, the work clamp comes
down, retrieves the origin, travels to the
sewing starting point and goes up. Then, the
origin is retrieved. After the origin retrieval,
the work clamp travels to the sewing starting
point and goes up.(The P keys can operate
the pattern change by one-touch even when
the SET READY LED is lighting up.)
7) Perform the above items 4) and 5).
* P1 to P25 can be specied by selecting the
pattern. Display the target pattern using DATA
CHANGE key .
P1 to P25 which have not been registered are
not indicated.
0 to 200 ←→ P1 to P25
➡
➡