• 2 wall-mounng brackets (provided in the wall-mounng kit)
• 12 wall-mounng bracket screws (provided in the wall-mounng kit)
• 6 mounng screws (8-32 x 1.25 in. or M4 x 30 mm) (not provided)
• Hollow wall anchors rated to support up to 75 lb (34 kg) if you are not screwing the screws directly
into wall studs (not provided)
• Phillips (+) screwdriver, number 2
You can mount an EX4100 and EX4100-F switch on a wall by using the separately orderable wall-
mounng kit.
To mount one or two switches on a wall:
1. Remove the switch from the shipping carton (see "Unpack the EX4100 and EX4100-F Switch" on
page 119).
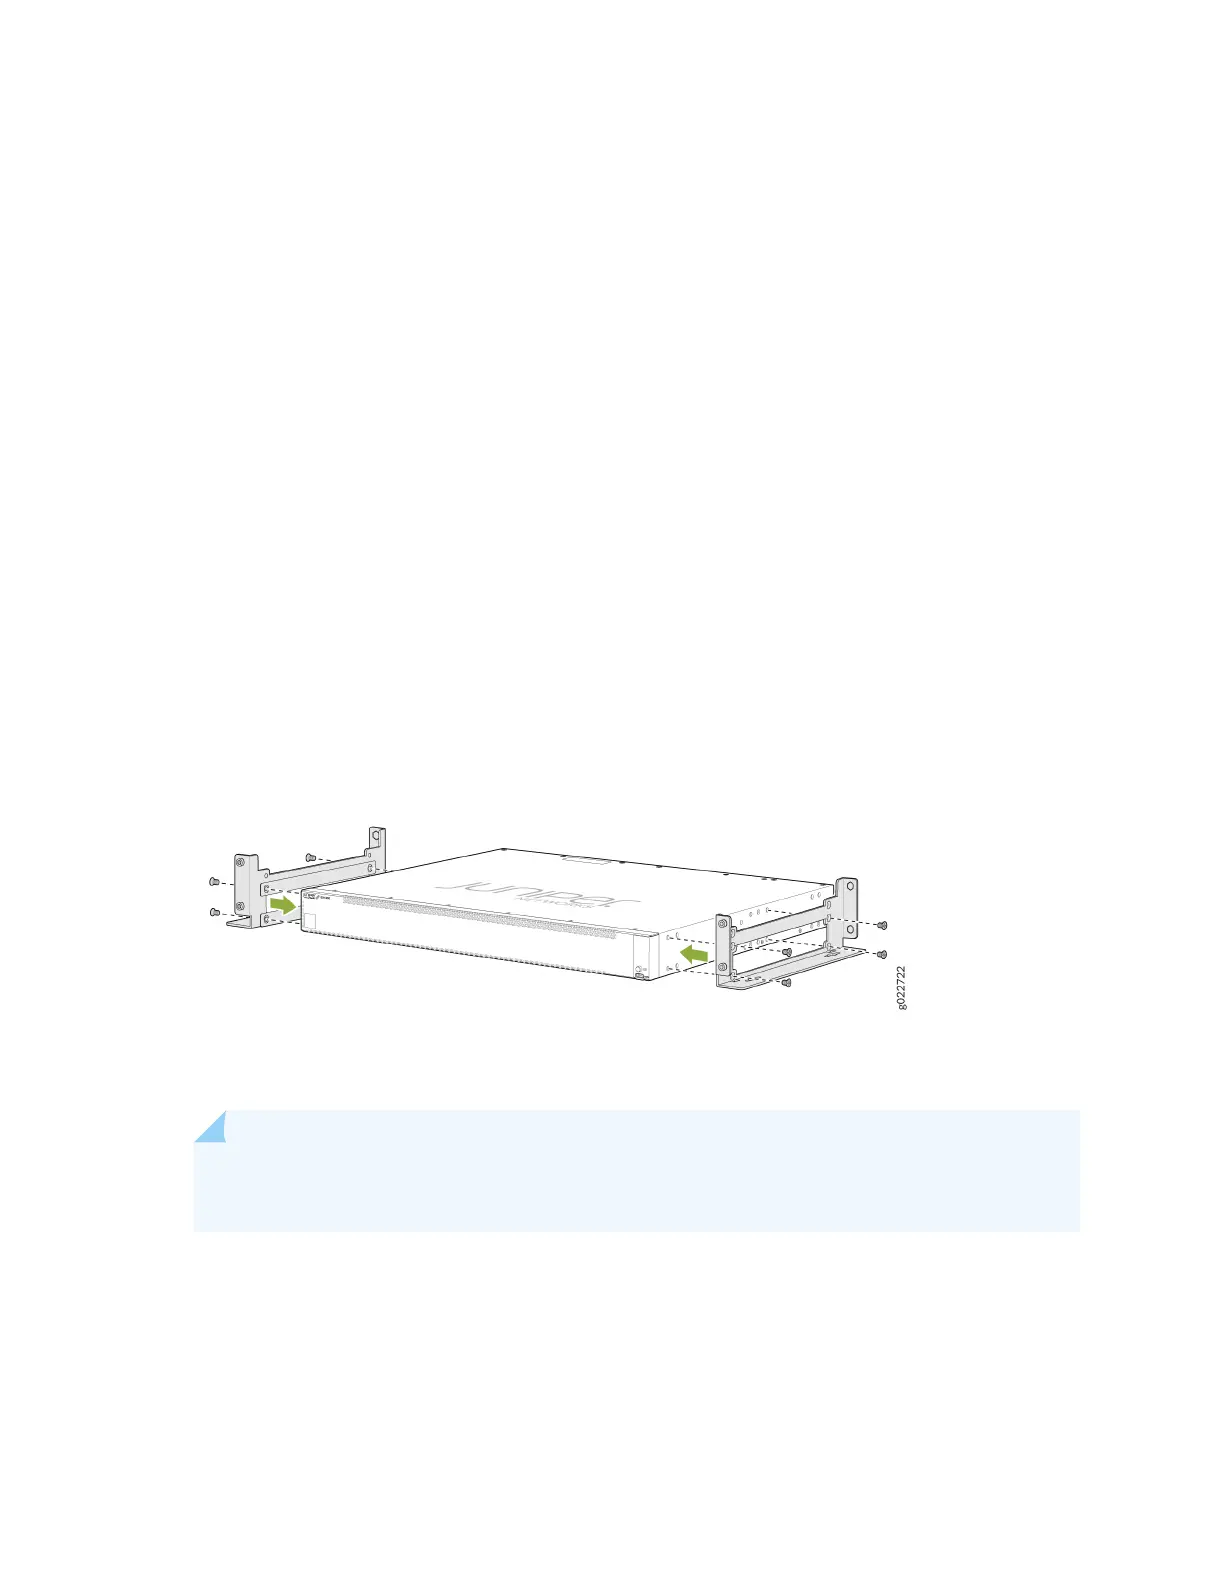
2. Aach the wall-mounng brackets to the sides of the chassis using four wall-mounng bracket
screws on each side, as shown in Figure 81 on page 134.
Figure 81: Aaching Wall-Mounng Brackets to a Switch Chassis
3. Install six mounng screws in the wall for the wall-mounng brackets at the locaon shown in Figure
82 on page 135:
NOTE: Tighten the screws only partway in, leaving about 1/4 in. (6 mm) distance between the
head of the screw and the wall.
a. Drill a hole (A) and install a mounng screw.
b. Drill a hole (B) at a distance of 5.98 in. (15.2 cm) from screw A on a level line to the right and
install a mounng screw.
134