Installing a 3G USB Modem on the Rear Side of the SRX110 Services Gateway
To install the 3G USB modem on the rear side of the SRX110 Services Gateway:
1. Before you begin, ensure that the device is powered off.
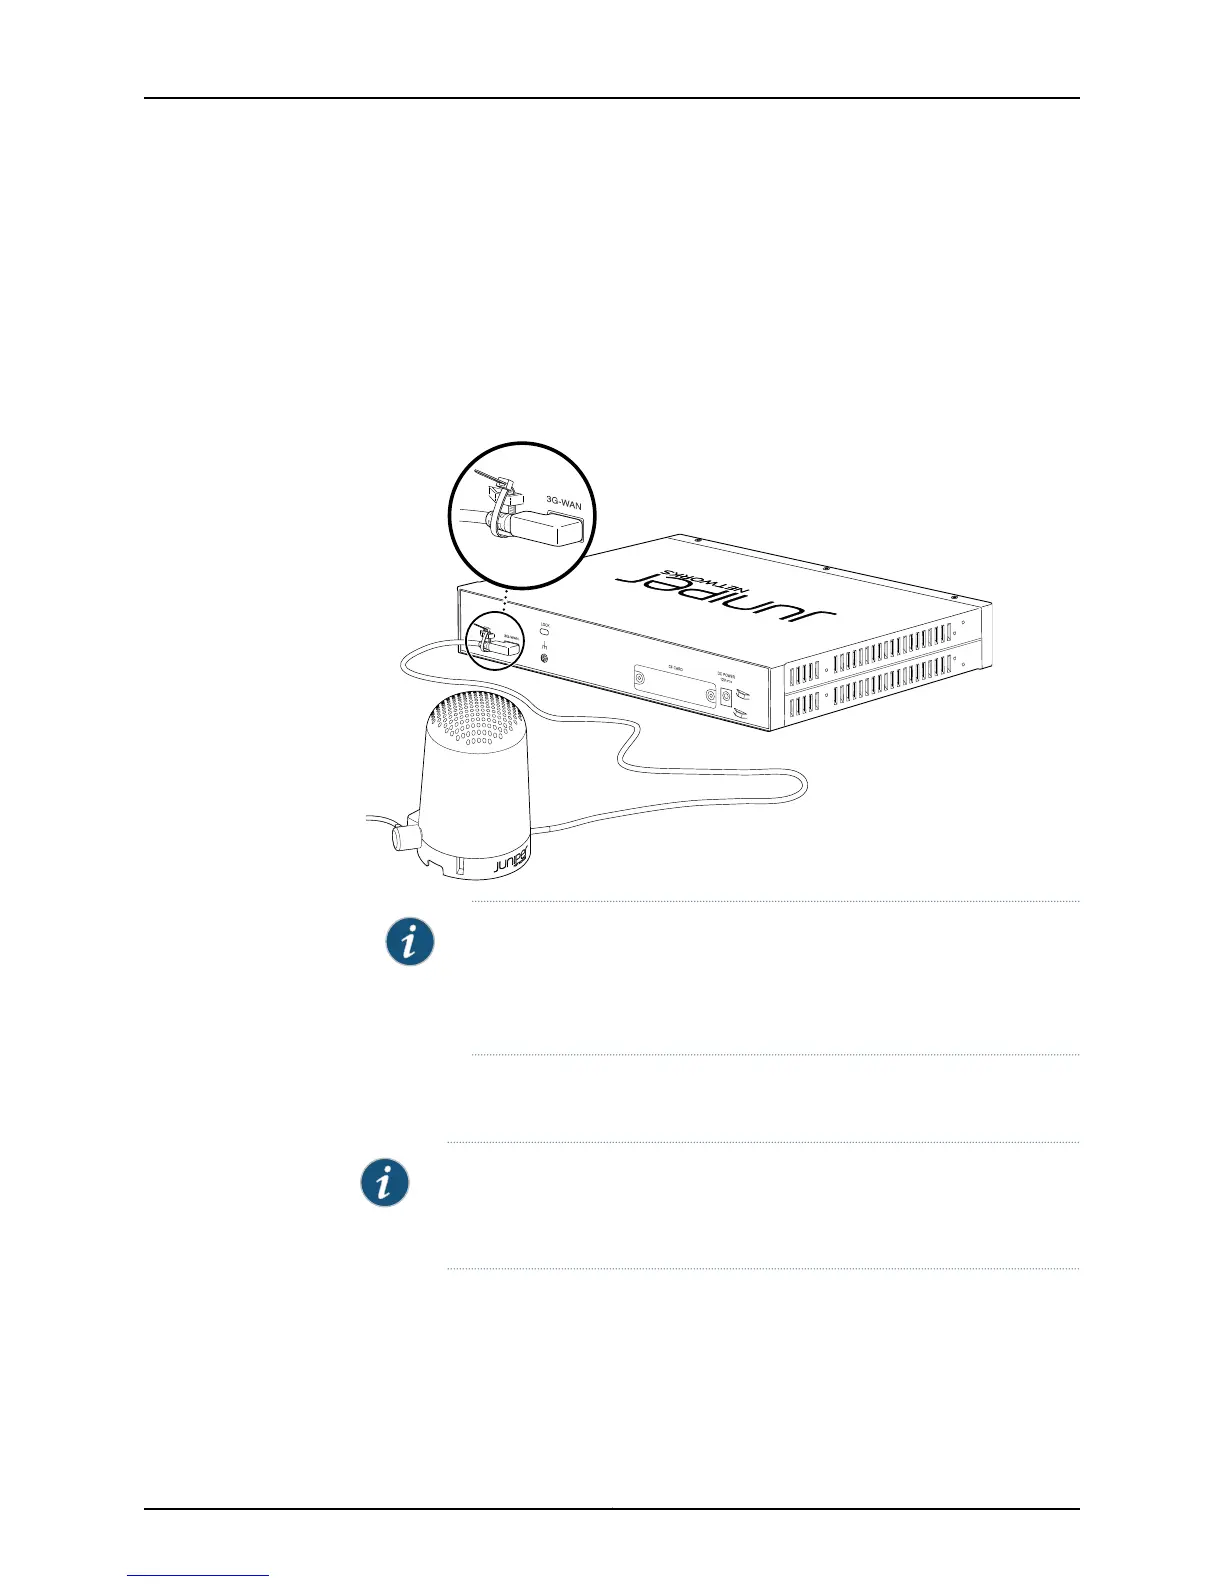
2. On the rear side of the device, insert the USB modem extension cable into the 3G-WAN
USB port until the cable is engaged (see Figure 11 on page 26).
Figure11: Connecting the 3G USB modem to the SRX110 Services Gateway
NOTE:
•
The 3G USB modem is not hot-swappable.
•
Ensure that the base of the 3G USB extension of the cable mount is 18
inches away from the device.
3. Power on the device. The 3G LED on the front panel of the device indicates the status
of the 3G USB modem interface.
NOTE: You can wall-mount the modem using keyholes as shown in
Figure 12 on page 27 or ceiling mount the USB protection cover using screw
holes as shown in Figure 13 on page 27.
Copyright © 2013, Juniper Networks, Inc.26
SRX110 Services Gateway Hardware Guide