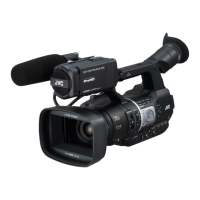
Basic Shooting
Procedures
Preparations
.
1
Supply battery or AC adapter power to the
camera recorder.
(A P
24 [Power Supply] )
2
Insert an SD card.
(
A P35 [SD Card] )
3
Turn on the power of the camera recorder.
Hold down the lock button (blue) at the center of
the [POWER ON/OFF] switch to set to “ON”. The
camera recorder starts up in Camera mode and
is ready for recording.
4
Adjust the angle of the LCD monitor and
viewfinder.
(A P32 [Adjusting the LCD Monitor and
Viewfinder] )
Shooting
1
Configure the video and audio input
settings.
0
Set
the
[FULL AUTO ON/OFF] switch to “ON”
to enter Full Auto mode. This mode adjusts
the Iris, Gain, Shutter and White Balance
automatically.
0
The audio
recording level is also set to Auto,
and audio from the built-in microphone is
recorded in the Full Auto mode.
0
The a icon appears at the lower center area
of the LCD in the Full Auto mode.
.
AE+6
12 :34 :56
Jan 12, 2016
00: 00: 00.00
4030 20 10 0
P13000K
Memo :
0
To set each individual video setting item
automatically or manually, and to carry out the
audio input settings and the audio recording
level adjustment, refer to the following.
0
[Adjusting the Brightness] (A P 50)
0
[Adjusting the Iris] (
A P 50)
0
[Setting the Gain] (A P 51)
0
[Setting the Electronic Shutter] (A P 52)
0
[Adjusting the White Balance] (A P 53)
0
[Adjusting Audio Recording Level]
(A P 58)
2
Press the [REC]
button to start recording to
the SD card.
This camera recorder has three [REC]
buttons.
Any of the [REC] buttons can be used to start/
stop recording by default.
The tally lamp lights up in red during recording.
0
Zoom Operation
(A P
43 [Zoom Operation] )
0
Adjusting the Focus
(
A P45 [Focus Operation] )
Memo :
0
If both
the slots are loaded with recordable cards
in the factory default, pressing the [REC] button
starts recording only to the media in the selected
slot.
When [Main Menu] B [System] B [Record Set]
B [Slot Mode] is set to “Dual”, recording can be
performed simultaneously to the cards in both
the slots.
(A P68
[Dual Rec] )
0
The tally lamp can be turned off in [System]
B
[Tally Lamp].
(A P104
[ Tally Lamp ] )
3
Check the most recently captured images.
0
Press
the
[C.REVIEW/7] button on the lens to
activate the Clip Review function. The most
recently captured images are played back on
the LCD monitor and viewfinder screen.
0
After playback, the camera recorder returns
to standby mode (STBY).
(A P66 [Viewing Recorded Videos
Immediately (Clip Review)] )
Memo :
0
[Clip Review] is assigned to
[C.REVIEW/7]
button in factory default.
0
[Clip Review
] can also be assigned to other user
buttons.
(A P34 [Assignment of Functions to User
Buttons] )
Basic Shooting Procedures
41
Shooting