5
Select “ENTER
”, and press the [OK] button
0
The modified shooting date/time is saved.
Memo :
0
Alternatively, you can press the
[RETURN] button to cancel
the shooting date/time modification and return to the initial
screen.
0
The
shooting date/time modification will not be reflected on a
title that was dubbed.
0
Pressing the [OPTION] button in the playback navigation
screen instead of the [INFORMATION CORRECT] button will
also display the shooting date/time edit screen.
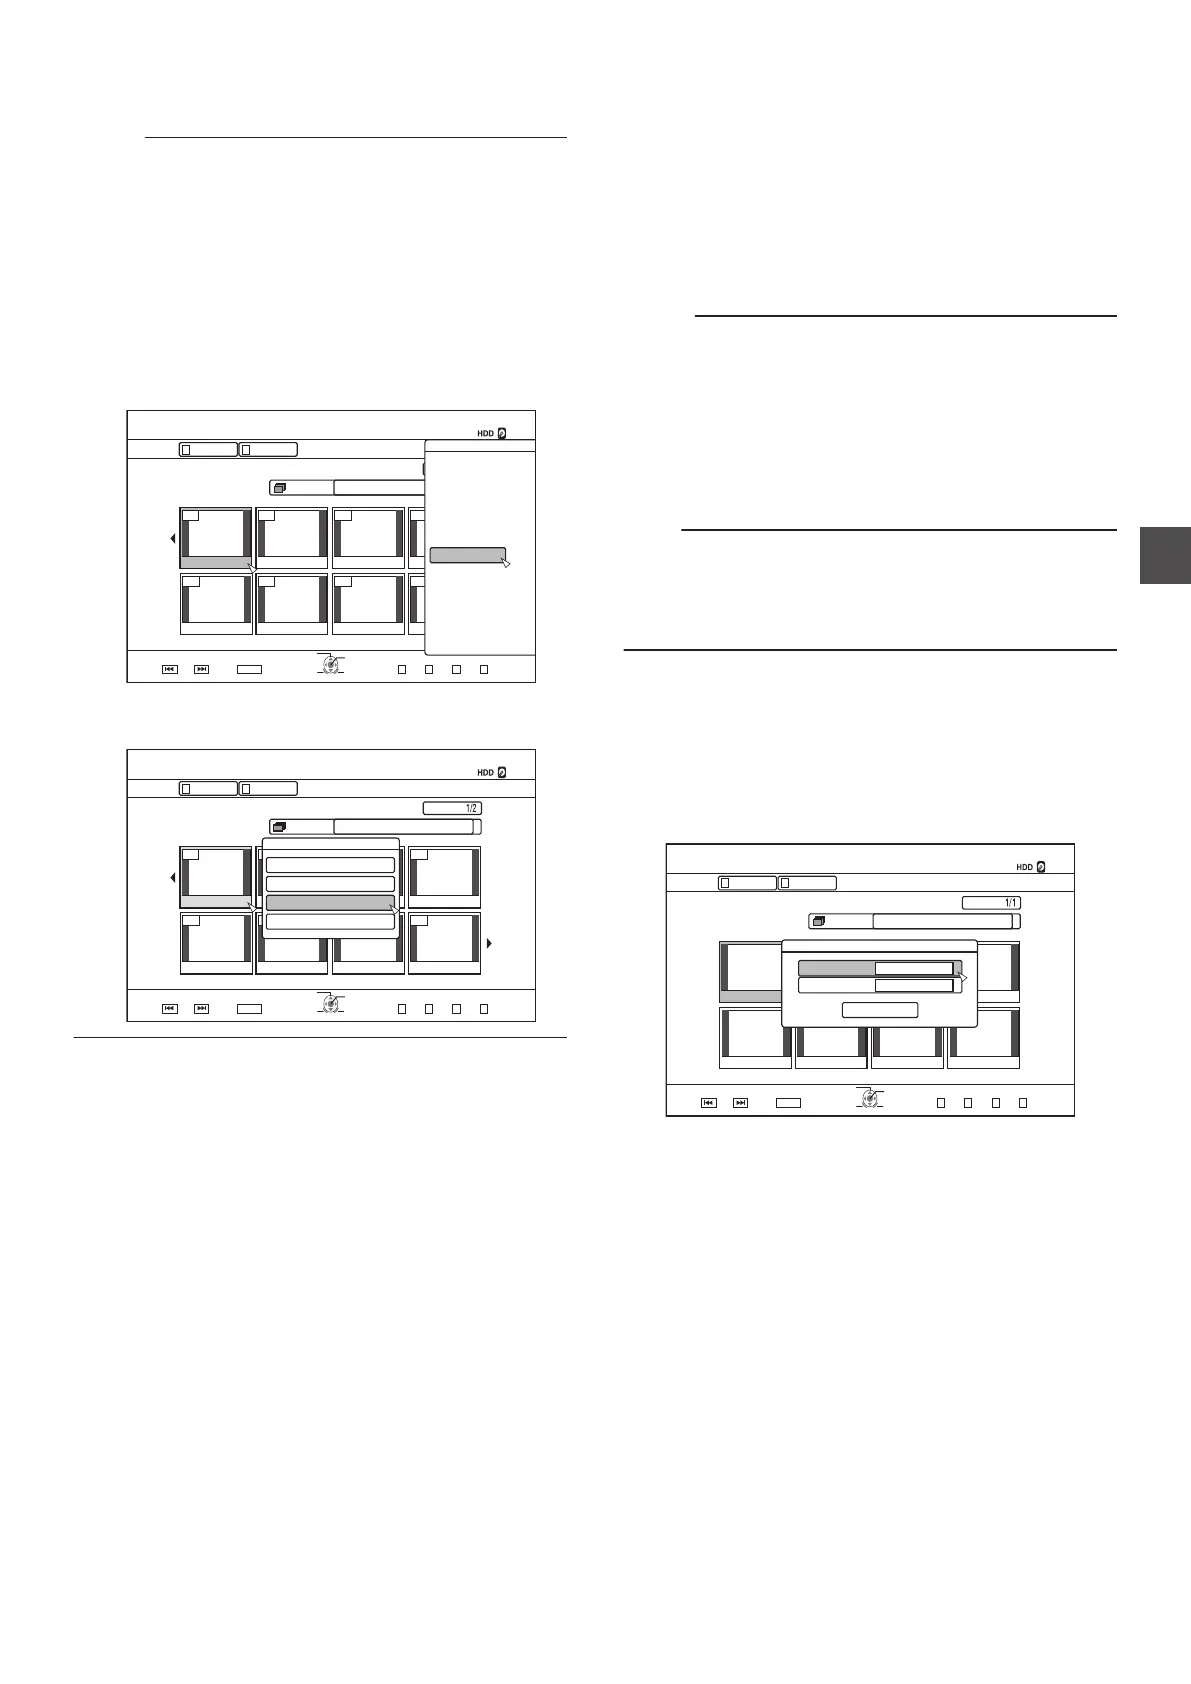
A
Select the title for which the shooting date/time is to be
changed, and press the [
OPTION] button
B
Select “EDIT INFO”, and press the [OK] button
.
001 002 003 004
006005 007 008
126+10
1-
4'6740
5'.'%6
VKVNG
0#8+)#6+10
6+6.' 6*7/$0#+.
8+&'1 2+%674'
)4172 #..
':+6 )4172
2+%674'
0#8+)#6+10
.+56
24'82) 0':62)
126+105
2.#;
&'.'6'
&7$
/1&'%*#0)'
'&+6
'&+6+0(1
16*'45
$#%-
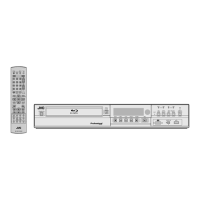
C
Select “CHANGE SHOOTING DATE/TIME
”, and press
the [OK] button
.
001 002 003 004
006005 007 008
VKVNG
2CIG
OKP
0#8+)#6+10
126+10
4'6740
1-
)41722+%674'.+56
5'.'%6
':+6
0':62)24'82)
)4172 #..
4'/#+0+0)4'%14&+0)6+/':2
2+%674'
8+&'1
6+6.'6*7/$0#+.
0#8+)#6+10
2416'%6
%*#0)'5*116+0)'6+/'
/1&+(;6*7/$0#+.
/1&+(;6+6.'0#/'
+0(14/#6+10%144'%6
Mode Conversion
You
can convert HD quality video titles saved on the HDD if they
are recorded in the DR, AVC, AF, AN, AL, or AE mode.
Seamless
conversion
: Seamless conversion can be performed to
enable smooth playback of joined scenes
after dubbing to a BD. (Titles recorded in the
DR recording mode h seamless)
Recording
mode
conversion
: Enables conversion of recording mode.
(Titles recorded in the DR, AVC, AF, AN, AL,
or AE mode h AF/AN/AL/AE/XP/SP/LP/EP)
Memo :
0
As seamless conversion does not re-encode video and
audio, there is no deterioration in the image quality.
0
Re-encoding is performed during recording mode
conversion.
0
Only titles that are recorded in the DR mode enable
conversion to the XP/SP/LP/EP mode.
0
To
apply “MODE CHANGE” after turning off the power, select
“AFTER POWER OFF” for “START METHOD” under the
“MODE CHANGE”.
Note :
0
When seamless conversion is performed, the chapters
(excluding joints of scenes) will be combined. To divide the
chapters, insert chapter marks after seamless conversion.
For details on dividing the chapters, refer to “Chapter mark
insertion (divide chapter)” (A P
79).
1
Press the
[NAVIGATION] button on the remote
control unit
2
Select a title/group, and press the
[OPTION]
button
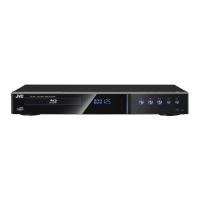
3
Select “MODE CHANGE
” from the Option menu,
and press the [OK] button
0
The
“MODE CHANGE” screen appears.
.
2CIG
OKP
0#8+)#6+10
126+10
4'6740
1-
)41722+%674'.+56
5'.'%6
':+6
0':62)24'82)
)4172 #..
4'/#+0+0)4'%14&+0)6+/':2
2+%674'
8+&'1
6+6.'6*7/$0#+.
0#8+)#6+10
%10(+4/
+//'&+#6'
56#46/'6*1&
5'#/.'55
/1&'
/1&'%*#0)'
4
Select
a recording mode from “MODE”, and press
the [OK] button
5
Select
“CONFIRM”, and press the [OK] button
Changing the Shooting Date/Time
83
Editing