Importing Data from a
BD/DVD to the HDD
Data can be imported from a BD/DVD to the HDD as follows.
0
File formats that can be imported
Videos : BDMV, BDAV, AVCHD, DVD-VR, DVD-
VIDEO, EverioBackup
Still Images
: EverioBackup, BDAV (BD-RE)
Memo :
0
BDMV, AVCHD and EverioBackup titles that are imported
using “FULL IMPORT
” are combined into one title.
This unit does not support combining of titles during the
editing operation after import is complete. To combine and
import data, select “FULL IMPORT”.
0
For
data that is selected for import via “SEL. TITLE(VIDEO)”,
titles with the same date are combined.
0
Titles of two or more scenes cannot be combined if the
recording criteria, such as video size, are different.
Note :
0
Only titles that are not copyright-protected can be imported.
0
Recognizing the device and importing the files may take a
long time depending on the amount of files in the device.
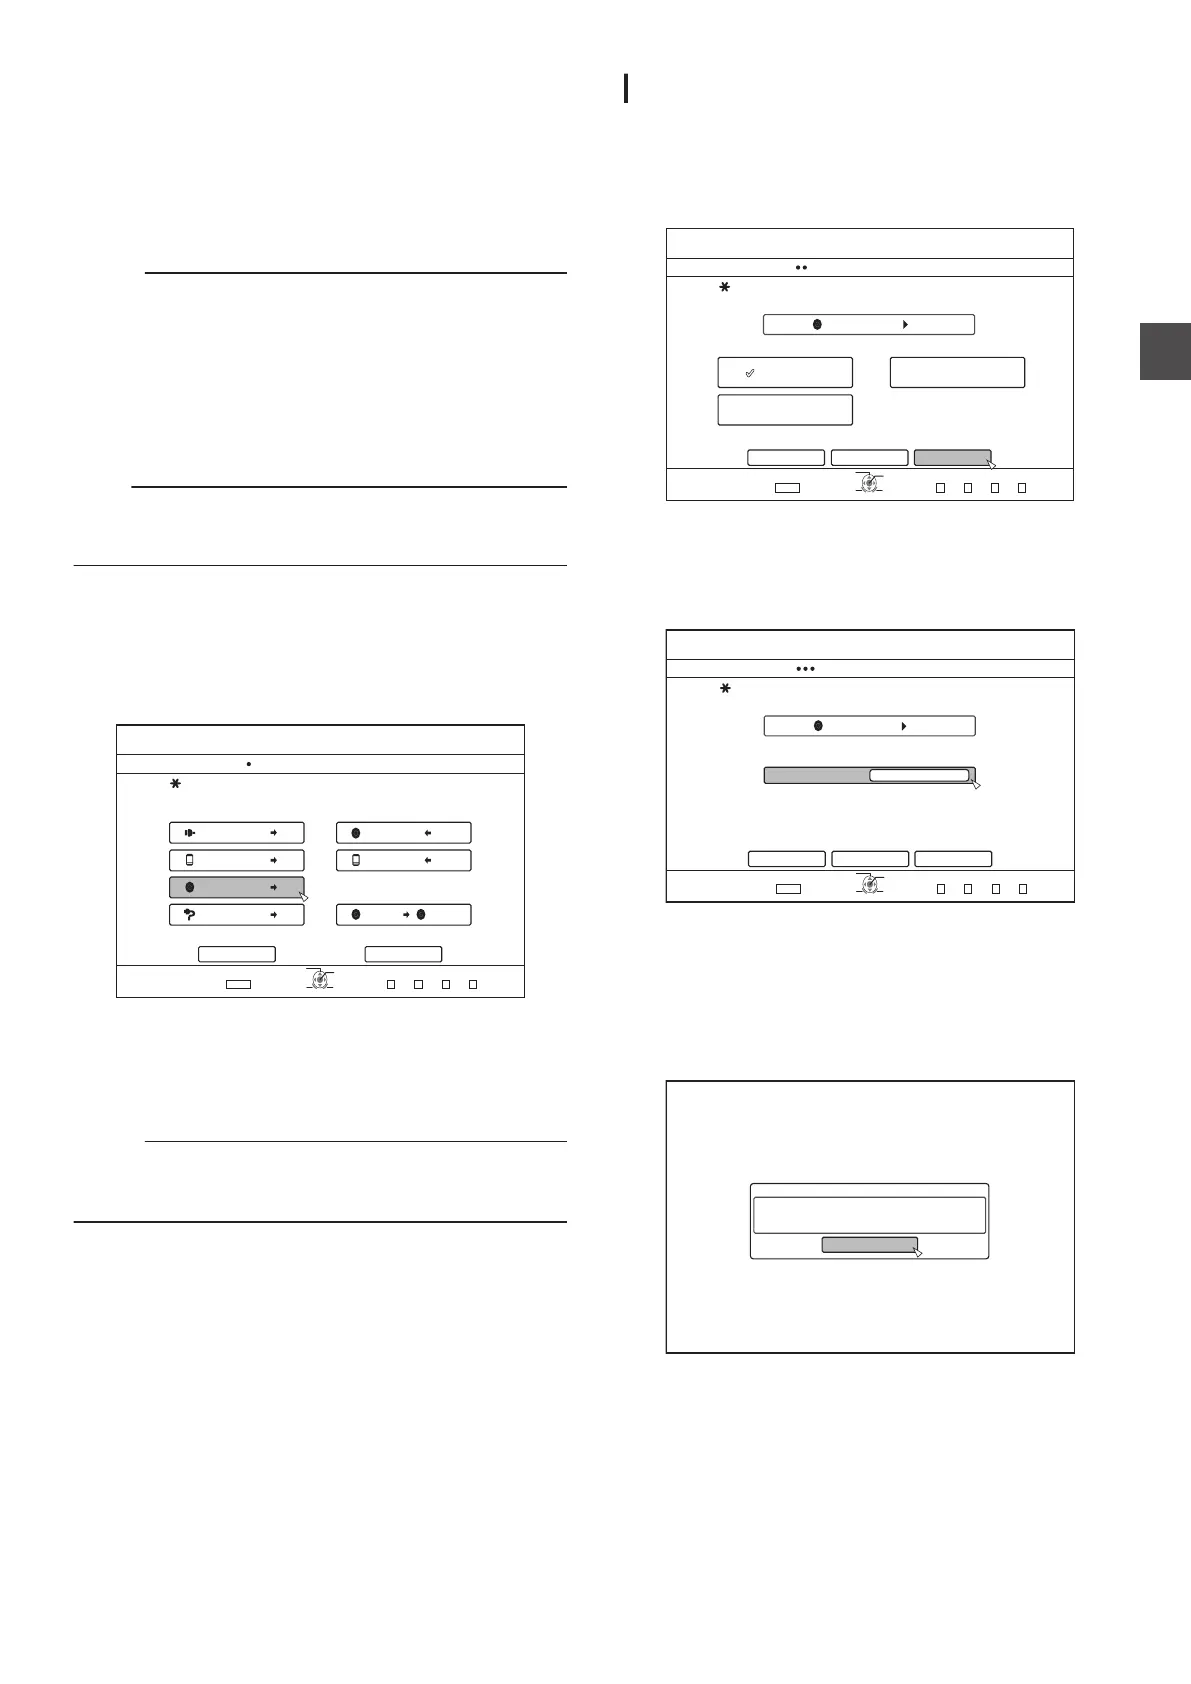
Preparations
1
Set a BD or DVD on the disc tray
2
Press the
[DUBBING] button on the remote
control unit
0
The importing screen appears.
.
75$
5&
&+5%
*&8&8
&+5%
&+5%
&+5%
&+5%5&
126+10
1-
4'6740
':+6
5'.'%6
&7$$+0)
56'2
5'.'%6+/2146&7$$+0)
*&&
*&&
*&&
*&&
61*&& 61&8&
&+5%%12;
%#0%'. 0':6
&7$$+0)
8+&'1
2+%674'
3
Select “DISChHDD” in the importing screen, and
press the [OK] button
0
A check mark is added to the “DISChHDD” item.
4
Select “NEXT”, and press the
[OK] button
0
The import selection screen appears.
Memo :
0
A recording mode selection appears instead of the import
selection screen when DVD-VIDEO is detected.
For details, refer to “Importing DVD-VIDEO” (A P 37
).
Full import
1
Select “FULL IMPORT”
in the import selection
screen, and press the [OK] button
0
A check mark is added to the “FULL IMPORT” item.
2
Select
“NEXT”, and press the [OK] button
.
&+5%
126+10
1-
4'6740
&7$$+0)
56'2
5'.'%66*'/'6*1&1(+/2146
*&&
(7..+/2146 5'.6+6.'8+&'1
5'.6+6.'2+%674'
%#0%'. $#%-
':+6
5'.'%6
&7$$+0)
0':6
0
“START
” will appear instead of “NEXT” in the menu if the
disc is of a format other than “BDAV”. In this case, go to
step 5.
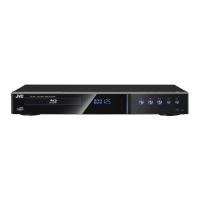
3
Select
“RECORDING MODE”, and press the [OK]
button
.
&+5%
52
&7$$+0)
56'2
5'66*'4'%14&+0)/1&'
*&&
%#0%'. $#%-
':+6
5'.'%6
126+10
1-
4'6740
56#46
4'%14&+0)/1&'
&7$$+0)
0
A pop-up menu appears.
4
Select the
“RECORDING MODE” option.
For details, refer to “Recording Modes” (A P 33).
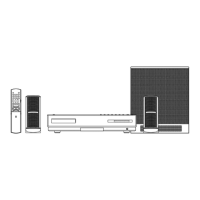
5
Select “
START”, and press the [OK] button
0
Importing of the titles starts.
0
After titles are successfully imported, a “DUBBING IS
COMPLETED
” message appears on the monitor.
.
%10(+4/
&7$$+0)+5%1/2.'6'&
1-
Importing Data from a BD/DVD to the HDD
35
Dubbing/Importing