4. Select Pitch Bend as the MIDI Type in column 3.
5. Use the math modifications if you wish to, or leave them the same if you don’t wish to
alter the data output with math.
Tip: The Channel parameter here in CV Layer is used only for messages coming from the USB
Ports, not the keyboard itself. The CV outputs will use MIDI notes from Keyboard Layer
regardless of the Channel. Whatever the Key Priority in Keyboard Layer is set to will be the note
that CV sends out (see the Key Priority chapter for more information).
3.10.2 CV Input (CV to MIDI)
The CV to MIDI table has 2 rows (1 for each CV output) and 9 columns. Start with what CV
input you are using, go across the row, and end with the MIDI Device the converted MIDI Data
will be sent to (Expander, USB 3, or USB 3 + Expander). For example, if you want to convert an
Expression Pedal to control CC# 7 on Channel 1 for a device connected to the MIDI Expander
follow these steps:
1. Choose the row for CV 1 or CV 2.
2. Select the MIDI Channel to convert the CV to.
3. Select the CC # to convert the CV to.
4. Use the math modifications if you wish to, or leave them the same if you don’t wish to
alter the MIDI output with math.
5. Select which MIDI device to output the data to (MIDI Expander, USB 3, or USB 3 +
Expander).
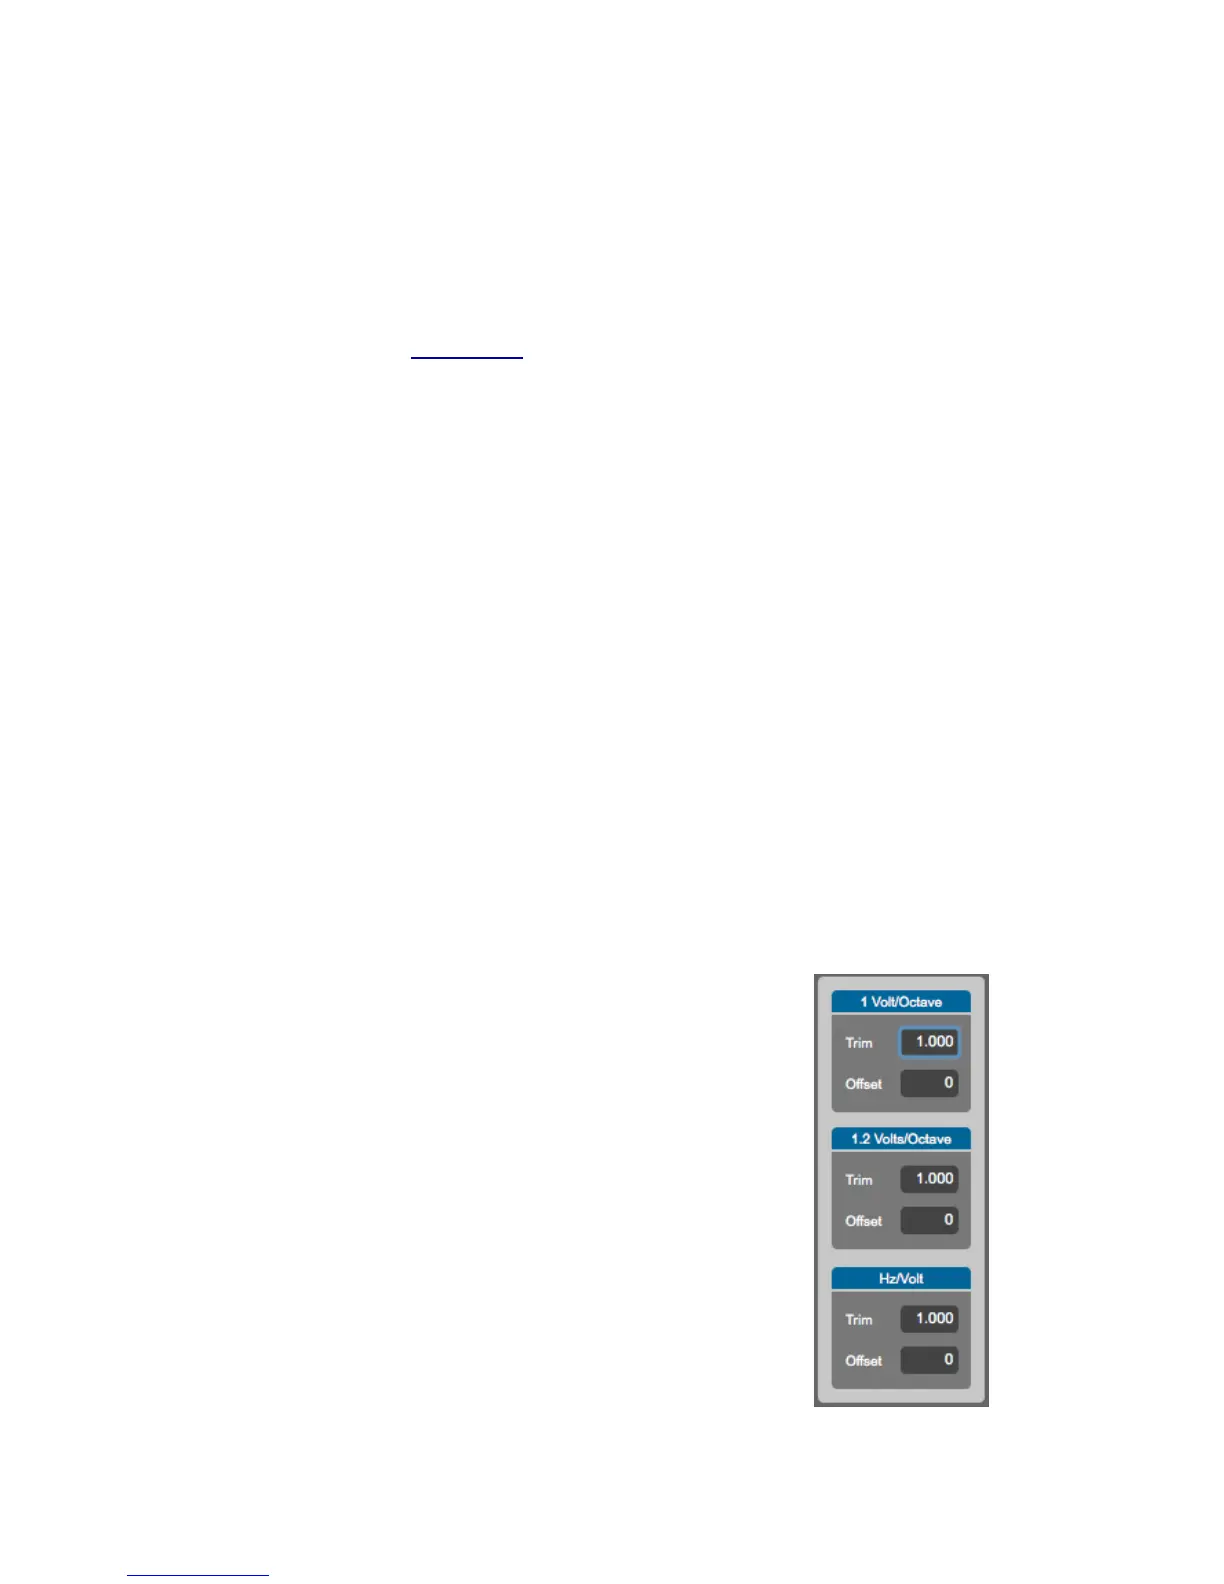
3.10.3 CV Trims
The CV Trims window is accessible from the Hardware
Menu. When you click CV Trims in the menu the window
to the right will appear.
This window is provides a way to compensate for an out
of tune synthesizer by allowing you to adjust the
QuNexusʼ tuning for each pitch scaling mode. Use this
only if you are unable to adjust the tuning from the
synthesizer itself.
Increasing the Trim and offset will raise the pitch of your
synth, while decreasing the values will lower the pitch.
The settings in the CV Trims window are not saved per
preset. They are applied globally for all presets and are
sent down to QuNexus as you adjust them in real time.
49
 Loading...