2-16 Calibration Model 2750 Multimeter/Switch System Service Manual
NOTE Ensure the calibrator has settled to the final value. You can do so by verifying
that the “Settled” indicator is off, or by using the *OPC? (operation complete)
query.
Resistance calibration
Follow these steps for resistance calibration:
1. Set the calibrator to the resistance mode, and turn on external sensing.
NOTE Use external sense (4-wire ) when calibrating all resistance ranges. Be sure
that the calibrator external sense mode is turned on.
2. Perform the calibration steps summarized in Table 2-9. For each step:
• Set the calibrator to the indicated resistance, and make sure the unit is in oper-
ate. (Use the recommended resistance or the closest available value.)
• Send the indicated programming command. (Change the command parameter
if you are using a different calibration resistance than that shown.)
• Wait until the Model 2750 completes each step before continuing.
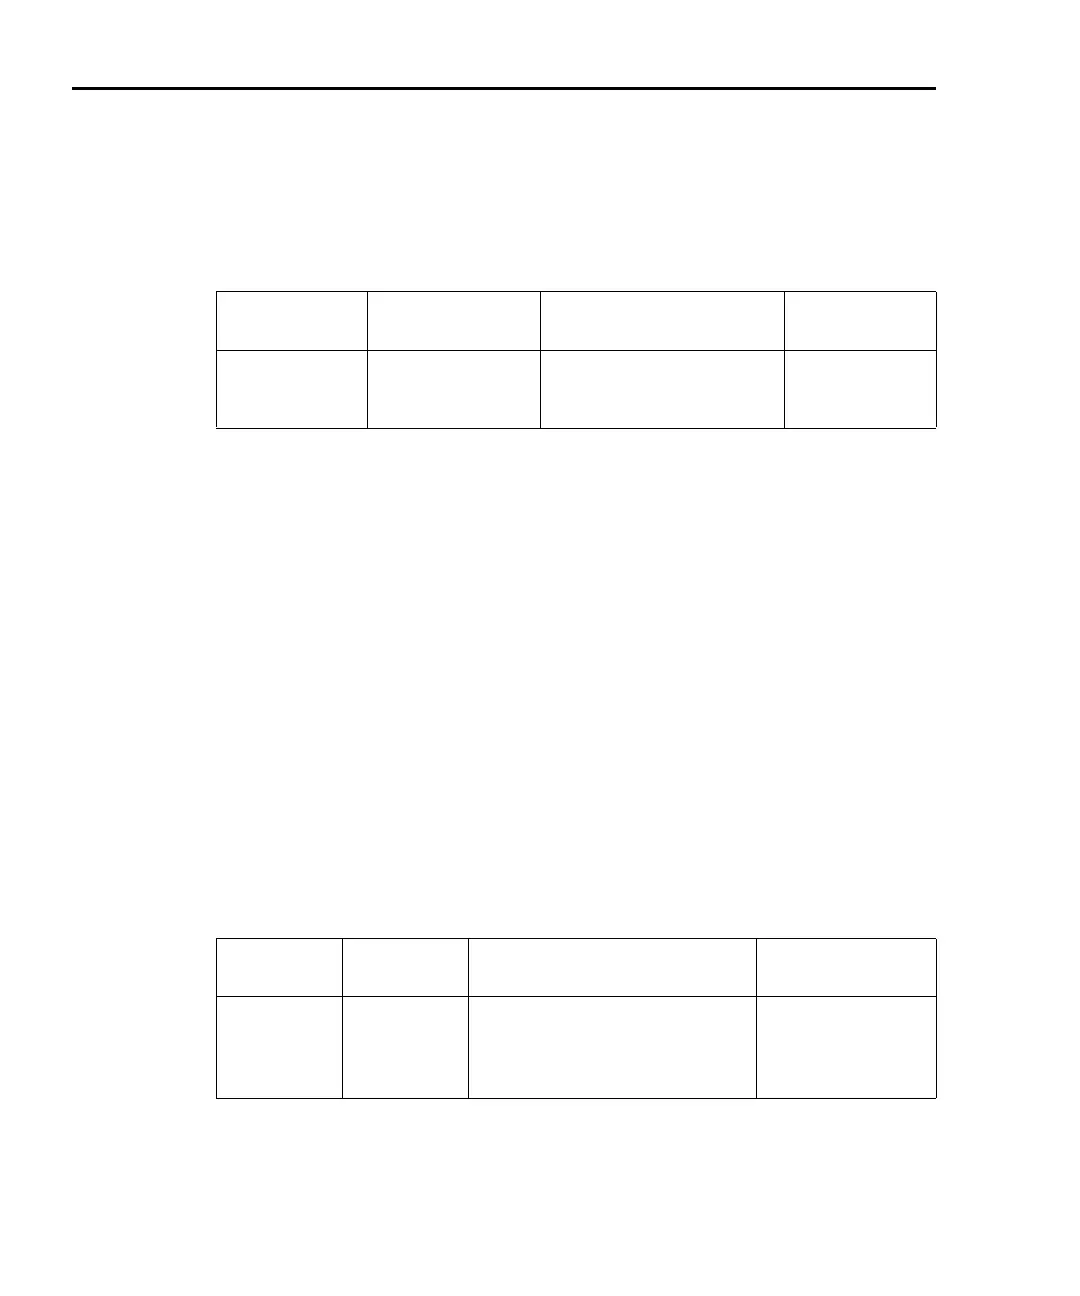
Tab le 2- 8
DC voltage calibration programming steps
Calibration
Step Calibrator Voltage Calibration Command*
Parameter
Range
+10V
-10V
100V
+10.00000V
-10.00000V
100.0000V
:CAL:PROT:DC:STEP3 10
:CAL:PROT:DC:STEP4 -10
:CAL:PROT:DC:STEP5 100
9 to 11
-9 to -11
90 to 110
*Use recommended value where possible. Change parameter accordingly if using a different calibrator voltage.
Tab le 2- 9
Resistance calibration programming steps
Calibration
Step
Calibrator
Resistance Calibration Command* Parameter Range
100
10k
100k
1M
100
10k
100k
1M
:CAL:PROT:DC:STEP6 100
:CAL:PROT:DC:STEP7 10E3
:CAL:PROT:DC:STEP8 100E3
:CAL:PROT:DC:STEP9 1E6
90 to 110
9E3 to 11E3
90E3 to 110E3
900E3 to 1.1E6
*Use exact calibrator resistance value for parameter.