Chapter 2 57
Test Descriptions
Noise Figure Range and Accuracy
Test Setup
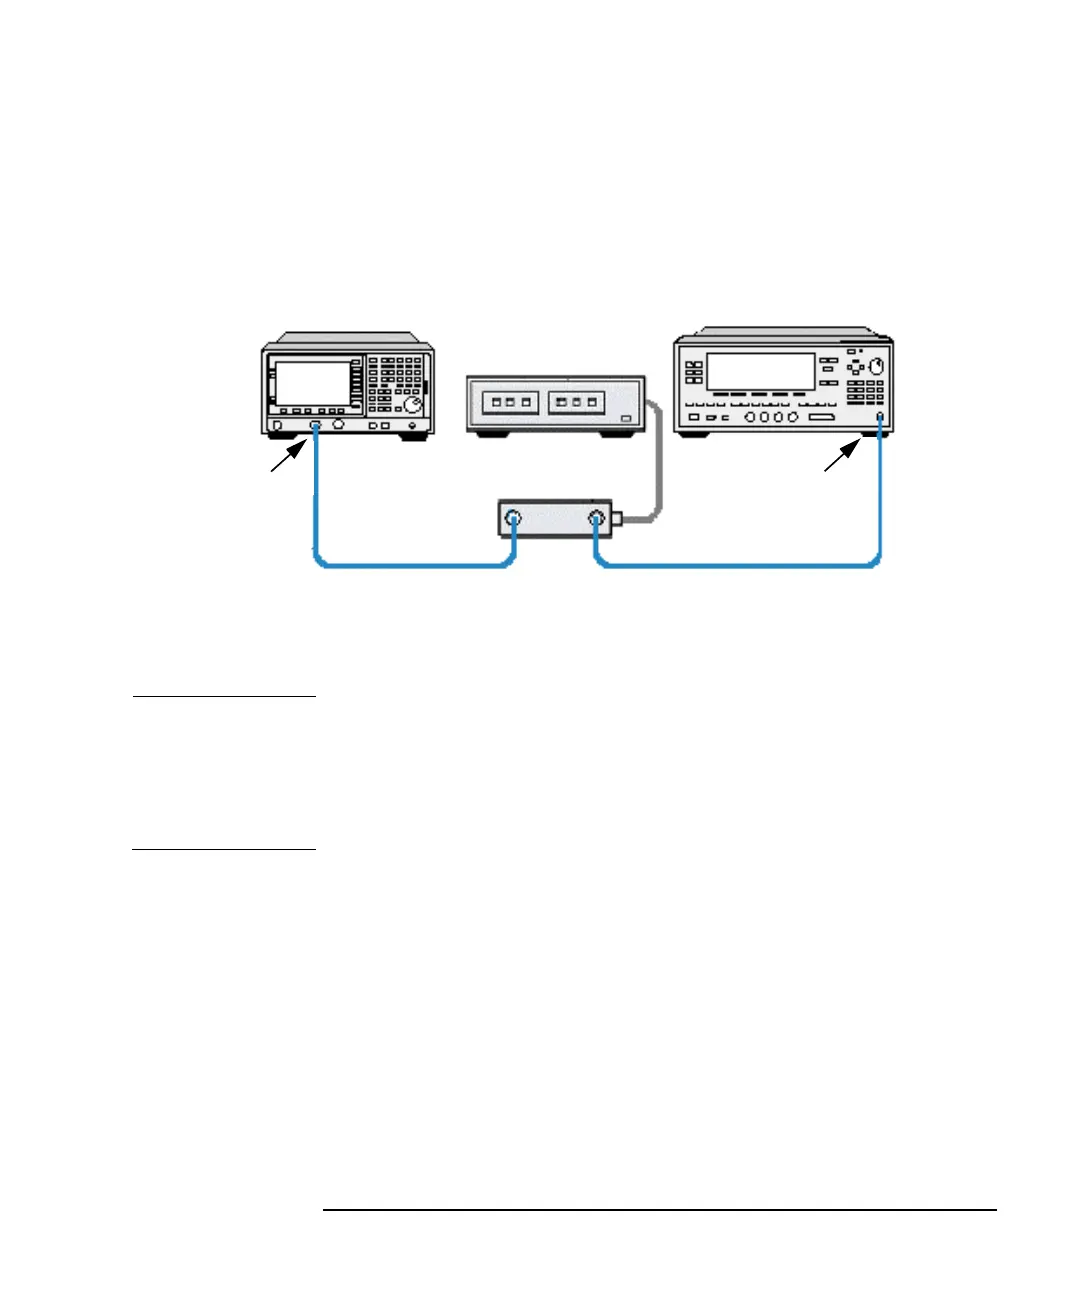
Figure 2-14 Equipment required for Noise Figure Range and Accuracy test
Test Procedure
NOTE Throughout the Noise Figure Range and Accuracy Test Procedure the
term ‘the Worksheet’ refers to the Noise Figure Range and Accuracy Test
Worksheet on page 61 and the term ‘the Test Record’ refers to the Noise
Figure Range and Accuracy Test Record detailed in the relevant
Appendix for the model number being tested.
Step 1. Connect the equipment as shown in Figure 2-14.
Step 2. Set the Synthesized Sweeper as follows:
1. Press the
Preset key.
2. Set the frequency to 50 MHz (press the
CW key and 5, 0, MHz.
3. Set the power level to -54 dBm (press the
Power Level key and -, 5, 4,
dB(m).
4. Switch
RF ON
NOISE FIGURE
ANALYZER
ATTENUATOR
SWITCH DRIVER
SYNTHESIZED
SWEEPER
Control
Cable
Attenuator X
RF Cable
Adapter 2
Input
RF Cable
Adapter 1
PRECISION 1dB
STEP ATTENUATOR