40
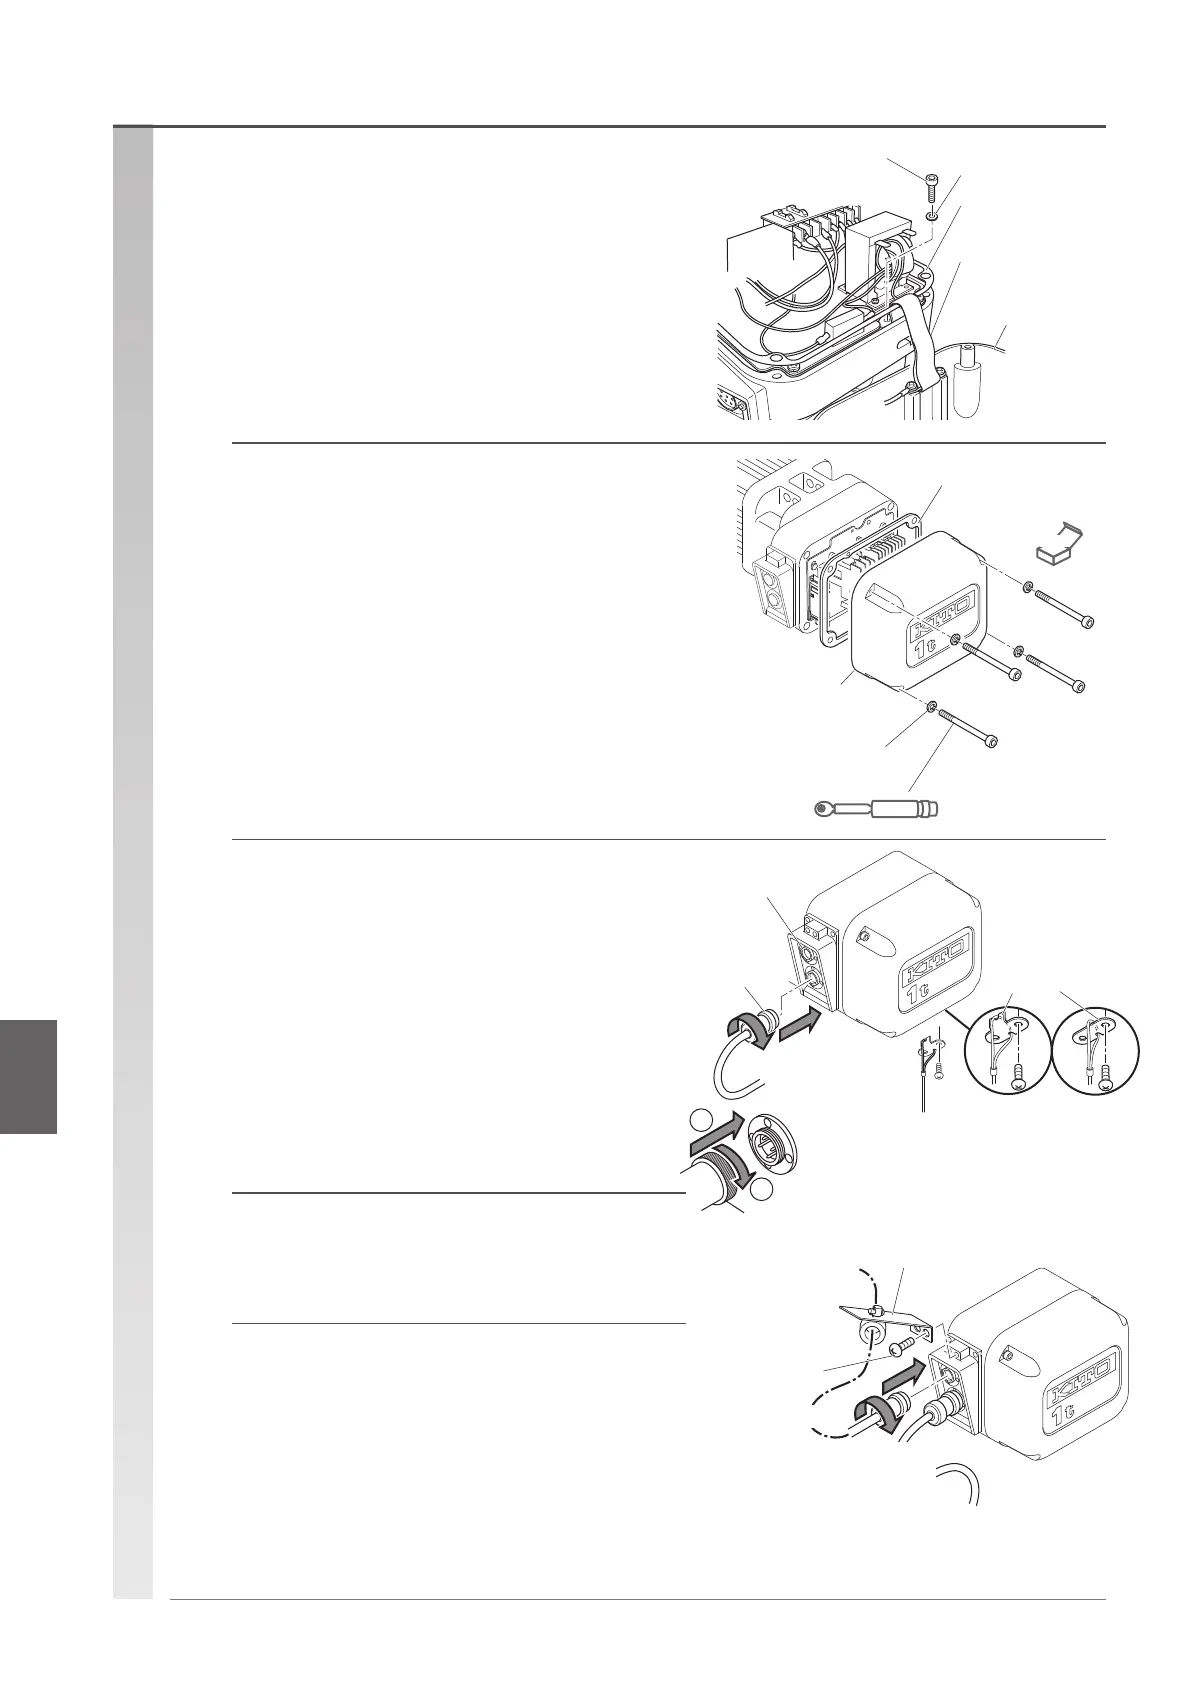
Reassembly procedure (continued)
(5) Install the controller cover with 4 socket
bolts (spring lock washer required).
Tightening torque M5 : 8.4 N·m
M6 : 10.8 N·m
Spring lock washer : Yes
* When making a direct connection, do so
after connecting the power supply cable
and the push button cord.
NEW
Socket bolt
Controller cover
Spring lock washer
Controller cover
packing C
Torque
(4) Install the cover belt to the gear case.
•
Pass the cover belt through Controller Cover Packing C.
•
Tighten the socket bolt while holding the controller cover
with hands.
* For B type, install the cover belt before
xingtheplate.
Controller
cover
Cover belt
Plain washer
Controller
Cover Packing C
Socket bolt
(gear case side)
(6) Insert the push button cord plug to the
socket, and install the protection wire to the
body.
•
Install Cable Support L with the protection wire attached to
the body with the 2 pan-head machine screws.
Protection
wire
Cable
support
Socket
Pushbutton
cord
1
Coupling screw
2
Push in the
coupling and turn
clockwise.
(7) Insert the power cable plug to the socket.
Cable support arm
Push in the coupling and
turn clockwise.
Pan-head
machine
screws (x2)
(8) Install the cable support arm to the body
with the 2 pan-head machine screws.
Reassembly procedureAssembling the controller cover

 Loading...