4. MECHANICAL ADJUSTMENT
9
Field Service Ver1.0 Jun.2005
PK-503/504/505
ADJUSTMENT/SETTING
4. MECHANICAL ADJUSTMENT
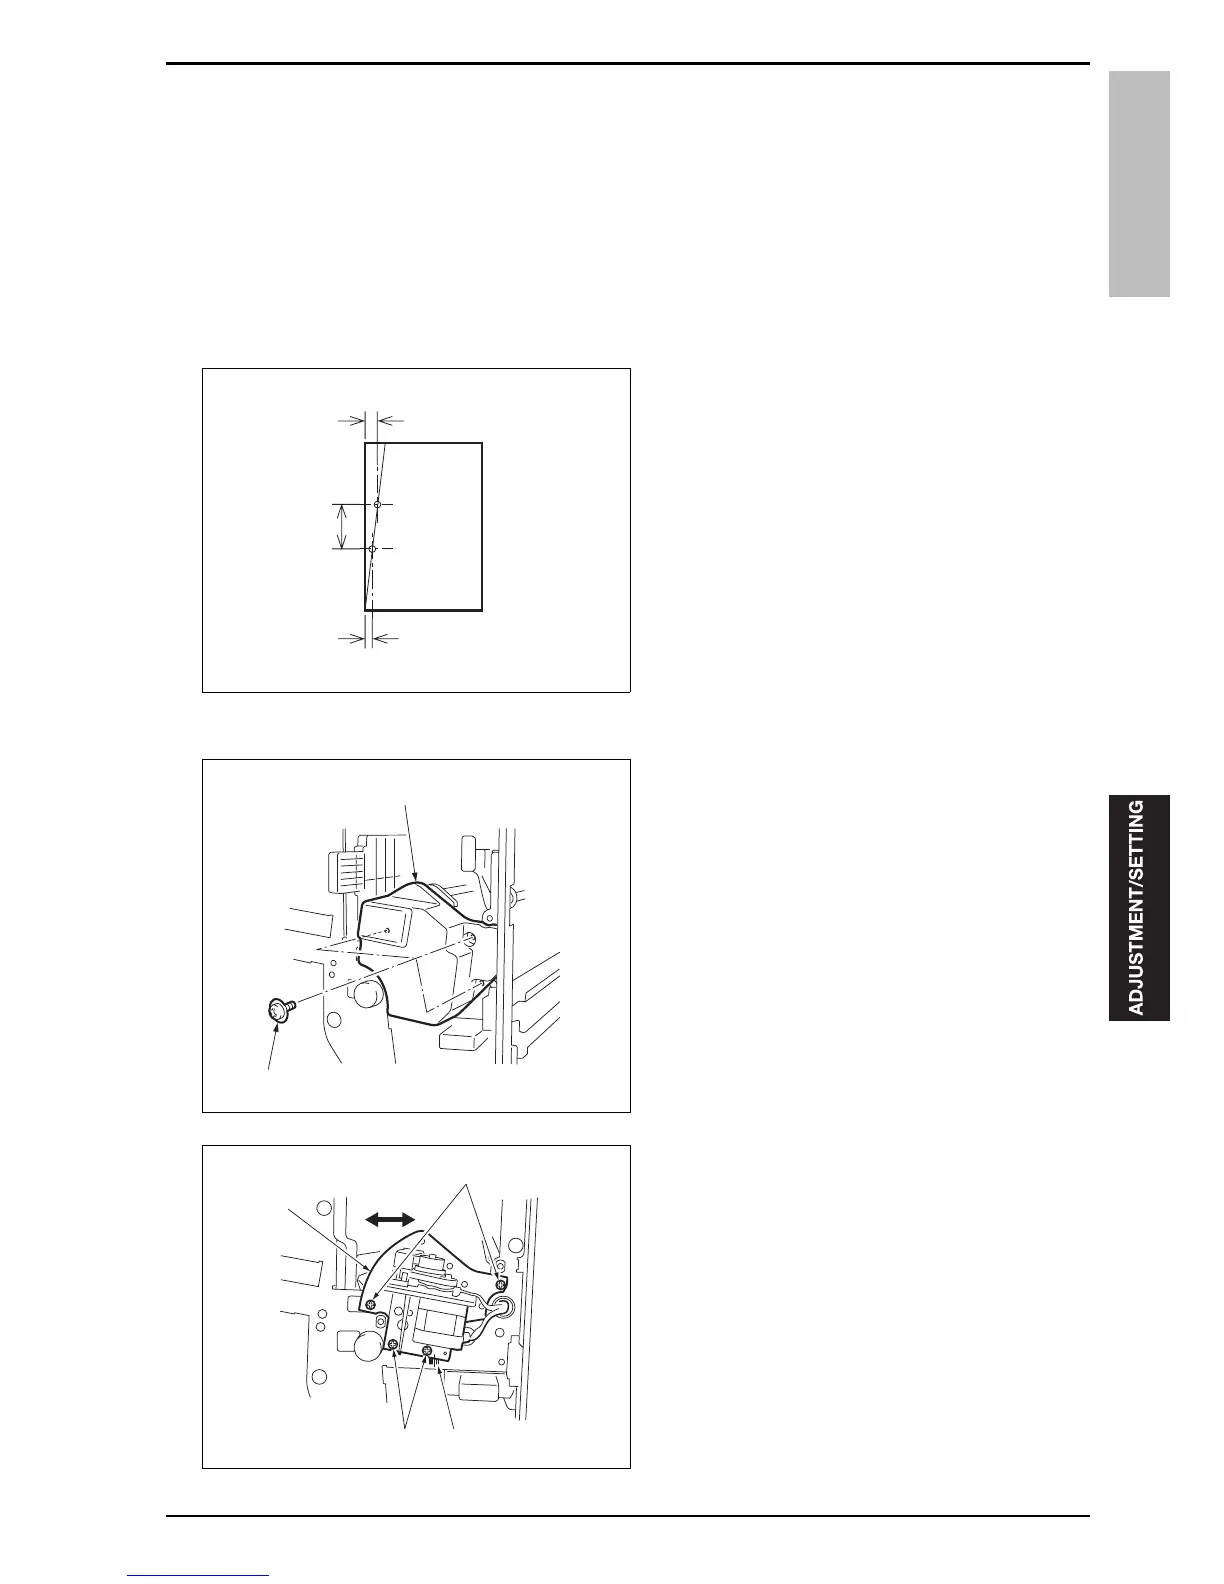
4.1 Punch hole position tilt adjustment
Conduct this adjustment if the edge of the paper and the punch hole position on the paper are not in parallel.
A. Procedure
1.
Align the paper on the main body tray with the
side guide plate and the rear edge guide plate,
and then check the tilt with the platen copy or the
Tech. Rep. mode (DF is unavailable).
2.
Conduct the paper tilt adjustment if it is tilted sig-
nificantly.
3.
Perform the punch mode printing for 3 sheets of
paper in each of the single sided mode and the
double sided mode as samples for checking the
tilt of the punch hole position.
4.
Measure the tilt of the punch hole position for the
3 sheets of paper.
Tilt of the punch hole position (%) = (A - B)/C
5.
Open the front door of FS.
6.
Remove 3 screws [2], and then remove the punch
unit cover [1].
7.
Loosen 4 adjustment screws [1] on PK.
8.
Move the punch unit [3] in accordance with the tilt
of the punch hole position by referring to the
markings [2].
1 index: 0.5%
9.
Tighten 4 adjustment screws [1].
10.
Reinstall the punch unit cover.
11.
Repeat step 3 to 10 until the tilt of the punch hole
position is corrected.
15kjf3c001na
A
B
C
[2]
[1]
15kjf3c002na
[1]
[3]
[1] [2]
15kjf3c003na