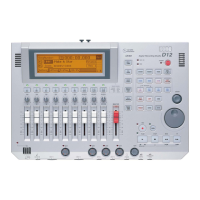
KORG D12 Guided Tour
31
Copy the selected audio region to the “Clipboard”:
The “Clipboard” allows you to copy selected data from one song to another. The IN and OUT points set in the previous steps indicate
a selected audio range. The TO point needs to be set in the destination song only if you want the audio data in the Clipboard to be
copied to a location other than the beginning of the song.
3. Press [TRACK] until you select the “EditTrk” tab.
4. u to highlight the current “edit cell” (“CopyTrack”, etc.) and rotate the [DIAL] to the left, to select “CopyTrack”.
5. u to highlight the “edit cell” “1” in the lower left area of the display, then rotate the [DIAL] to read “11-12”.
6. u to highlight the “edit cell” “1” above the “EditTrk” tab, then rotate the [DIAL] to read “Clip2”. Note: The edit cell reads “Clip2”
when two or more tracks have been copied, and reads “Clip1” when a single track is copied.
7. u to the “Exec.” button and press ENTER. u to the “Yes” button and press ENTER to copy tracks 11b and 12b to the
Clipboard. Press ENTER again to return to the Edit Track page.
Copy the Clipboard contents to a new song:
This is an efficient way to “import” your two track mixdown to a new song, where no effect or EQ processing is assigned to tracks 1
and 2. Note that tracks 1 and 2 must be the destination mixdown tracks in order to master a CD on the D12.
8. Press [SONG/CD] until you select the “SelSong” tab, then u to the “New” button in the display, followed by pressing ENTER.
9. u to the “OK” button and press ENTER.
10. Press [TRACK], and u to highlight “1” in the lower left area of the display, then rotate the [DIAL] to read “Clip2”.
11. u to highlight “1” above the “EditTrk” tab, then rotate the [DIAL] to read “1-2”.
12. u to the “Exec.” button, and press ENTER. u to the “Yes” button and press ENTER. Press ENTER again to return to the Edit
Track page.
13. Press [METER/TRACK VIEW], then press [PLAY], and raise the Channel 1 and 2 faders and MASTER fader for playback,
avoiding clipping. Set the Channel 1 PAN knob all the way to the left, and the Channel 2 PAN knob all the way to the right.
14. Press [STOP] after setting your mix, and verifying that the copy procedure was a success, then press [END/LOC4] to reset to
the song beginning.
Important! In mixdown and bouncing operations, assigned Insert, Master and Final effects, as well as EQ settings are “printed”
to destination bounce tracks. If in the future you decide to master to CD after performing a bounce operation, and
do not want to use the previous “Clipboard” technique, make sure to disable all of the destination bounce track’s
effects and EQ settings after bouncing operations are completed, or on playback, the current effects and EQ
settings will still be applied!
Tip: Before conducting mixdown, bounce or CD mastering operations, it’s a good idea to copy the entire song you’re working
with to another location (or backup to CD or external media). Although the UNDO function allows you to recall earlier edit
operations, you may want to start “from scratch”, especially if you’ve made extensive edits to the song.
Tip: Make it a practice to backup your song data to CD or external media, even if the project is in an incomplete state. By doing
this, you can always get the original project back if you decide to re-mix your work and master a new CD!