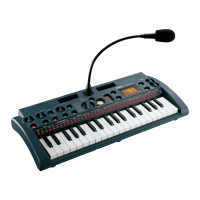
microSAMPLER
10
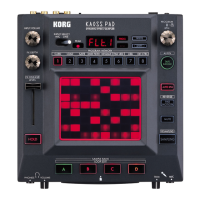
4. PATTERN SEQUENCER section
a. [PATTERN] dial
Use this to select a pattern location in the pattern sequencer.
b. [MUTE] button
This allows you to prevent the sample of the selected key from sound-
ing. (
☞
p.34 “Using the mute function”)
c. [PLAY/STOP] button
Starts and stops the pattern sequence.
d. [REC] button
This switches the pattern sequencer between record-ready, start, and
stop.
5. SAMPLING section
a. [SAMPLING TYPE] switch
This specifies the type of sampling.
b. [INPUT SELECT] button
This selects the sampling source.
c. [SAMPLING] button
This switches between sampling setup, pause, start, and end.
d. [AUDIO IN LEVEL] LED
This will light green when there is input from the AUDIO IN [L/
MONO] and [R] jacks or from the AUDIO IN [ MIC] jack. It will light
red if the input is overloaded.
6. AUDIO IN [ MIC] jack
You can connect the included gooseneck or other dynamic microphone
here.
To use a mic to this jack, set the rear panel AUDIO IN [ /LINE] switch
to the “ ” position. Use the rear panel AUDIO IN [GAIN] knob to
adjust the input level.
7. SAMPLE STATUS buttons
These buttons indicate and specify the state of the following three sam-
ple parameters for the current sample (
☞
p.18).
a. LOOP (
☞
p.28 “PLAY.TYPE”)
b. REVERSE (
☞
p.28 “REVERSE”)
c. FX SW (
☞
p.30 “FX SW”)
To edit sample parameters other than the above, use the [EDIT] button
to select the “SAMPLE” page. (
☞
p.28 “2. Sample parameters”)
8. [ENTER/SHIFT] button
Press this button to execute the setting you specified.
You can execute SHIFT functions by holding down this button and
pressing another button. (
☞
p.64 “Shift functions”)
9. [EXIT] button
This button stops sampling, or cancels a save operation or utility opera-
tion.
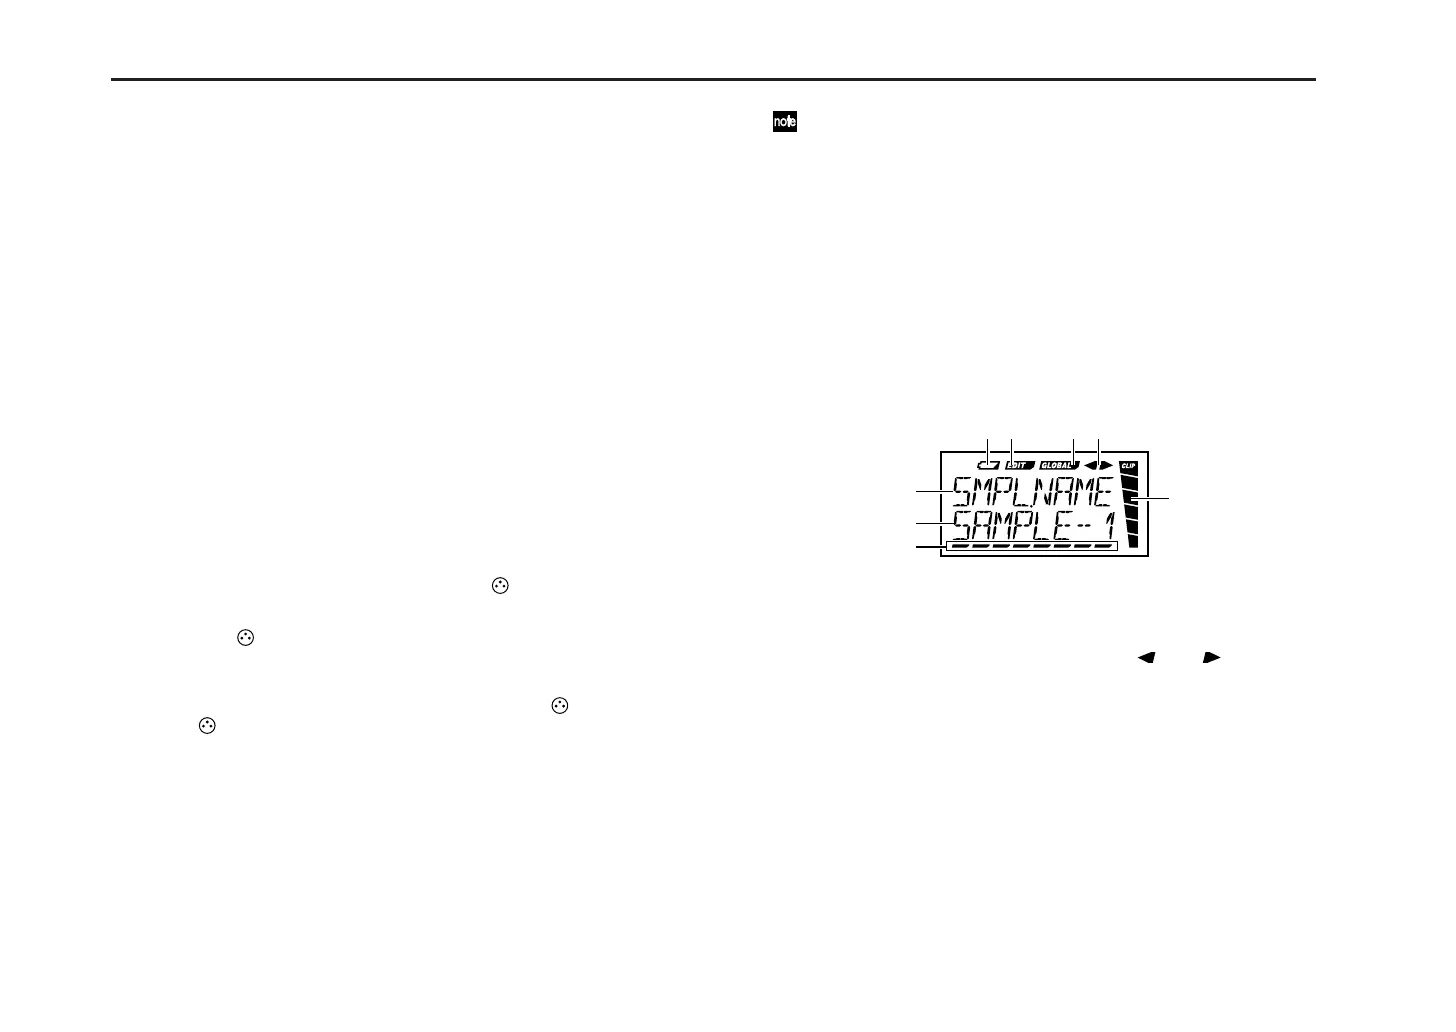
10. Main display
This shows the information such as the currently selected parameter and
its value, or messages.
a.
Battery indicator
b.
Edit indicator
c.
Global indicator
d.
If there are multiple pages or parameters, “ ” or “ ” symbols
will be shown to indicate that there are additional pages or param-
eters at the left or right.
e.
Sampling level meter
f, g.
These areas indicate the bank and sample, or the page and parame-
ter.
h.
Cursor, bank number, etc.
11. [WRITE] button
Press this to save banks, samples, or performances you’ve recorded in
the pattern sequencer.
ab c d
e
f
g
h