Top Enclosure
Removing the Endcaps
4-3
Removing the Endcaps
1. Move the unit so that one end hangs over the edge of your work surface.
2. Refer to Figure 4-2. Remove the two screws that secure the endcap to the rear panel
portion of the SP5-8.
Caution: While performing the following steps, be sure to hold onto the endcap as you
remove the screws.
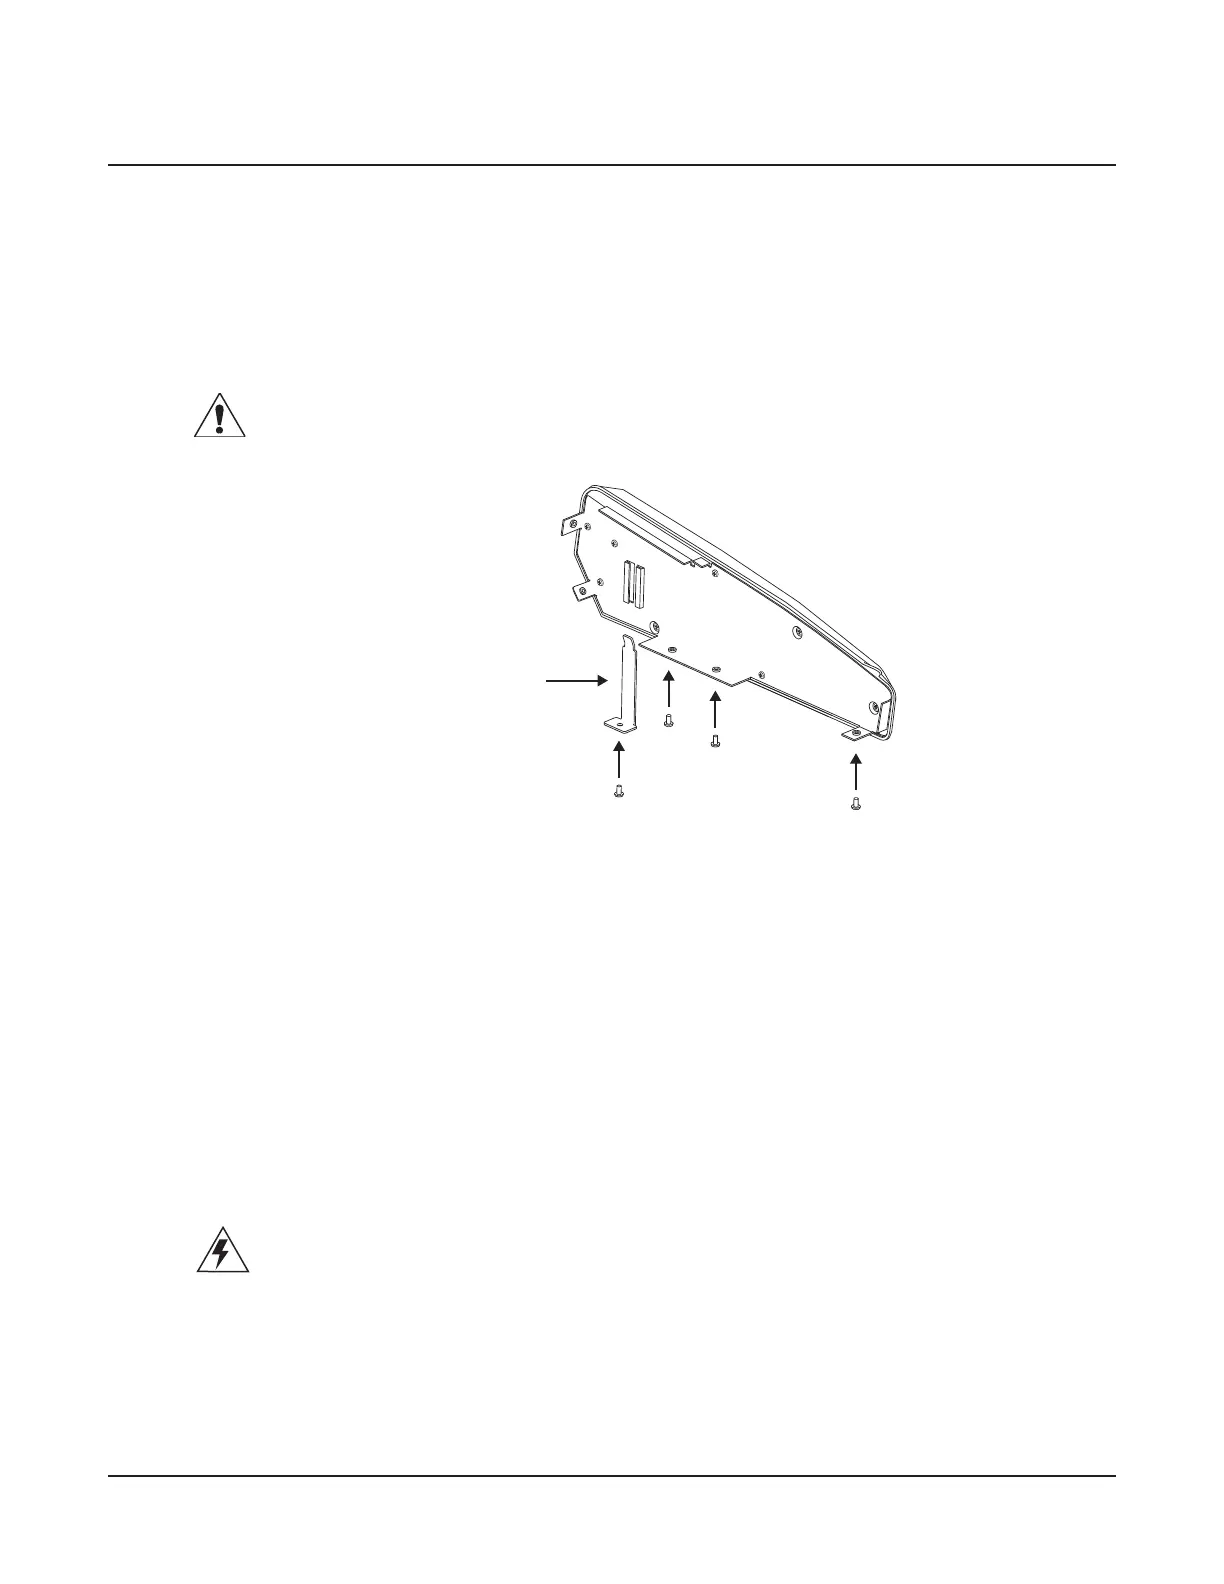
Figure 4-3
SP5-8 endcap
3. Refer to Figure 4-1. Remove the four screws that secure the endcap to the bottom
enclosure. One screw (noted with an * in Figure 4-1) secures the endcap locking bracket
into the endcap clamping bracket (see Figure 4-4). When you remove the endcap locking
bracket screw, it should remain in the endcap. If the bracket is still “locked” into the
top enclosure, pull it slightly to unlock it and remove the endcap. Set the endcap safely
aside.
4. Slide the SP5-8 back on to your work surface.
5. Repeat Steps 1– 4 for the other endcap.
Removing the Top Enclosure
Warning: Prepare your work surface. This includes placing foam blocks
behind the unit. When the top enclosure is removed, place it on the foam
blocks to avoid damaging the Alpha Wheel, front panel buttons, sliders,
and other components. The following procedure requires enough room
behind the rear of the unit to place the top enclosure face down on your
work surface.

 Loading...