2C9
1-6-12
(7) Adjustment after roller and clutch replacement
Perform the following adjustment after refitting rollers and clutches.
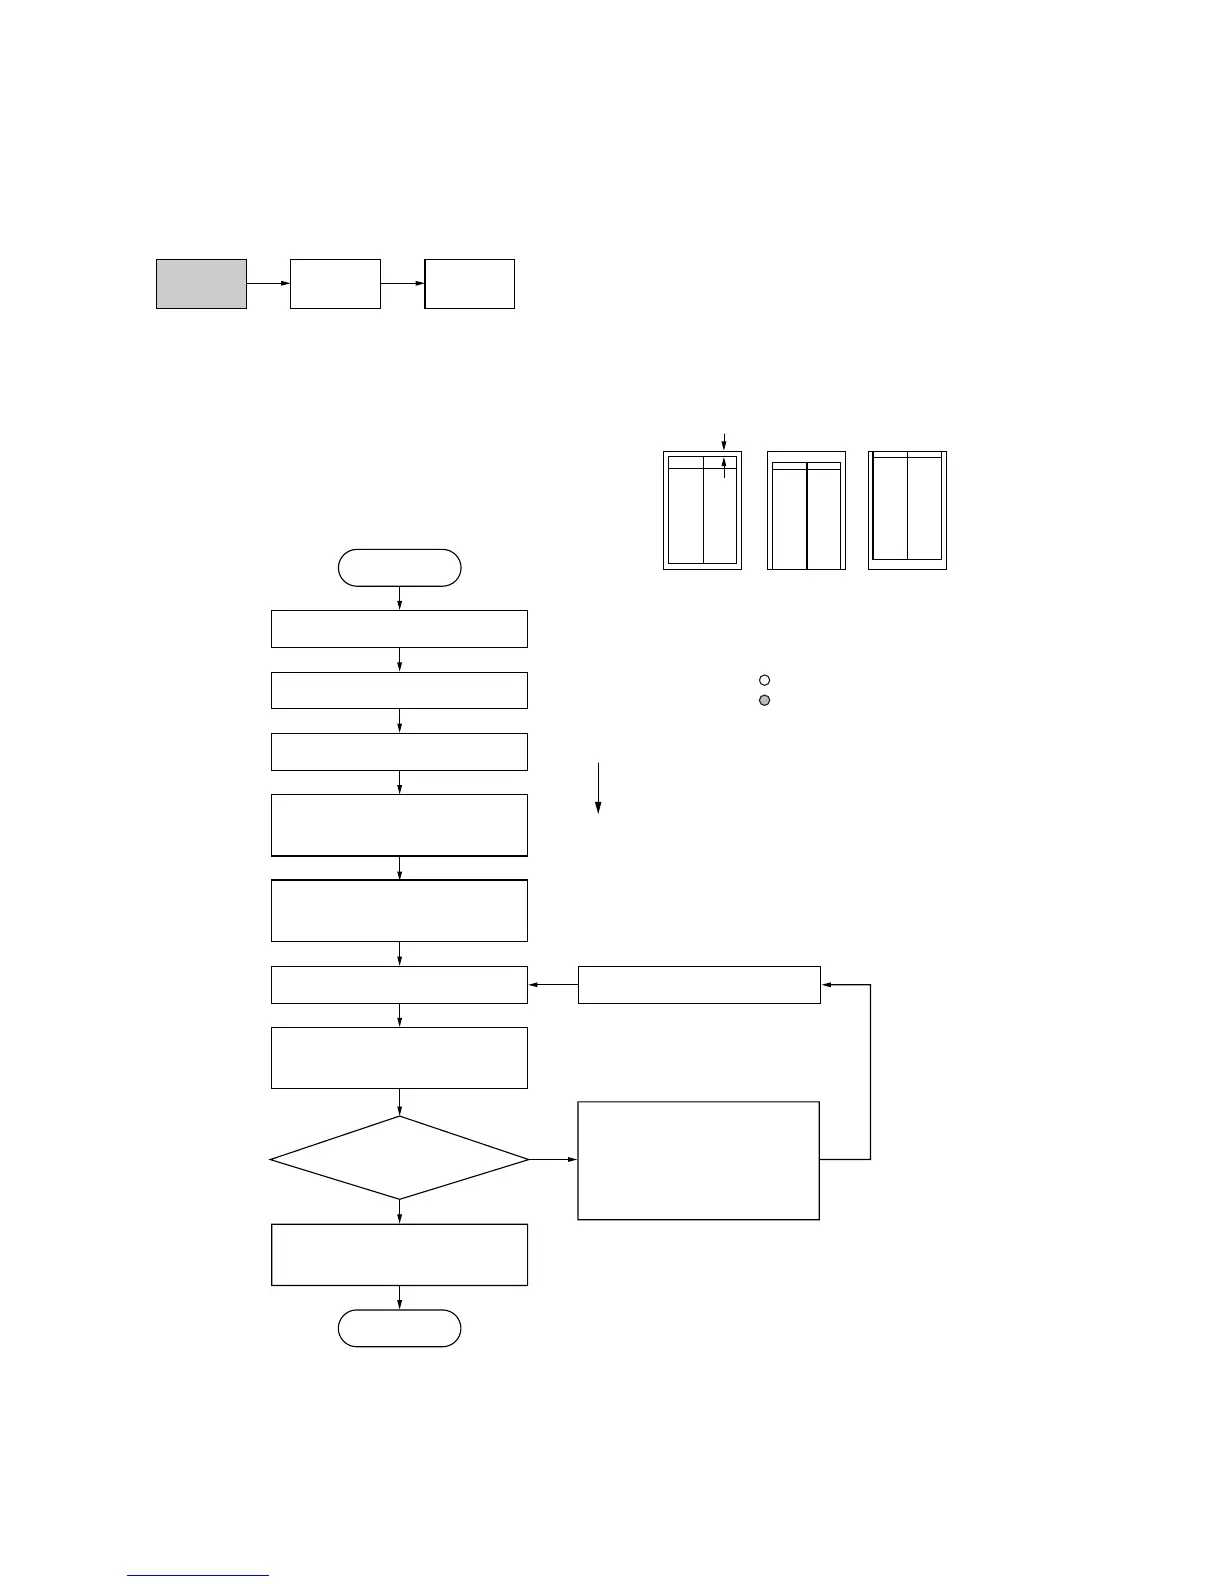
(7-1) Adjusting the leading edge registration of image printing
Make the following adjustment if there is a regular error between the leading edges of the copy image and original.
U034
U066
(P. 1-6-30)
U071
(P. 1-4-14)
Caution:
Check the copy image after the adjustment. If the image is still incorrect, perform the above adjustments in maintenance
mode.
Procedure
Correct image Output
example 1
Output
example 2
Leading edge registration
Figure 1-6-24
Yes
No
Start
Enter maintenance mode.
Enter “034” using the numeric keys.
Press the start key.
Press the interrupt key.
Is the leading edge
registration correct?
Press the start key
The new setting is stored
Press the stop/clear key to exit
maintenance mode.
End
Select the items to be adjusted
using the copy exposure
adjustment keys.
For output example 1, decrease
the value using the zoom (–)
key.
For output example 2, increase
the value using the zoom (+)
key.
Setting range (Initial setting)
Drawer: –5.0 – +10.0 (5.1)
Bypass tray: –5.0 – +10.0 (0.0)
First paper feeder: –5.0 – +10.0 (0.0)
Second paper feeder: –5.0 – +10.0 (0.0)
Third paper feeder: –5.0 – +10.0 (0.0)
Duplex copying: –5.0 – +10.0 (0.0)
Changing the value by 1 moves the
leading edge by 1.0 mm.
Press the image mode selection
key to light the text indicator.
Press the start key
to output a test pattern.
● Image mode selection key
Text indicator is on:
Leading edge registration adjustment
● Copy exposure adjustment keys
Exp. 1 (lit): Drawer
Exp. 2 (lit): Bypass tray
Exp. 3 (lit): First paper feeder
Exp. 4 (lit): Second paper feeder
Exp. 5 (lit): Third paper feeder
Exp. 1 (flashing): duplex copying (second face)
Photo
Text
 Loading...