33
15.1) BATTERY-POWERED EMERGENCY OPENING DEVICE ET-BAT150P
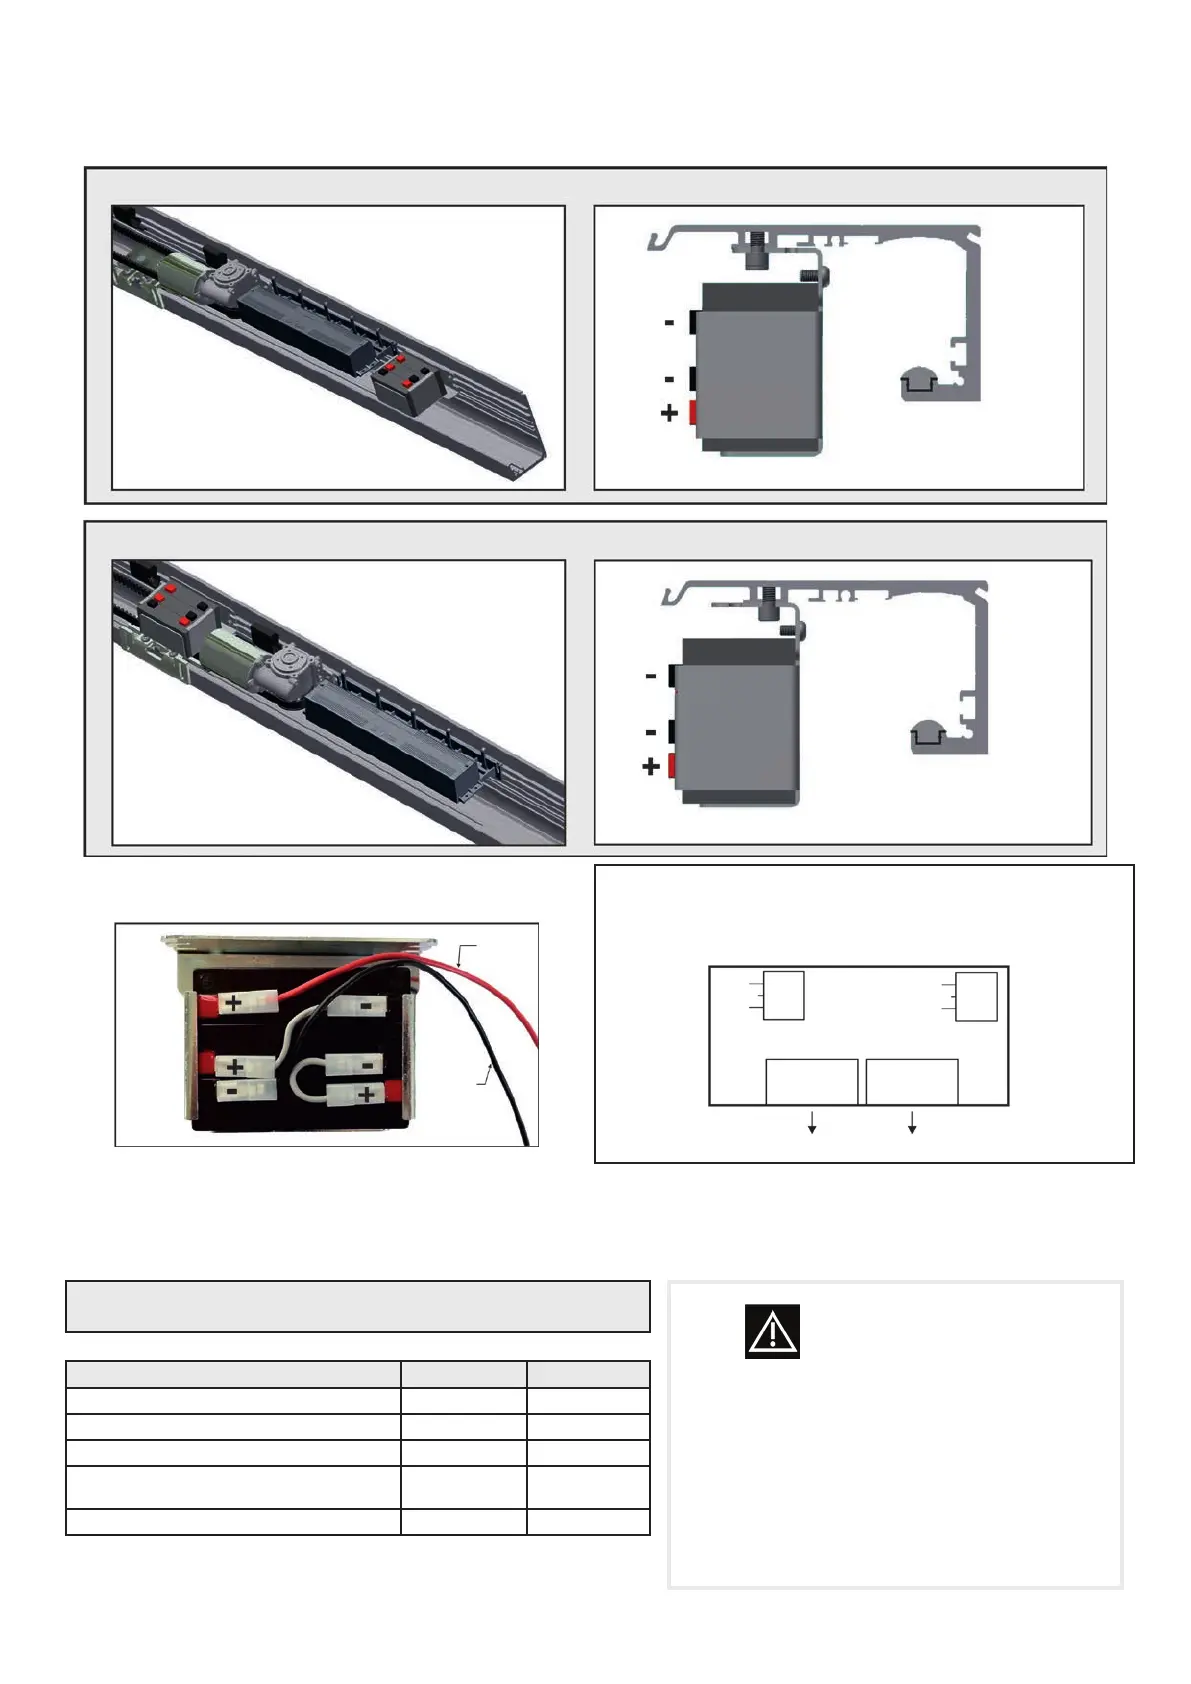
Battery unit location inside the automation
Depending on the space available inside the automation, the battery unit can be installed on the right side of the transom, next to the
electronic control unit casing (Solution 1), or to the left of the gearmotor (Solution 2).
Connect the battery to the connector J5 of the control unit
ET‑LOGIC‑B.
Insert the battery charger card ET-BAT in connector J12 of the control
unit ET-LOGIC-B.
To enable operation with battery, set the function F06 = ON, or set
S04 = ON from the initial setup.
OPERATION
The device ET-BAT150P is enabled in case of mains power failure, allowing the automation ETERNA 150 to operate.
Battery life depends on various factors, on the number of manoeuvres carried out, on the weight of the leaf, on the external devices
connected, etc. As a rough guide, the charged battery can supply power for about 30 consecutive door opening/closing cycles, or for
about two hours with the door stopped.
IMPORTANT!
Battery type: 3x6V (18V) - 1.3Ah
LED SIGNALLING
SIGNALLED EVENTS GREEN LED RED LED
BATTERY DISCONNECTED ON ON
BATTERY CHARGING BLINKING OFF
BATTERY CHARGED WITH MAINS VOLTAGE ON OFF
LOW OR DAMAGED BATTERY WITH AND
WITHOUT MAINS VOLTAGE
OFF BLINKING
BATTERY CHARGED WITHOUT MAINS VOLTAGE OFF ON
WARNING
•
Periodically check battery eciency
•
To allow recharging, the batteries must always be connected
to the electronic control unit
•
The equipment must be disconnected from the mains when
removing the batteries
•
In case of replacement, always use genuine batteries
•
Replacement must be performed by qualied personnel
•
Remove batteries from the equipment before its disposal
•
Batteries contain polluting substances; therefore they must
be disposed of in accordance with the provisions of local
regulations
RED
BLACK
BATTERY
CHARGER
ET-BAT
to connector J12 of the control unit ET-LOGIC-B
Front view
Front view
Solution 2
Solution 2
Side view (screw in through the front slot of the plate)
Side view (screw in through the rear slot of the plate)