14
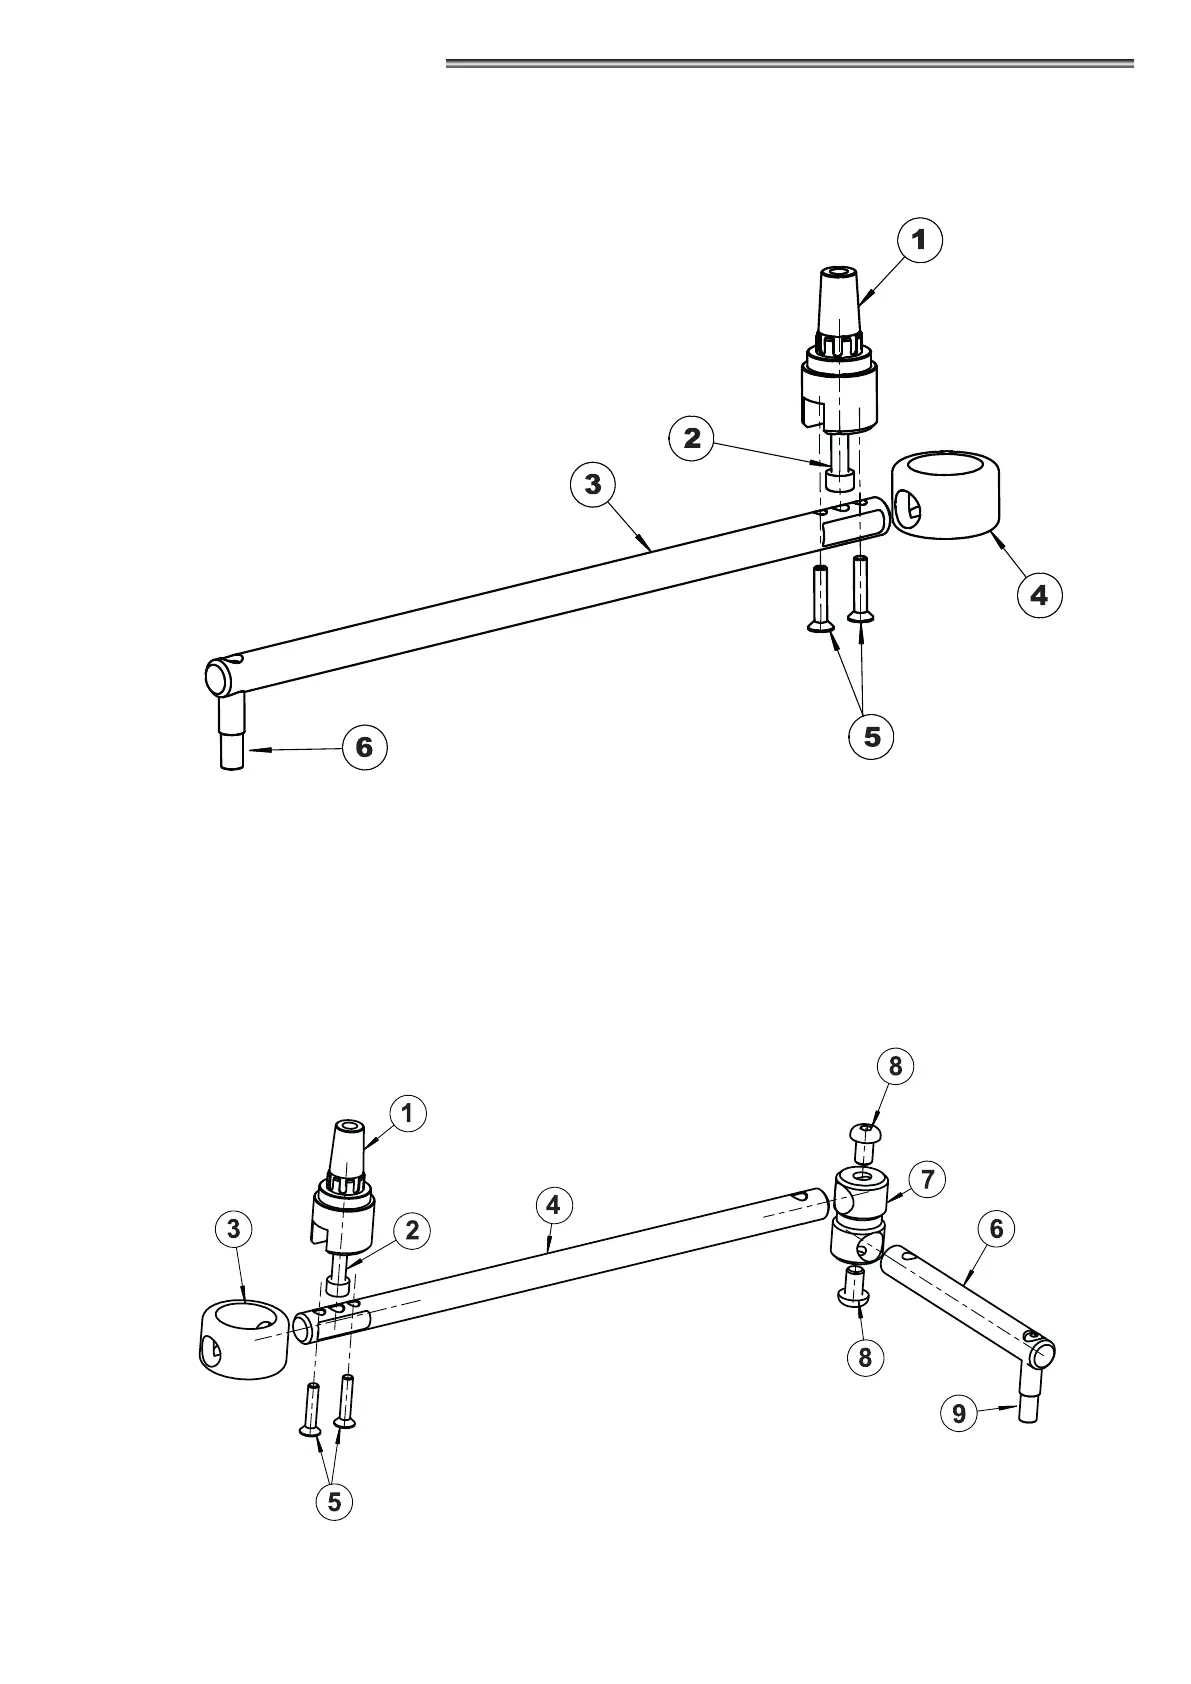
6) MOVEMENT TRANSMISSION ARMS
6.1) SLIDE PULL ARM BDT2
a) Insert the M8 x 70 screw (2) in the tapered pin (1);
b) Insert the sliding arm (3) into the closed shell (4)
c) Insert the tapered pin (1) above the sliding arm (3), through the closed shell (4)
d) Tighten the M6 x 30 screws (5) to lock the sliding arm (3) on the tapered pin (1)
e) For the assembly of the sliding guide, refer to paragraph 6.4
f) The pin (6) shall be inserted into the sliding guide shoe
6.2) SLIDING ELBOW ARM BSG 150 / BSG 250
a) Insert the M8 x 70 screw (2) in the tapered pin (1);
b) Insert the long arm rod (4) into the closed shell (3)
c) Insert the tapered pin (1) above the long arm rod (4), through the closed shell (3)
d) Tighten the M6 x 30 screws (5) to lock the long arm rod (4) on the tapered pin (1)
e) Insert the long (4) and short (6) rods into the bushing (7) and fasten them with the M10 x 6 screws (8)
f) For the assembly of the sliding guide, refer to paragraph 6.4
g) The pin (9) shall be inserted into the sliding guide shoe