PL1220 Owner’s Manual
37
4. Carefully place the new, unconnected laser tube inside the mounts.
CAUTION
The laser tube is very fragile.
5. Carefully connect the water tube between the inlet on the rear of the connection panel and
the water inlet on the laser tube (left side, cathode side).
6. Carefully connect the water tube between the outlet on the rear of the connection panel and
the water outlet on the laser tube (right side, anode side).
7. Connect the high voltage (+) terminal (left side, cathode side) to the power supply according
to the wiring diagram in this manual.
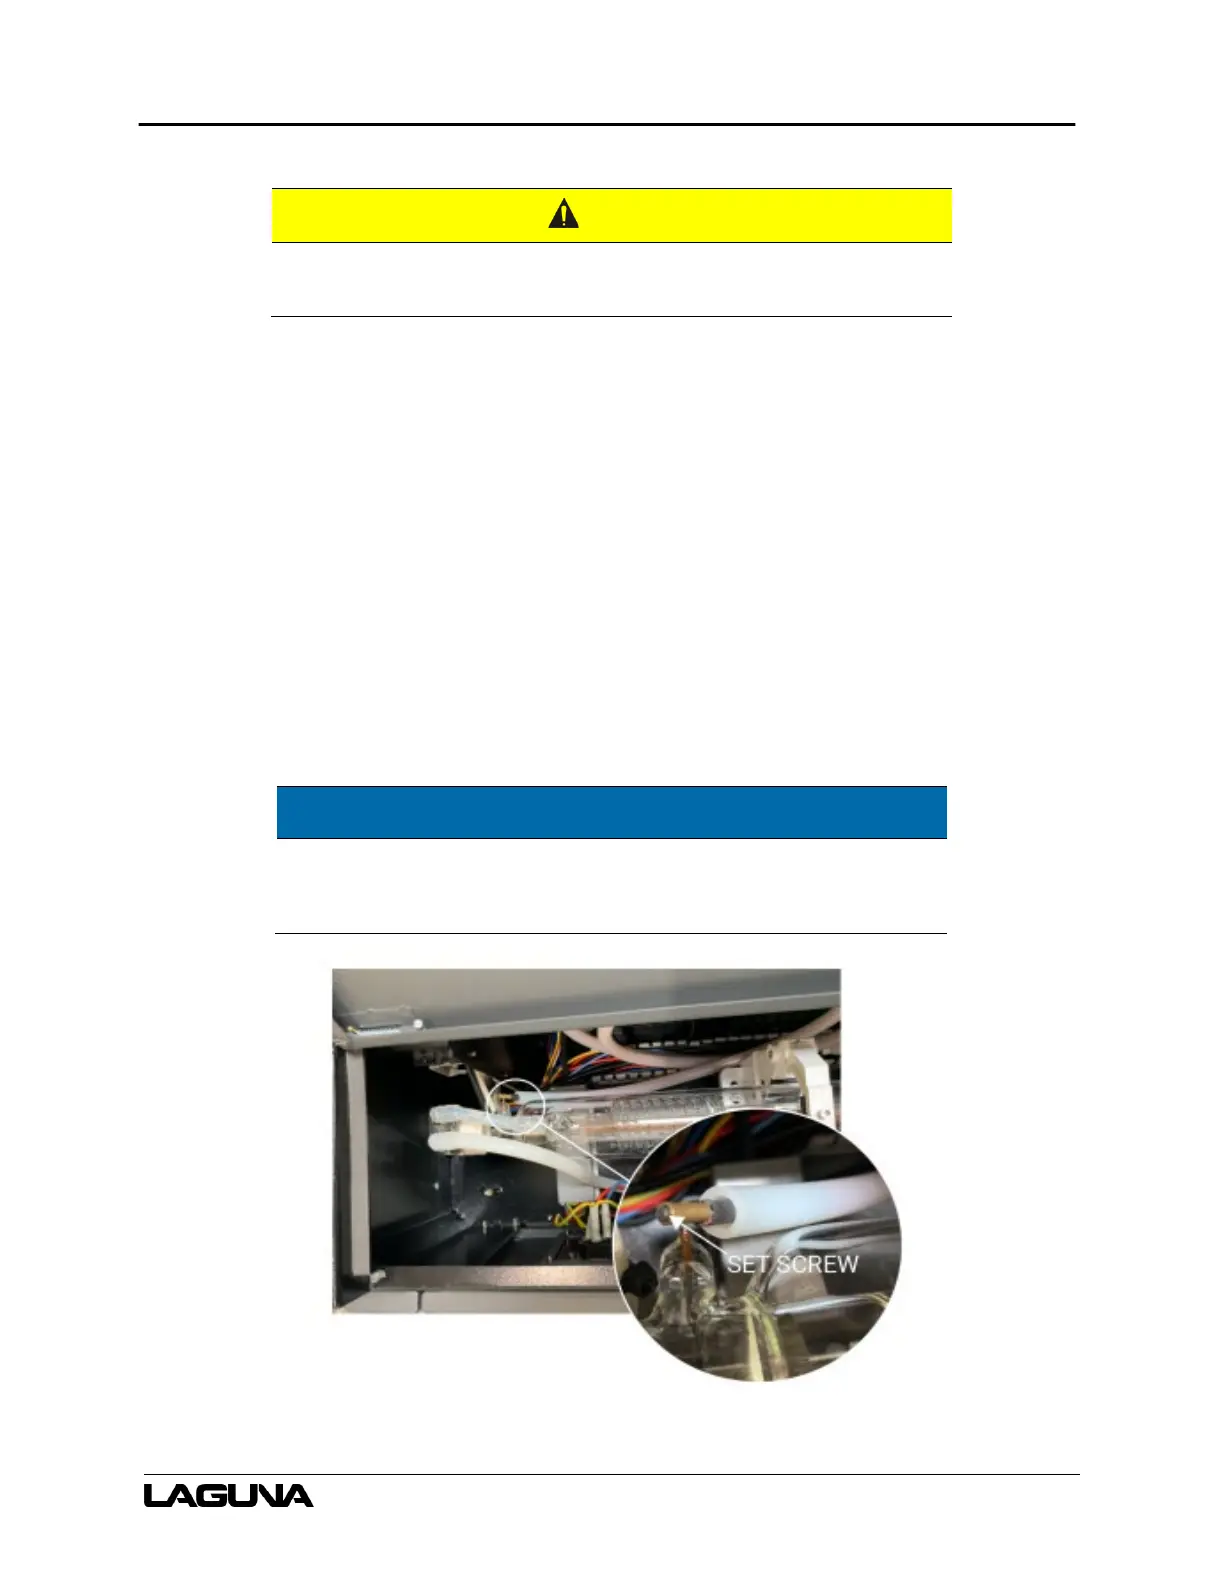
a. Use the wire insulated with the rubber sleeve. The set screw is in this sleeve. Loosen
and tighten the small set screw on the end of the cathode terminal. DO NOT break it
off.
b. Slide the set screw end onto the terminal, and tighten the set screw.
The connection should be from (+) to (-) the same direction
that the laser is firing (i.e., towards the first mirror).
Figure 6-3: Set screw on cathode terminal