Lake Shore Model 340 Temperature Controller User’s Manual
4-4 Front Panel Operation
4.4.3 Using Setting Screens
Use setting screens to change less used parameters. Press keys with a white background to display the
parameter setting screen associated with that key. The setting screen title displays on the center of the top
line.
On screens that contain parameters associated with sensor inputs or control loops, the top left corner will
show the sensor input or control loop. This field must be set correctly before proceeding. Use the s or t key
to select the appropriate sensor input or control loop and then press enter. The correct parameters will then
be shown on the setting screen.
The Next Setting and Previous Setting keys are
used to move around within the setting screen.
Once a parameter has been chosen and it is
highlighted, the data entry discussed above should
be used to make changes. The Next Setting and
Previous Setting keys will act like the Enter key
and end the setting operation.
After making changes to a screen, press Save
Screen to store the changes into the Model 340.
Press Cancel Screen or let the keypad time-out to
return screen parameters to pre-setting values.
A <more> annunciator may appear in the right
corner of the screen to indicate that the parameters
would not fit on one screen. Other parameters will
be shown if the More key is pressed. If the More
key is pressed after changes are made to a screen,
a message prompts users to save or ignore the settings.
4.4.4 Data Entry Screens
Data entry screens are similar to setting screens, but
they have data tables that are too long to fit on a
screen. Scroll up and down the data table instead of
using the More key to change screens. In the
following example of entering a temperature
response curve, curve identification information is
entered like a setting screen then the curve data is
entered in a long table.
4.4.5 The Help Key
The Help key at the lower right corner of the keypad can be pressed while selecting a parameter. The
information shown on the display will tell the operator the intended use of the parameter, then if the More key
is pressed, the setting limits and resolution of the parameter. Next the help will show how to use the
navigation keys discussed above as a reminder. Pressing Cancel Screen or the Help key will return the
instrument to its setting operation. Pressing Help from the normal display shows how to use the navigation
keys.
4.4.6 Keypad Time-out
The Model 340 suspends some of its operation during keypad operation. (The control loop and computer
interfaces are never disabled.) A time-out was put in the keypad so that the instrument would return to normal
operation if a key happened to be unintentionally pressed. The time-out acts like an Escape or Cancel
Screen key being pressed so that no accidental changes are made to settings. Even with the time-out, we do
not recommend you do long data entry operations while the instrument controls an experiment.
Sensor Unit:
Temp Coeff:
Excitation:
Range:
V
Neg.
10 u A
§2.5V
Curve:
SN:
1 D T -4 7 0
Standard
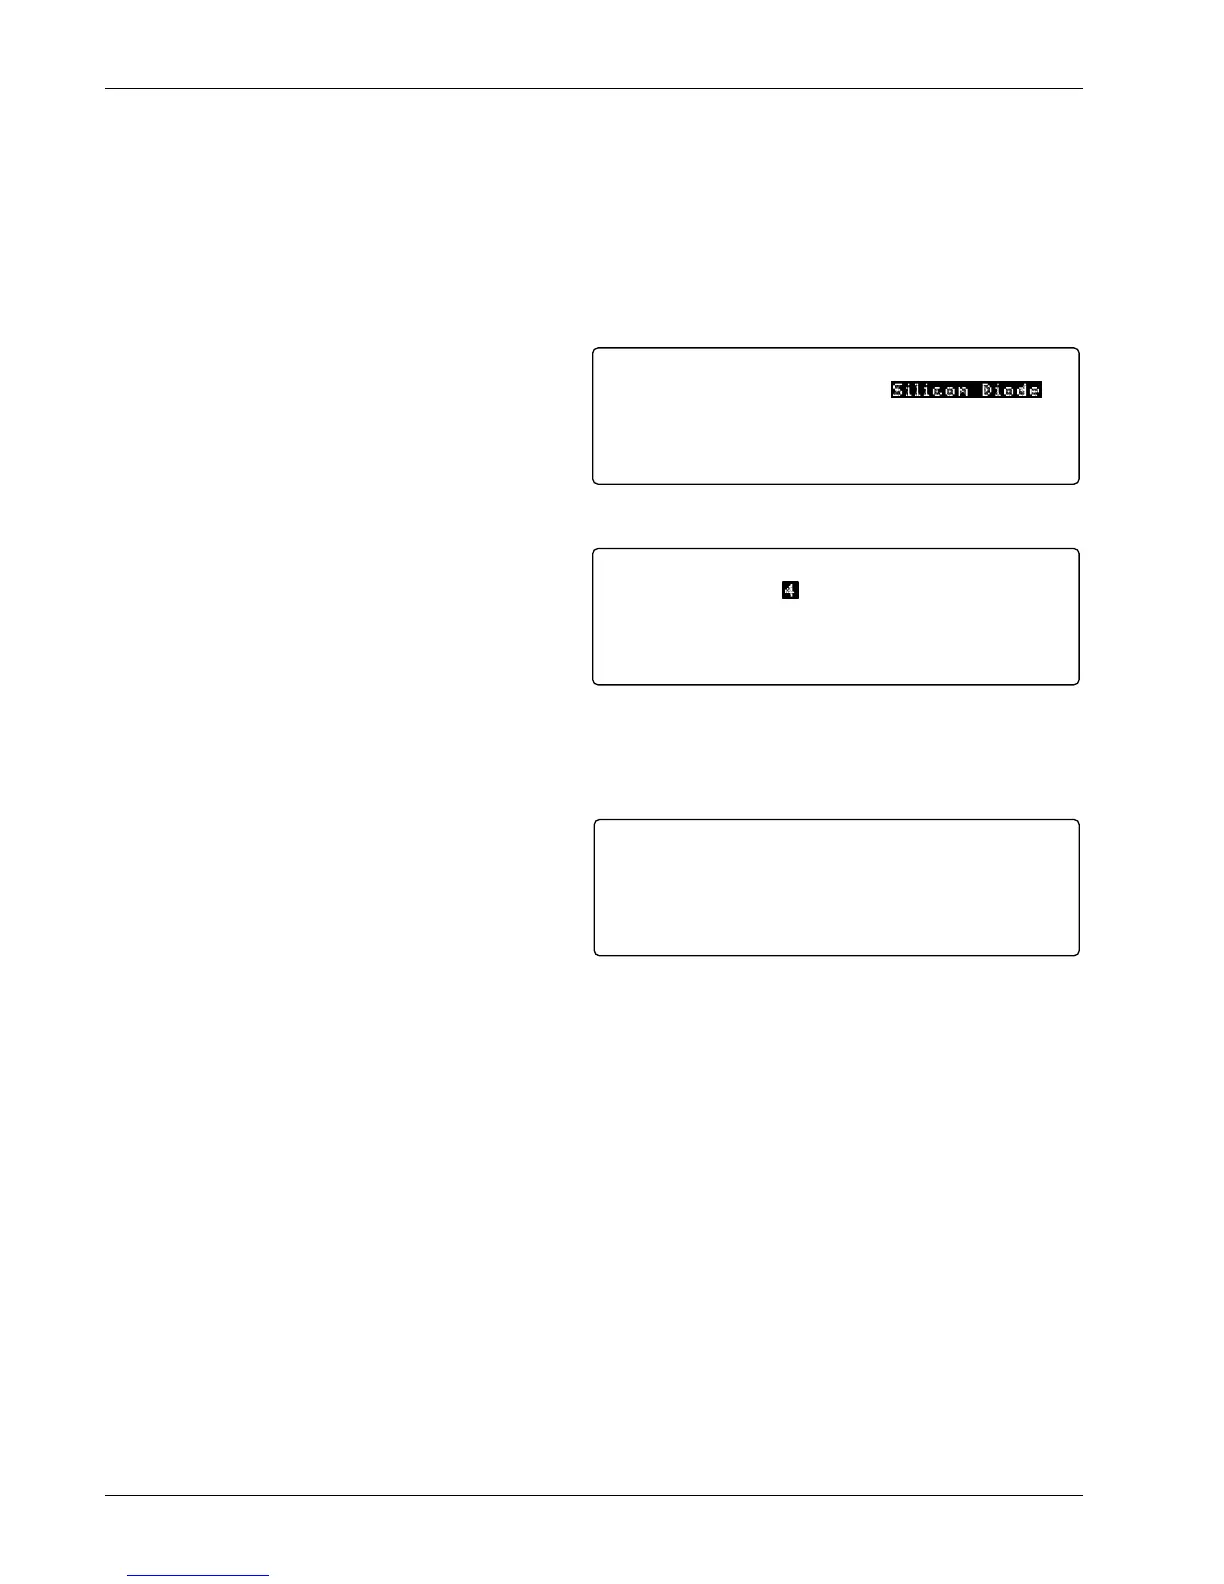
Input: A INPUT SETUP
Type: Silicon Diode
Entering a New Sensor Type for Input A
Disp1:
Disp3:
Disp2:
Disp4:
A SENSOR
A TEMP K
A SENSOR
A TEMP K
<more>READING DISPLAY FORMAT
Input Displays:
Example screen showing <more>
Name:
SN:
Limit:
Format:
Coeff:
1:
2:
3:
4:
5:
DT-470
Standard
499.900
V/K
Neg.
(I) In s e r t
(D ) D e le t e
Sensor Temp(K)
0.09062 475.000
0.10191 470.000
0.11356 465.000
0.12547 460.000
0.13759 455.000
Edit Curve: # 1
Entering a Temperature Response Curve