A
A
C
C
S
S
6
6
0
0
6
6
D
D
i
i
g
g
i
i
t
t
a
a
l
l
A
A
C
C
S
S
e
e
r
r
v
v
o
o
d
d
r
r
i
i
v
v
e
e
M
M
a
a
n
n
u
u
a
a
l
l
R
R
e
e
v
v
1
1
.
.
0
0
Tel: (86)755-26434369 16 Website: www.leadshine.com
1. If servo system is UNSTABLE, then the first thing of tuning is to stabilize
the system. You can increase Derivative Gain of Position Loop (Kd) or
decrease Proportional Gain of Position Loop (Kp) or Integral Gain of
Position Loop (Ki).
2. If servo system is UNDER DAMPED, then increase Kd or decrease Kp or
Ki.
3. If servo system is CRITICALLY DAMPED, then stop tuning and
download the parameter settings to the Drive’s EEPROM.
4. If servo system is OVER DAMPED, then decrease Kd or increase Kp or
Ki.
6. PC window based Tuning Using ProTuner
Introduction to ProTuner
As a professional tuning tool, ProTuner has been developed specially for all
Leadshine digital drives. It can be also used to configure the servo drive for many
settings such as control signal modes, number of motor poles, position following
error limit, default move direction, and etc. The most important feature is ProTuner
offers the numeric method for tuning position-loop parameters (Kp, Kd, Ki) and
give a visualization result synchronously for users to evaluate the performance of the
system.
Before Tuning
ProTuner Installation
The ProTuner is windows based setup software for tuning Leadshine’s digital drives.
It can run in windows systems, including Win95/Win98/WindowsNT/Windows2000
/Windows XP. And the selected PC should have 1 serial port at least for
communicating with the drive.
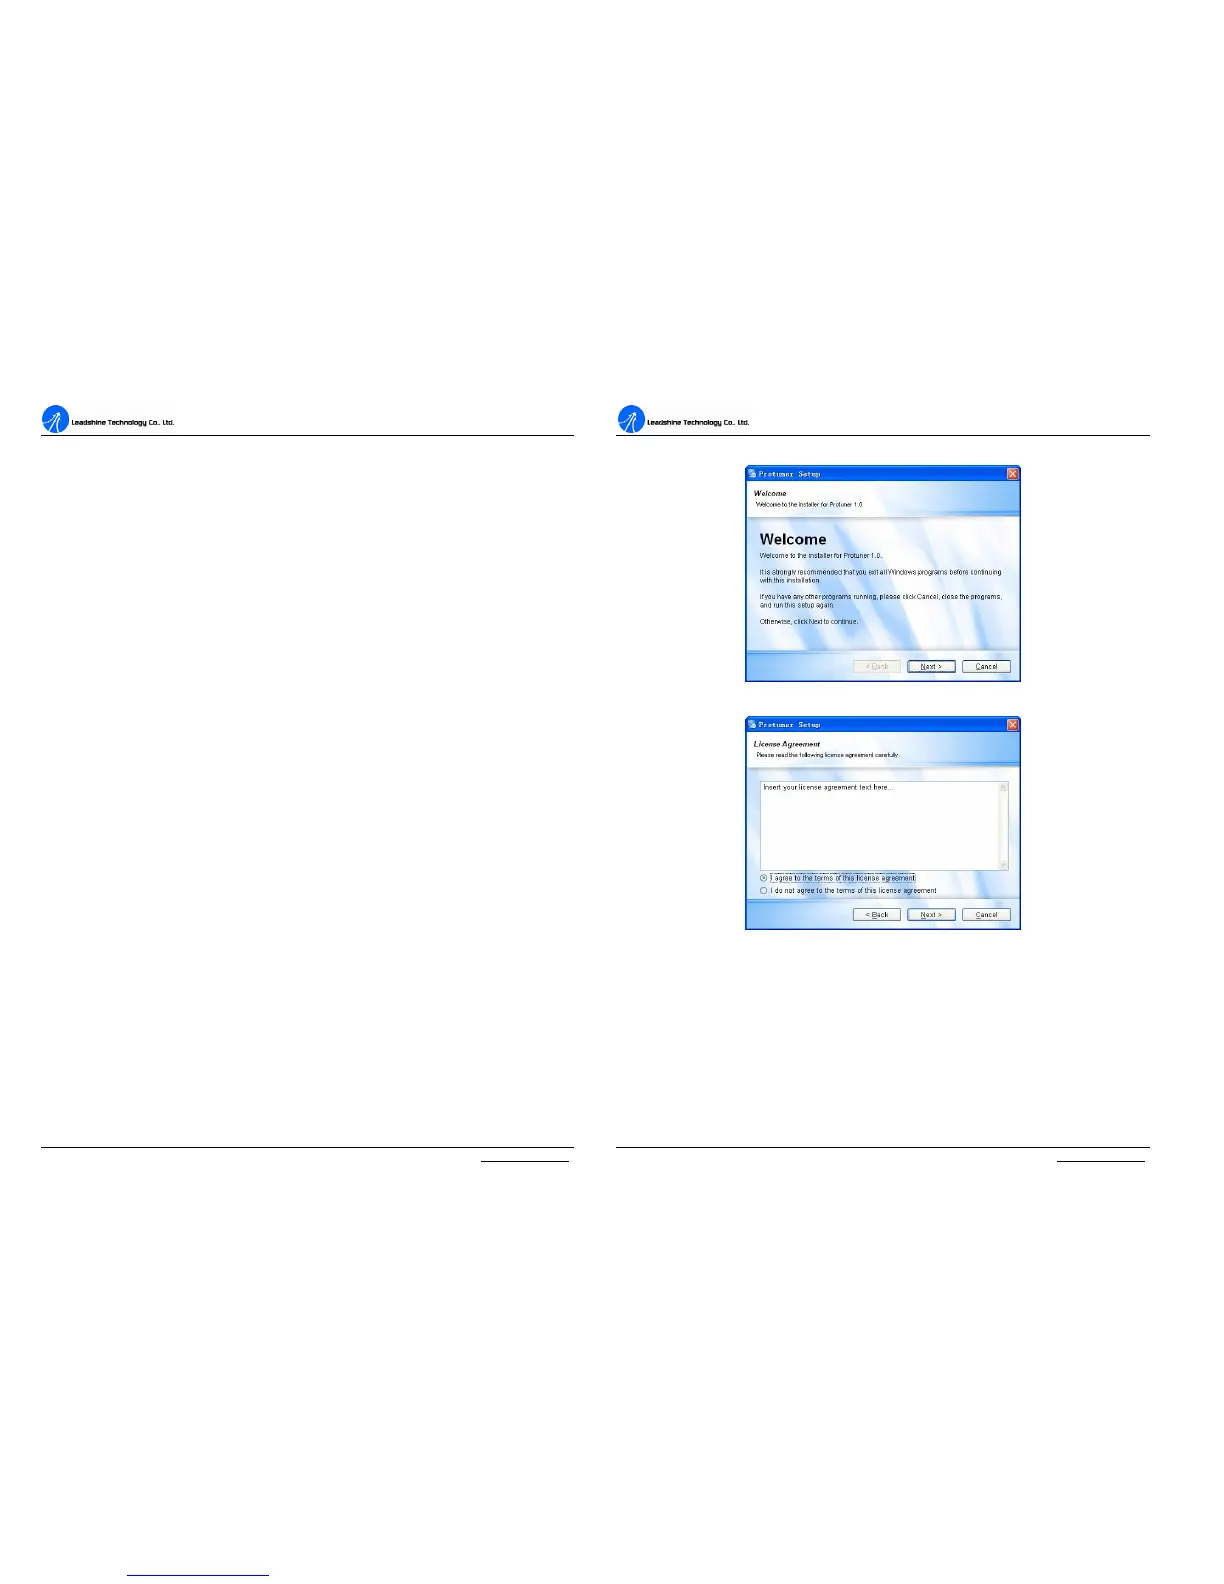
Double click “ProTuner_setup.exe” to begin installing the ProTuner. See Figure 12.
A
A
C
C
S
S
6
6
0
0
6
6
D
D
i
i
g
g
i
i
t
t
a
a
l
l
A
A
C
C
S
S
e
e
r
r
v
v
o
o
d
d
r
r
i
i
v
v
e
e
M
M
a
a
n
n
u
u
a
a
l
l
R
R
e
e
v
v
1
1
.
.
0
0
Tel: (86)755-26434369 17 Website: www.leadshine.com
Click Next to enter the “License Agreement” window. See Figure 13.
Figure 12: Begin to install the ProTuner
Figure 13: License agreement
Choose “I agree to the terms of this license agreement” and click Next to continue
installation. The user can enter user’s information in the following window. See
Figure 14. After entering the user’s information, click Next to select installation folder,
where you would like to install the ProTuner. See Figure 15.