17
Display Description Press
Point to the desired
Panel IR Sensor and
press ‘Select’
Point the LMCT-100 at the infrared sensor on the
LMRD board and press Select.
lect
Date and Time Set
SEND DSTSTD DONE
Year: < 2014>
Month: <August>
Date: <14>
Hour (24 Hour): <16>
Minute: <37>
Scroll to each field and set the value. An illegal
date (for example, February 30) cannot be entered.
After selecting all values, scroll to DSTSTD and
press Select.
NOTE: There is no clock in the LMCT-100, so the
time values will not change if you remain
on this screen longer than a minute.
then choose
DSTSTD and
or
parameter
or
to change the value
of the parameter
DST Configuration
BEGINS ENDS DONE
Follows DST: <Yes>
Method: <Auto>
This screen determines if the panel will follow
Daylight Savings Time. If you set Follows DST
to “Yes”, you can choose a value of “Auto” or
“Manual” for Method. Select BEGINS.
NOTE: If you set Follows DST to “No”, the
Method field disappears. Highlight DONE
and press Select, or press to return to
the Date and Time Set screen
then choose
BEGINS and
or
parameter
or
to change the value
of the parameter
DST Automatic Rules
DONE
Begins:
<2nd>
<Sun>
<Mar>
Depending on whether you choose a value of
Auto or Manual, the screen changes. For Auto,
you select the week, the day of the week, and
the month. For Manual, you select a specific date
(for example, March 20th). Select DONE to return
to the DST Configuration window. Repeat the
process for the end of DST by pressing ENDS.
Then select DONE to return to the Date and Time
Set screen.
then choose
DONE and
or
parameter
or
to change the value
of the parameter
Date and Time Set
SEND DSTSTD DONE
Year: < 2014>
Month: <August>
Date: <14>
Hour (24 Hour): <16>
Minute: <37>
Highlight SEND and press Select.
Once again, point the LMCT-100 at the infrared
sensor on the LMRD board and press Select. You
return to the Date and Time Set screen.
Highlight DONE and press Select, or press to
return to the Panel Setup screen
then choose
SEND and
or
parameter
or
to change the value
of the parameter
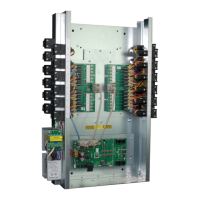
Conguring the Network Settings
The Network Settings screen allows you to customize settings related to communication over a BACnet network.
Display Description Press
Location Settings
Date and Time
Network
Button Binding
Panel Programming
Status
Panel Setup
From Panel Setup, scroll to Network. Press
Select.
Point to the desired
Panel IR Sensor and
press ‘Select’
Point the LMCT-100 at the infrared sensor on the
LMRD board and press Select.
lect
 Loading...