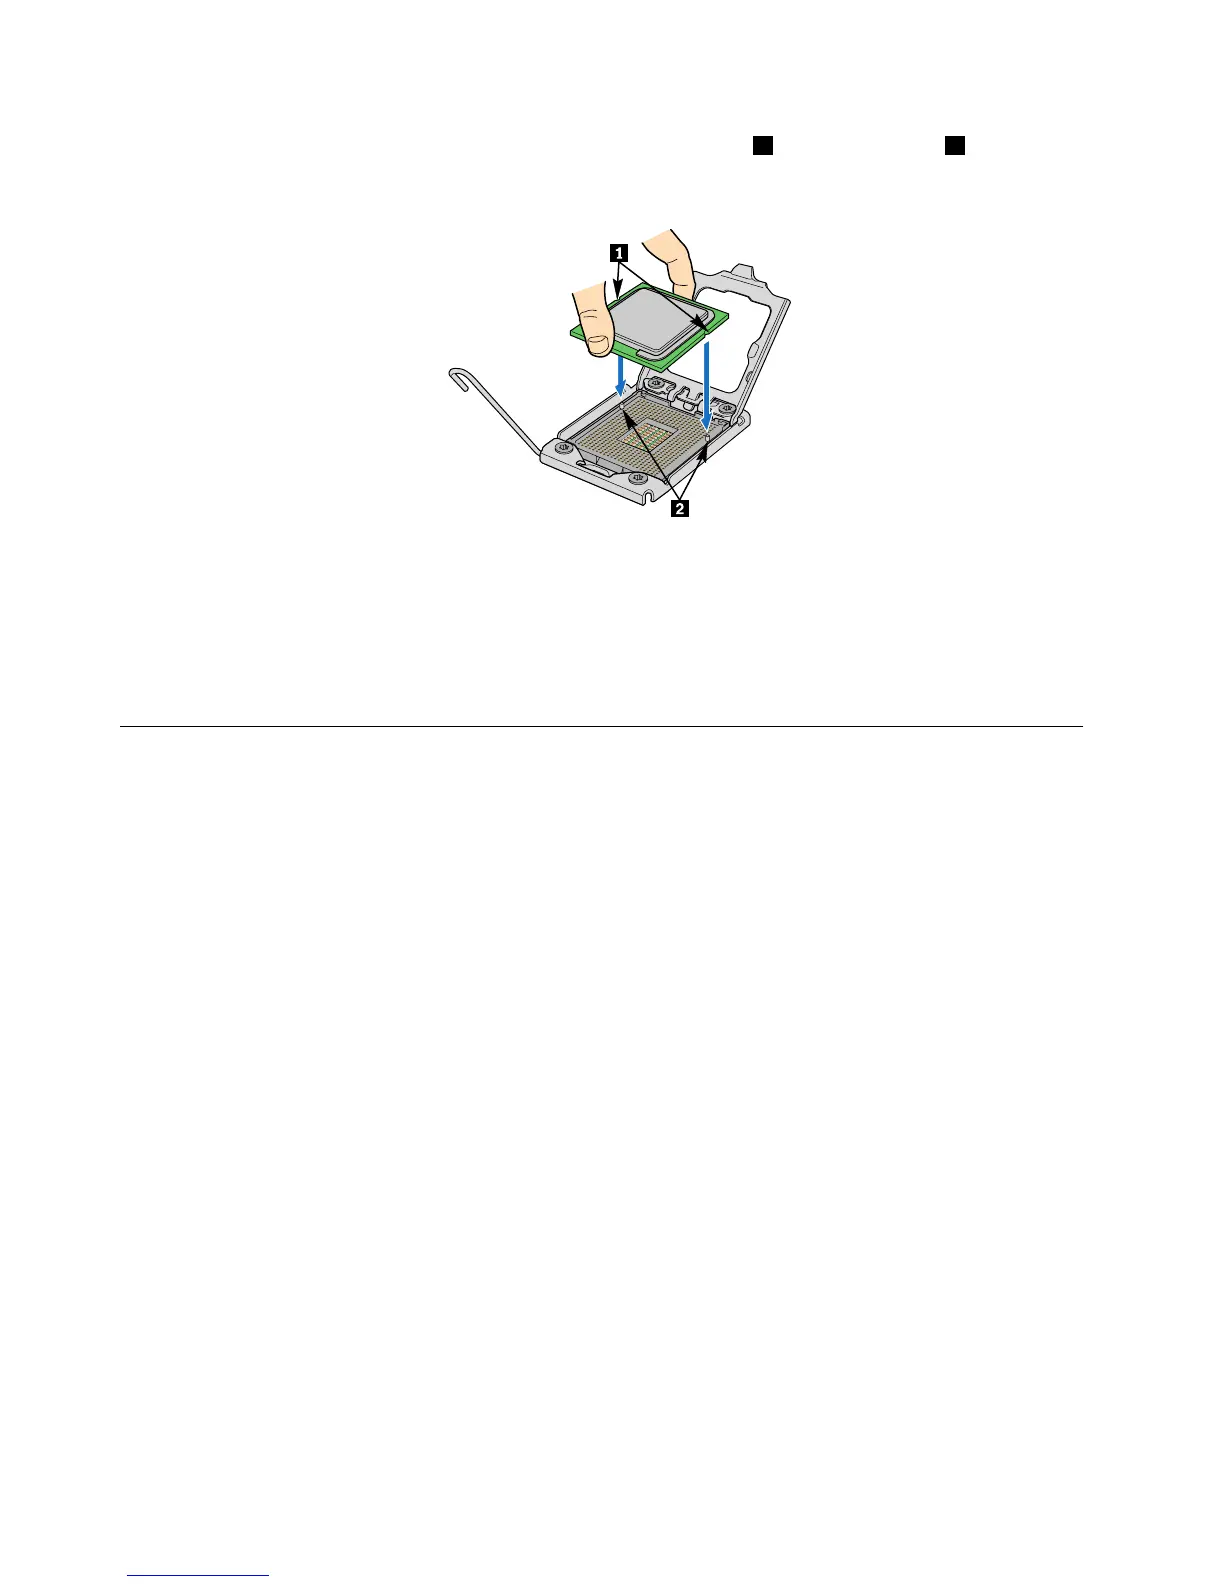
9.Holdthenewmicroprocessorbytheedgesandalignthenotches1onitwiththetabs2inthe
microprocessorsocket.Then,installthemicroprocessorintothesocket.
Figure61.Installingthemicroprocessor
Whattodonext:
•Toworkwithanotherpieceofhardware,gototheappropriatesection.
•Tocompletetheinstallation,goto“Completingthepartsreplacement”onpage68.
Completingthepartsreplacement
Thissectionprovidesinstructionstohelpyoucompletethepartsreplacementandturnonyourserver.
Tocompletethepartsreplacement,youmustreinstalltheservercover,reconnectallthecablesand,for
somedevices,runtheSetupUtilityprogramtodofurthersetup.
Installingtheservercover
Thissectionprovidesinstructionsonhowtoinstalltheservercover.
Attention:Forpropercoolingandairow,installtheservercoverbeforeturningontheserver.Operating
theserverforextendedperiodsoftime(morethan30minutes)withthecoverremovedmightdamage
servercomponents.
Toinstalltheservercover,dothefollowing:
1.Makesurethatallcables,add-oncards,andothercomponentsareinstalledandseatedcorrectlyand
thatyouhavenotleftloosetoolsorpartsinsidetheserver.Also,makesurethatallinternalcablesare
correctlyrouted.
2.Positiontheservercoveronthechassissothattherailguidesonthebottomoftheservercoverengage
therails.Then,slidetheservercovertothefrontoftheserveruntilitsnapsintopositionandisclosed.
Then,tightenthethumbscrewtosecuretheservercover.
Note:Althoughtheservercoverissecuredbyathumbscrew,forsafetyconsideration,besuretousea
tool,forexampleascrewdriver,totightenthethumbscrewandalwaysmakesurethatthethumbscrew
issecurelyinstalled.Also,donotover-tightenthethumbscrew.
Connectingthecables
Attention:Topreventdamagetoequipment,connectthepowercordslast.
68ThinkServerInstallationandUserGuide